
Are you just starting out with Canva and trying to learn how to use the platform as as seamlessly as possible?
If so, this is the guide for you.
We’ve covered everything a Canva beginner needs to know needs to know to get up and running with this incredible online design tool.
Let’s dive right in.
Jump to a specific section:
- What is Canva
- Part 1: Steps to getting started
- Part 2: Canva pro features
- Part 3: What to use Canva for
- Part 4: How to use the Canva app
What is Canva?
There’s a very good chance that everyone reading this already knows what Canva is, but just in case you don’t here’s a quick introduction for you.
Canva is an online graphic design software that was created to allow anyone, regardless of their design skills and experience, to create professional-looking visuals with ease.
The tool is designed to be as beginner-friendly as possible, so you should have no problems learning how to use it.
With Canva you can create a huge range of designs including posters, logos, videos, social media content, printables, banners, websites, and so much more.
Essentially Canva is the ultimate tool for creating high-quality designs and marketing assets quickly and easily.
Part 1: Steps to get started with Canva
Below are 10 steps you can take to quickly go from a beginner Canva user to having a solid grasp of the platform.
- Step 1: Sign up for an account
- Step 2: Starting a design
- Step 3: Using the editor
- Step 4: Further customization
- Step 5: Creating videos
- Step 6: Downloading your design
- Step 7: Sharing your design
- Step 8: Organizing your designs
- Step 9: Canva’s integrations
- Step 10: Use shortcuts
Step 1: Sign up for an account
You can use Canva without signing up for an account but to get access some important basic features such as being able to save your designs we highly recommend you sign up for a free Canva account.
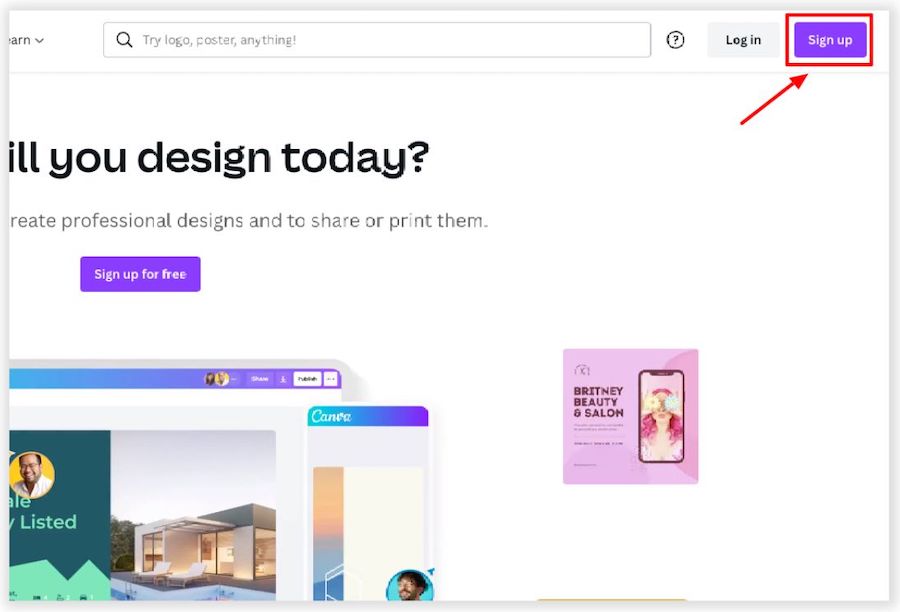
To do that you simply need to go to Canva’s homepage, click the ‘Sign Up’ button, and follow the steps:
Step 2: Starting a design
To start off a design you can choose between two methods. Either you can start from a blank canvas or a simply choose a predesigned template as the starting point for your design.
Blank canvas
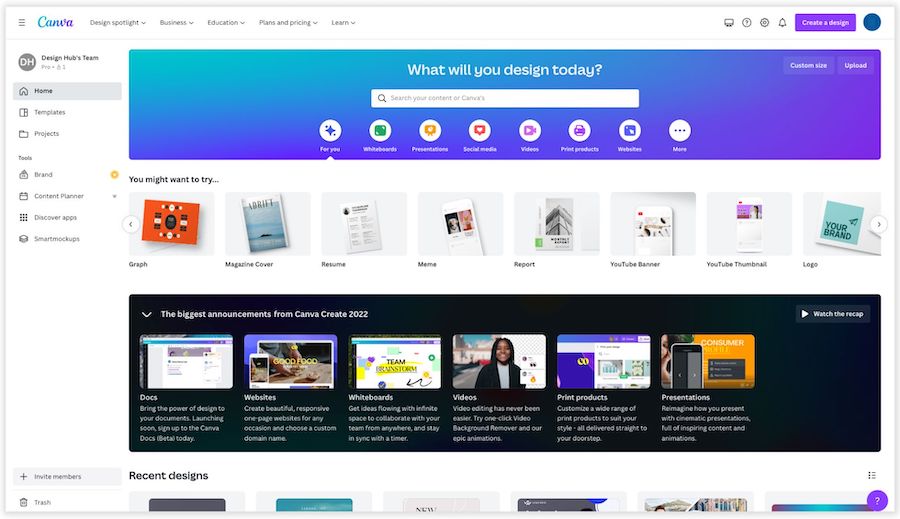
To start from a blank canvas simply click on the ‘Create a design’ button and select a default size (e.g. Instagram story, poster, YouTube thumbnail, etc.) or click on ‘Custom size’ and put in the dimensions you want if you have something specific in mind:
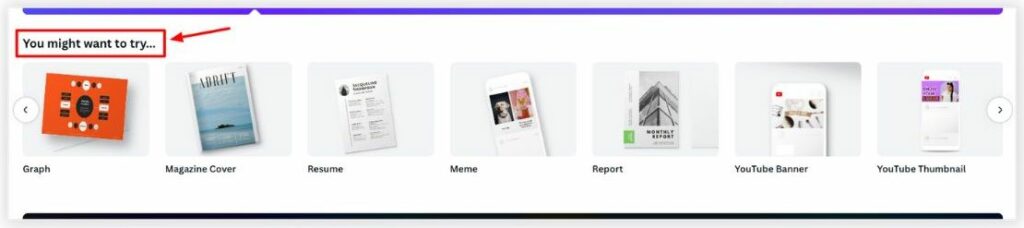
You can also select a specific design type under the ‘you might want to try’ header:
Any of these options will take you to the editor area (which we’ll cover in the next step).
Templates
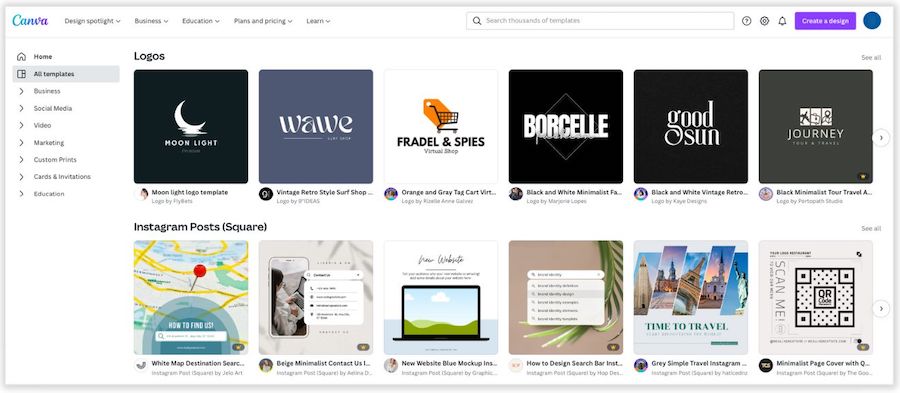
As mentioned you can choose an existing template to start your design from.
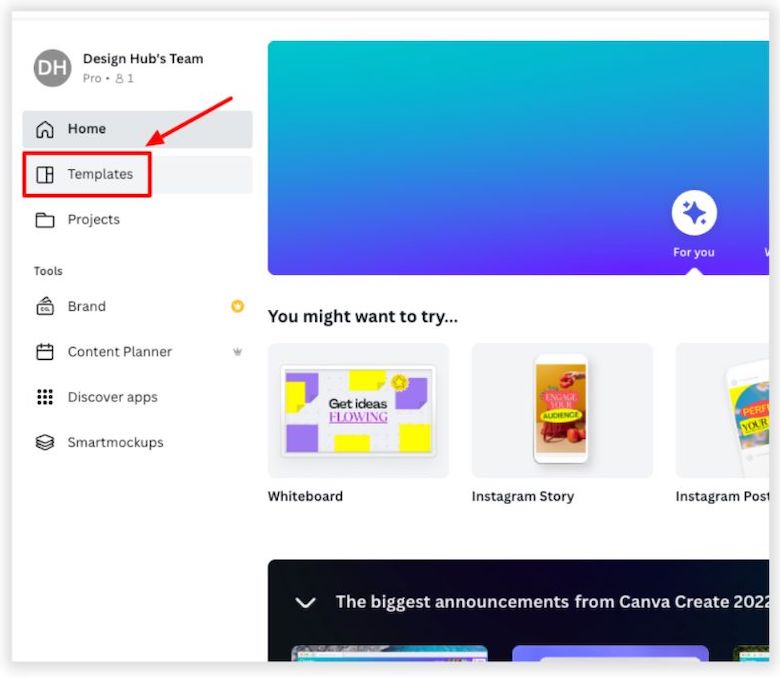
To find your ideal template you can either go to the ‘Templates‘ tab via the left side of the homepage and scroll through some of the existing template options:
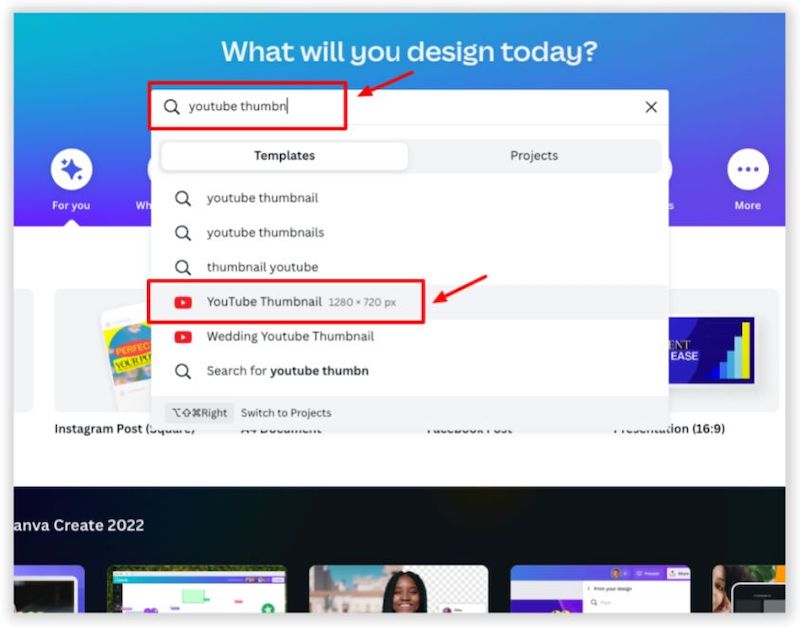
Or you can search for specific templates in the search bar e.g. ‘YouTube thumbnail’ and find a template from the search results page:
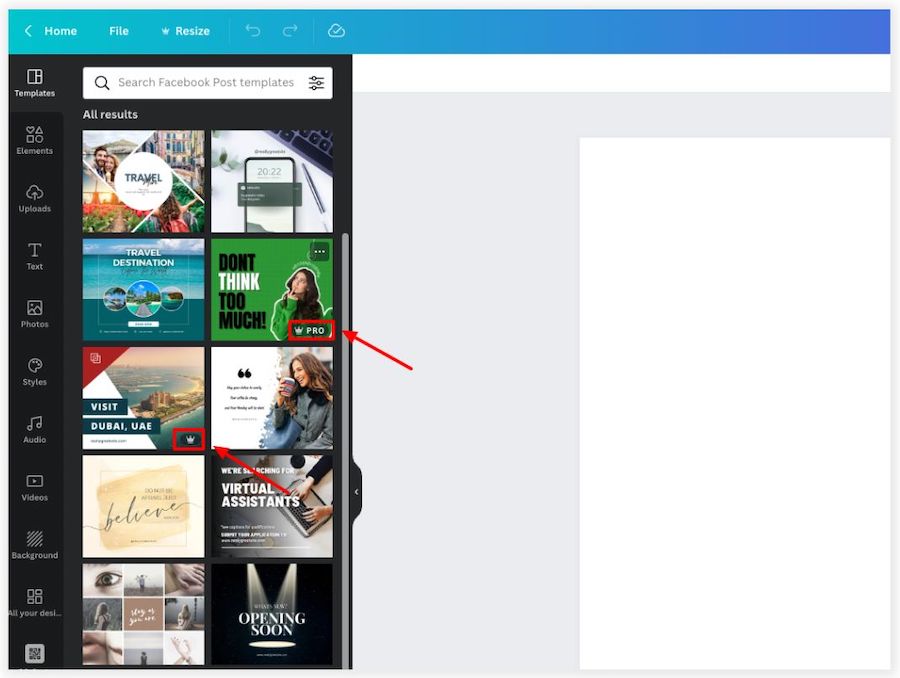
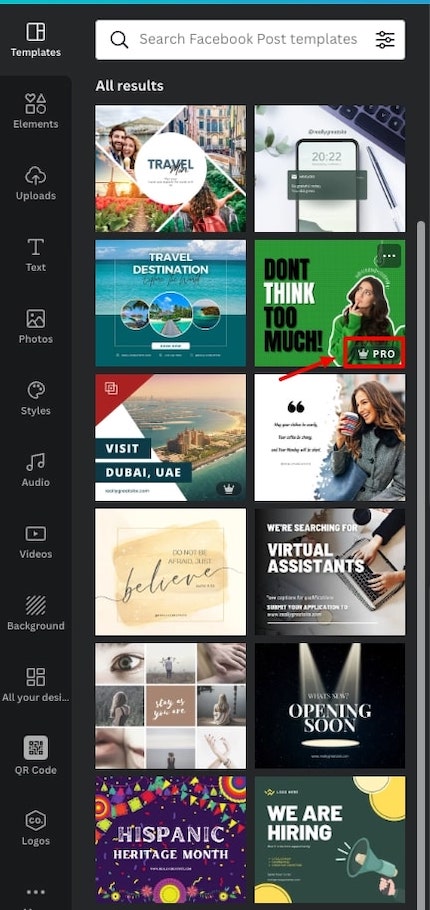
One good method of finding free templates on Canva is to choose a specific design size e.g. ‘Facebook post’, go to the editor with a blank canvas, and then select a template from the side panel.
The templates with a crown icon are the ones only available to Canva Pro users, and the ones without a crown icon are free to use for all users:
Step 3: The editor area – basics
To get started with the Canva editor, there are a few basic areas to cover:
Modifying existing elements
If you choose an existing template, there will be various elements already on the canvas. These can be easily modified and customized to your liking.
You can click on an element and drag to where you want it on the canvas, and resize or rotate it using the toggles around the element that you’ve selected:

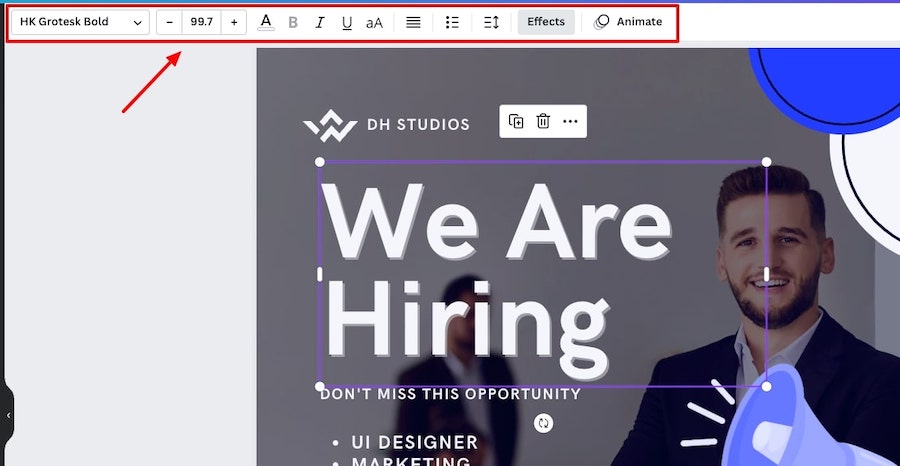
You will also see some additional customization options for your selected element above the editor. Depending on the type of element that you’ve selected there will slightly different options here.
For example with a text element you’ll see options such as font type, text size, color, alignment, uppercase, effects (we’ll cover these later), and a few other options:
With a graphic element you’ll see different options depending on the type of element that you’ve selected but the basic options normally include color, flip (e.g. horizontally or vertically), and effects:

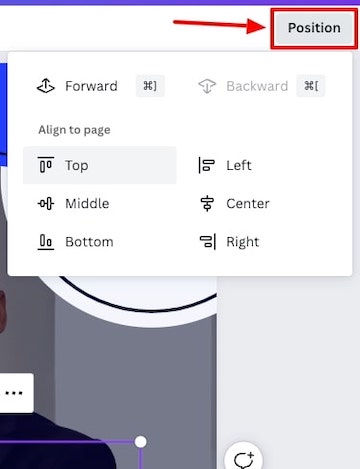
Whatever element you select you’ll have additional options at the top right of the editor including position – which allows you to align the element to a specific area of the page (e.g. top, middle, bottom, etc.), and transparency – which allows you to change the opacity of a specific element:
Grouping elements
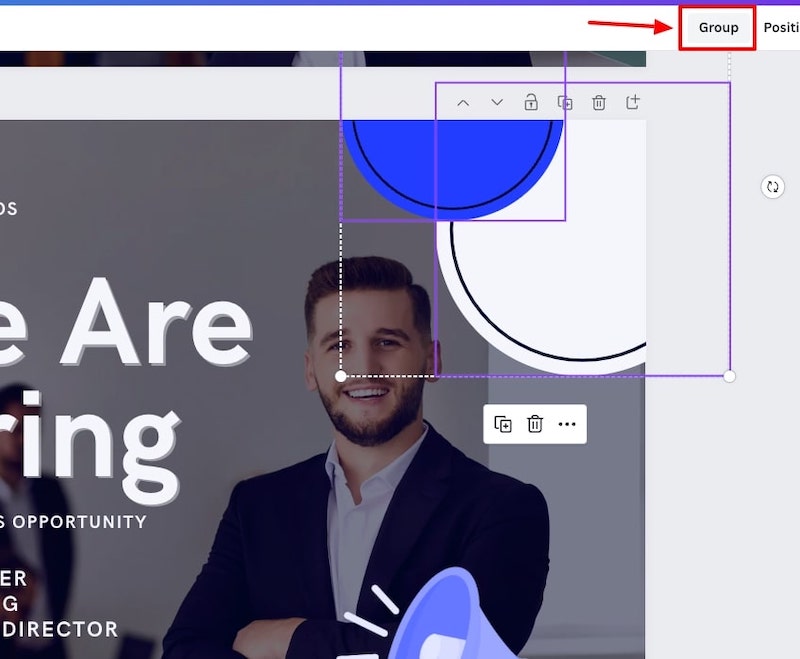
You can group elements together so you can move them around or resize them as if they were one element. To do this you can select one element then hold shift and click on another element to select that too, then click on the group button:
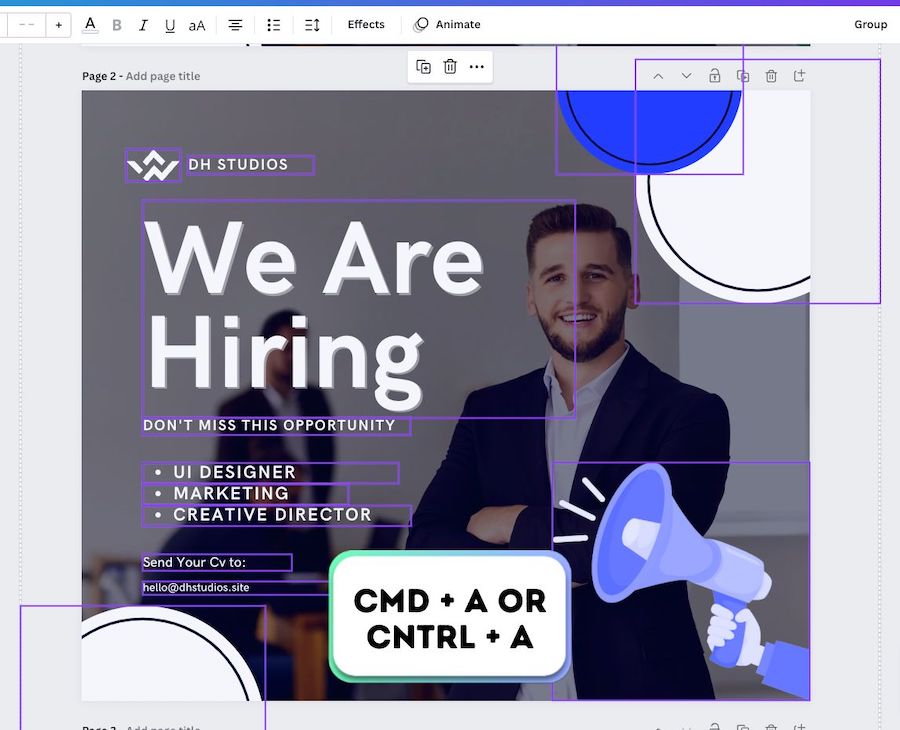
You can also select all the elements on a page at the same time by clicking command + A on a Mac or control + A on a windows computer.
Working with layers
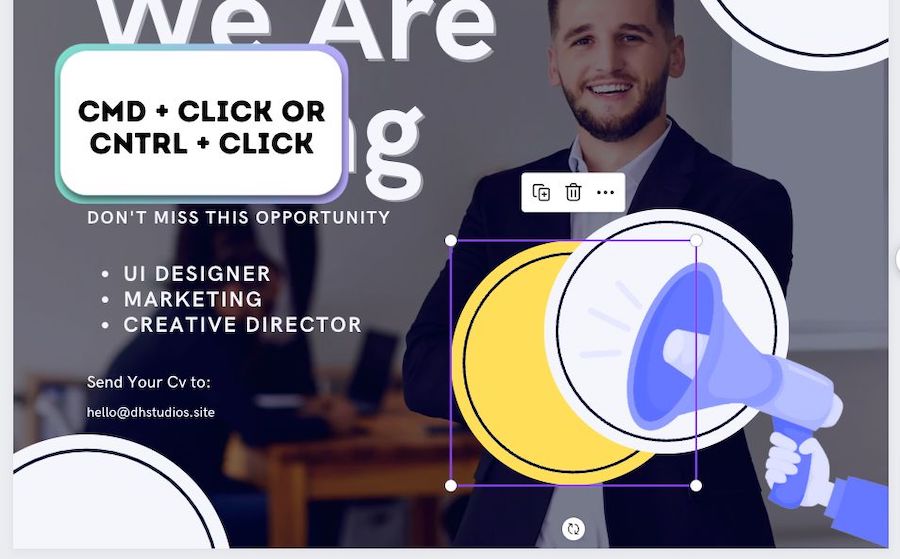
If you have several different elements in your design each element will be on its own layer. Sometimes it can be tricky to select a particular element if it’s on a layer that is near or at the bottom of the layers hierarchy.
To select an element that is behind another one, simply hold command + click (Mac) or control + click (Windows) and keep clicking until you find the layer that you want to edit:
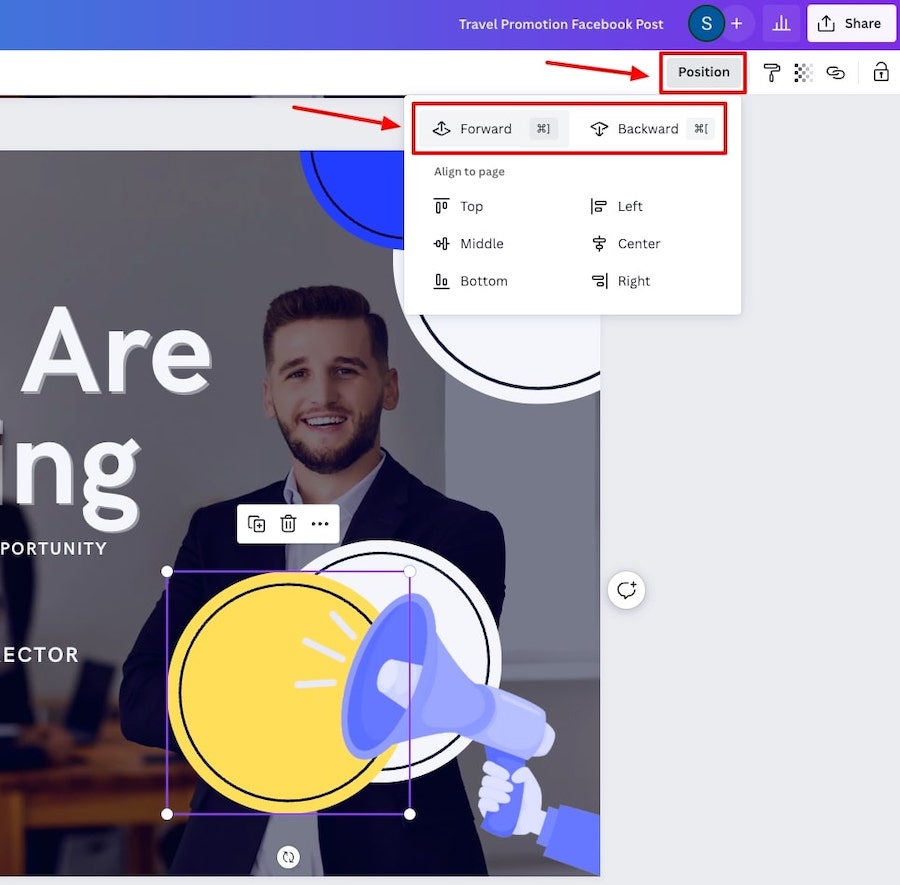
You can also adjust the layer position of an element if you select it, then go to ‘Position’ and you can choose to move it forwards, backwards, to the front, or to the back:
Lock elements
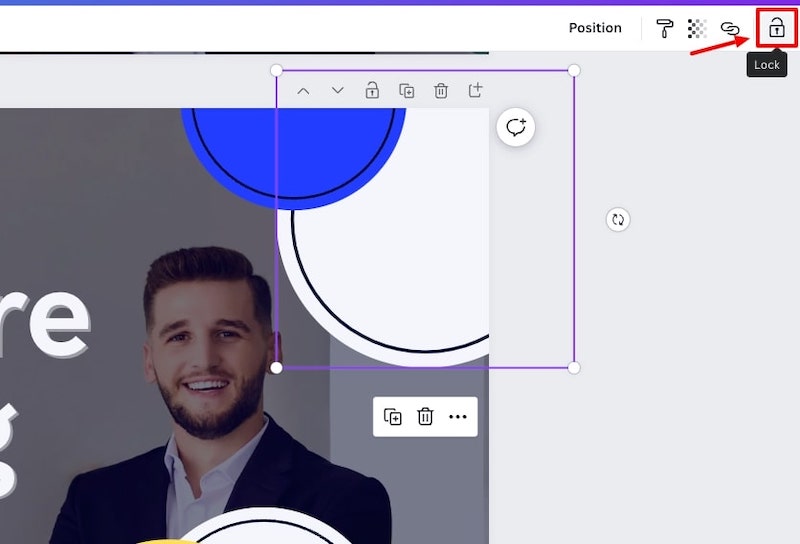
If you like how a specific element or group of elements looks within your design, you can make sure they stay exactly how and where they are by locking them in place.
To do this simply select the element or elements that you want to lock, and click the lock icon at the top right of the editor:
Guidelines & Safezones
If you move around an object on a page, guidelines will appear on the canvas to show you how the selected element lines up with the other elements on the page and also how it lines up on the overall canvas:

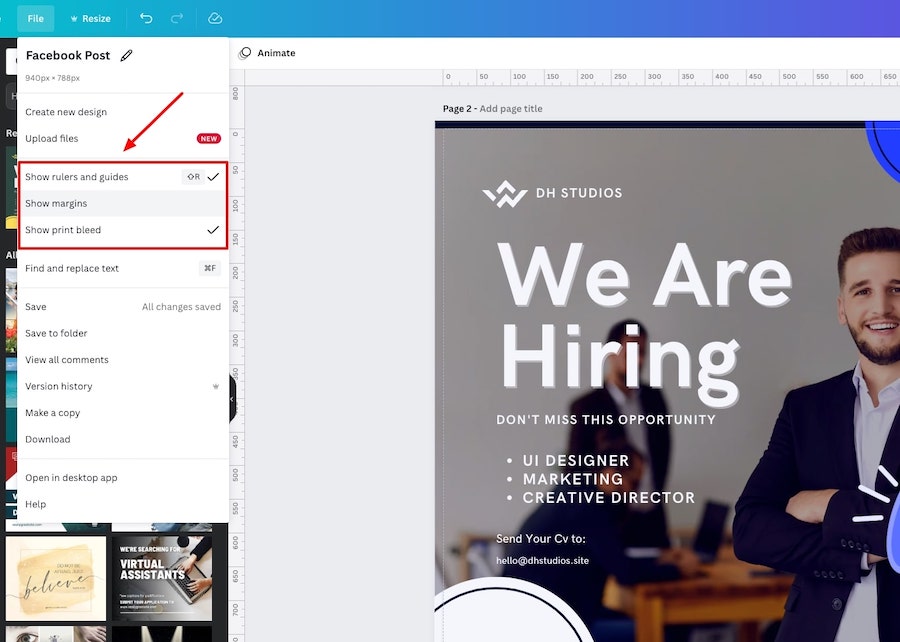
You can also go to ‘File’ and select to show rulers & guides, margins, and print bleeds which is particularly useful if you’re creating print collateral:
Undo or Redo changes
If you make a change to your design that you want to reverse you can click command/control + Z to undo it, or you can select the undo button at the top left of the editor:
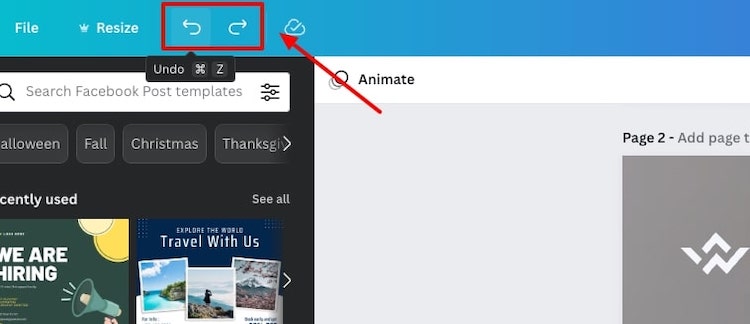
There’s also the ‘redo’ button if you want to reapply the alteration.
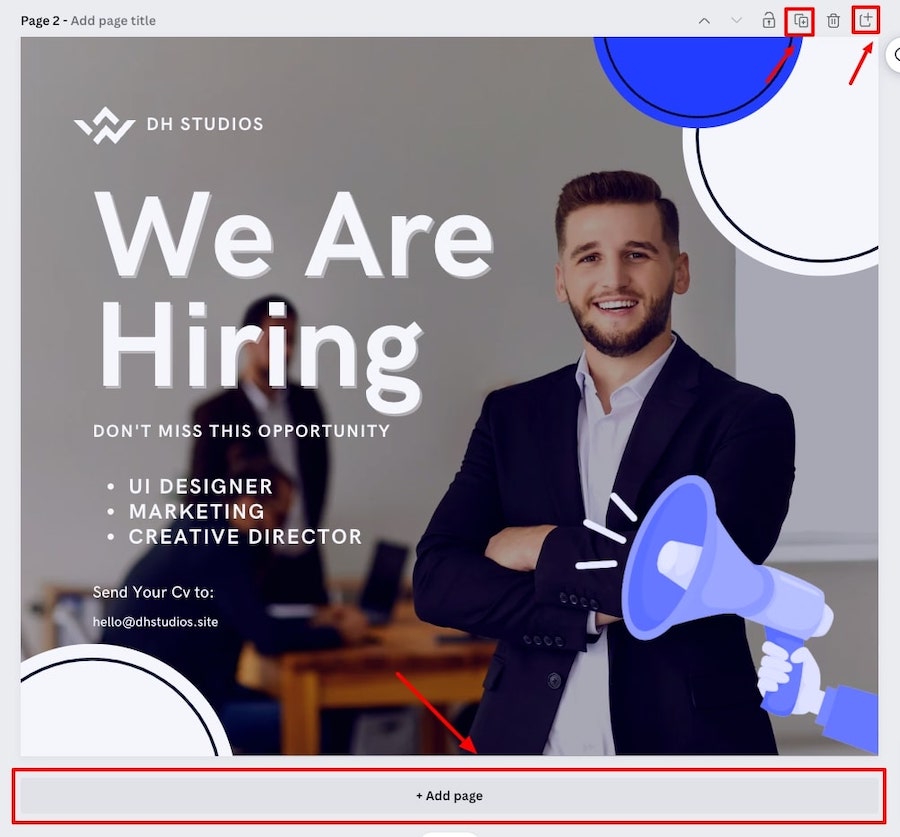
Adding new pages
To add a new page to a design, you can simply click on the ‘+Add page’ button below your existing page. This will bring up a new blank page in the same dimensions.
Or you can click on the one of the options above your existing page (add page or duplicate page):
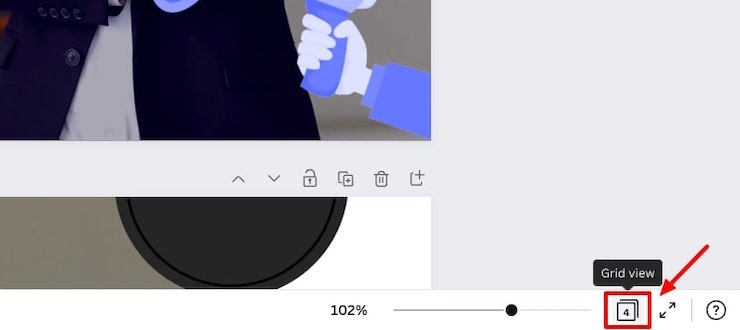
Viewing multiple pages
If you do have multiple pages within the same design file, you can quickly see how they all look together side by side by going to the ‘Grid view’ option.
This is particularly useful if you’re creating something like a Facebook or Instagram carousel post, you can quickly check if all the pages look together:
You can also click the ‘Show pages’ arrow at the bottom of the editor, and this will bring up a thumbnail view of your pages to give an overview of all the pages in your design:

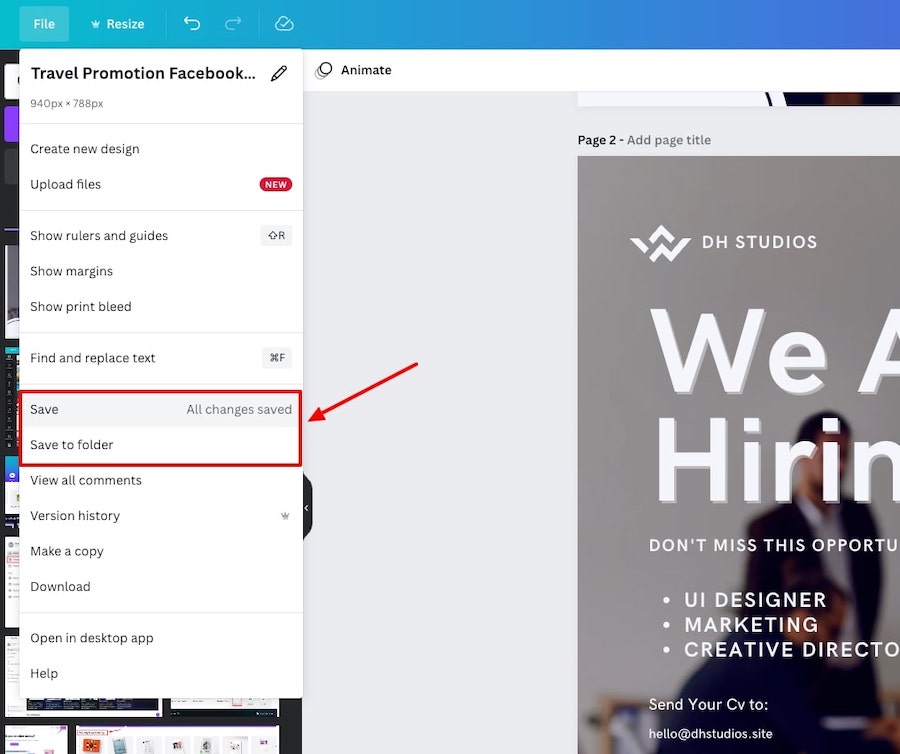
Saving your designs
Before you save your design we’d recommend naming your design, this particularly useful if you plan to create lots of designs, so you can easily come back and find it, and also store in a relevant folder (we’ll cover this later on).
You can even name the individual pages within your design to keep things super clear and organized:

Once that’s done you can go to ‘File’ and click save design. You can also ‘Save to folder’ if you have folders already created. This is something we’ll cover later in the article.
Step 4: Further customizing your designs
Now that we have the basics covered, let’s dive into some more of the customization options that you have when designing with Canva.
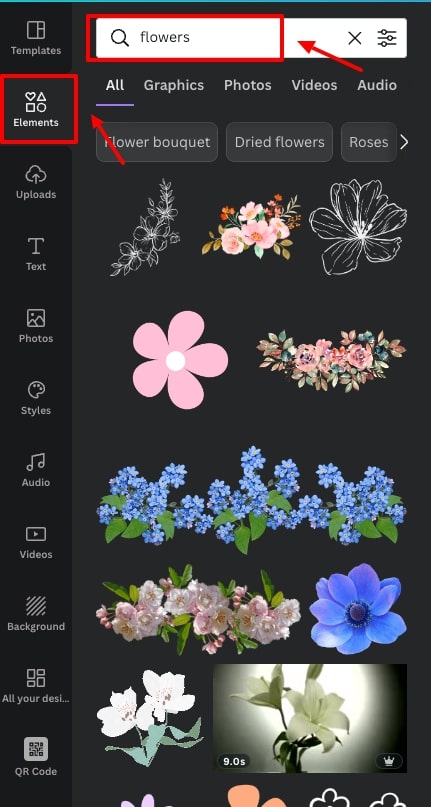
Elements
Canva has an incredible amount of design elements that you can use. We’ll only cover the most widely used ones in this guide including graphics, shapes, and photo frames but there is an almost endless amount for you to choose from.
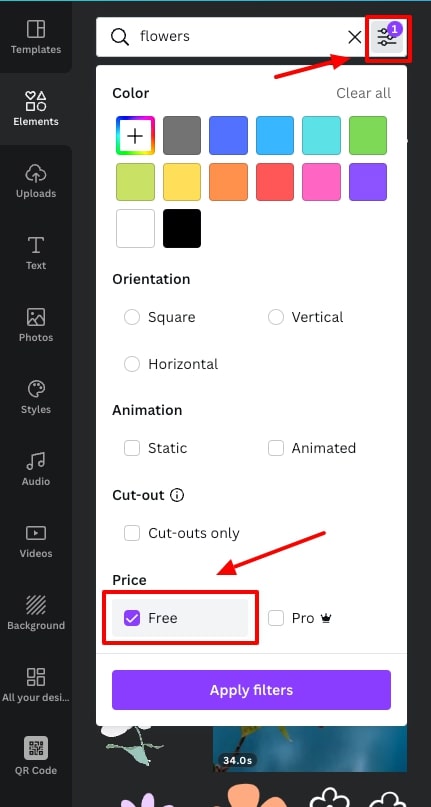
To find the elements that you need you can simply put in a search term to see what’s available e.g. ‘Flowers’.
If you only want to find free elements, you can filter your search results to only show free ones, this option is also available for templates, photos, audio, and video search:
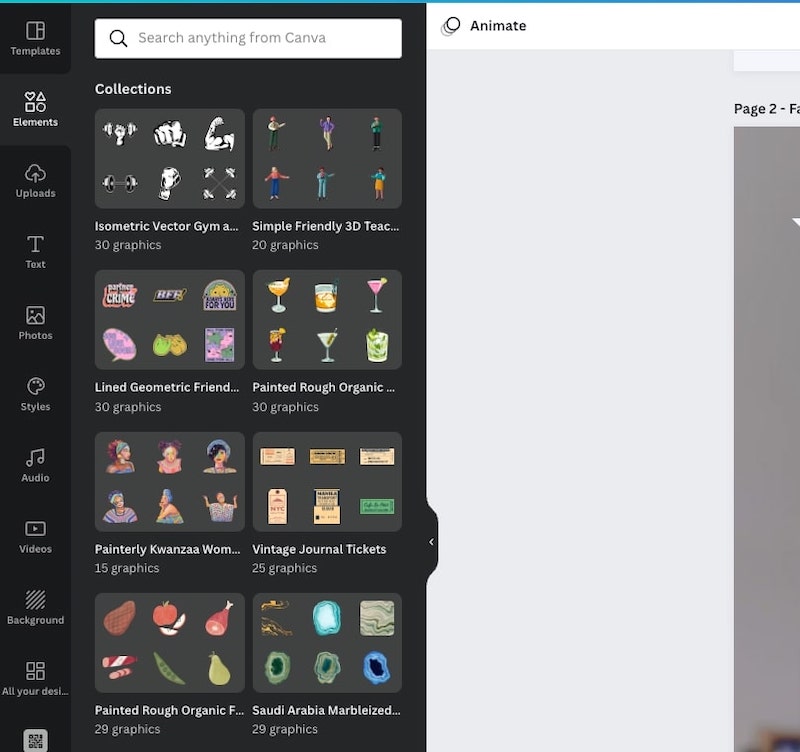
Canva also has ‘Collections’ which are groups of elements in the same style that you can use to keep your designs consistent:
Graphics:
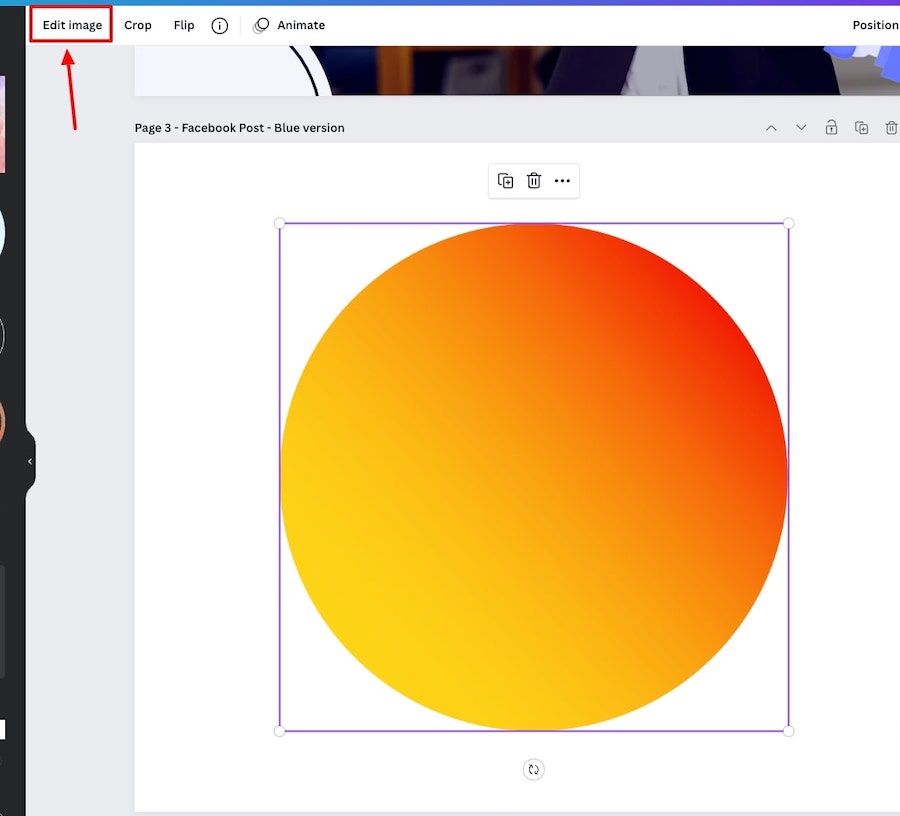
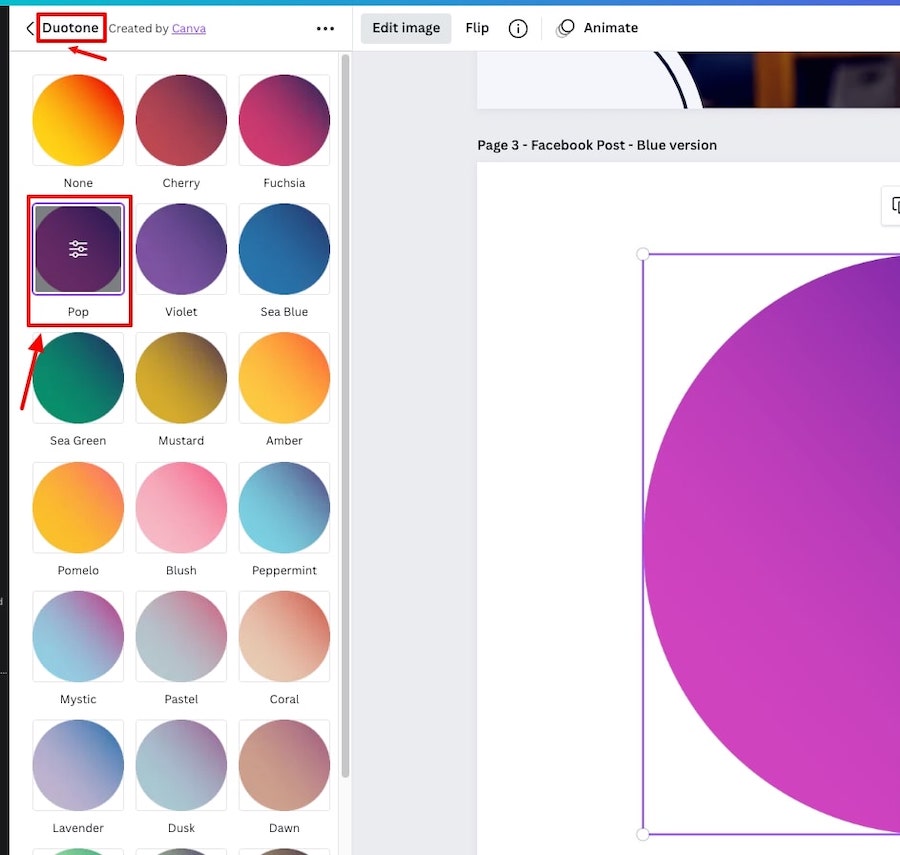
Some of the graphics that you add to your design will allow you to alter the colors, whilst with other graphic elements you might not have that option.
To get around this you can go to ‘Edit image’ and select the Duotone or ColorMix options to alter the colors of these elements:
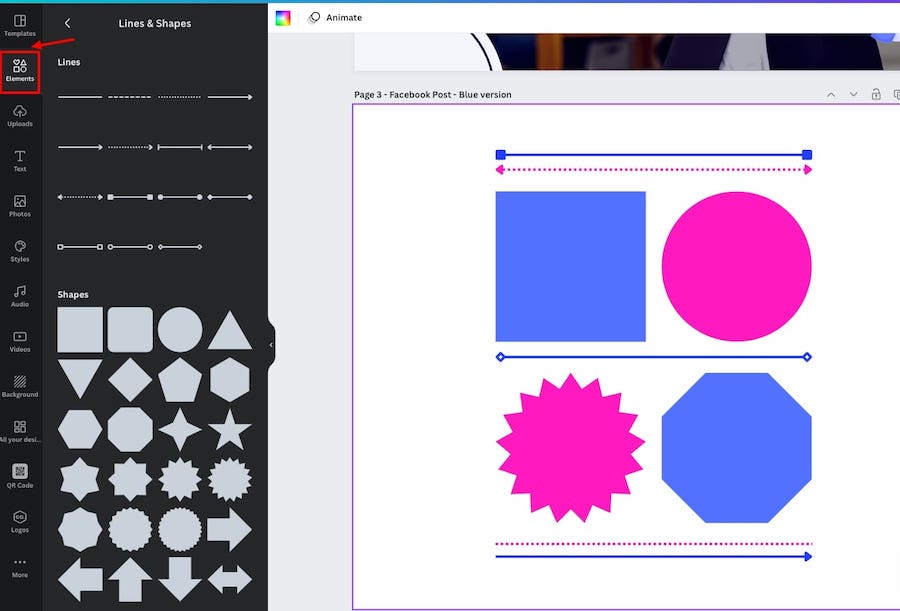
Shapes:
Canva has plenty of shapes, lines, and icons that you can add to your designs to spruce them up:
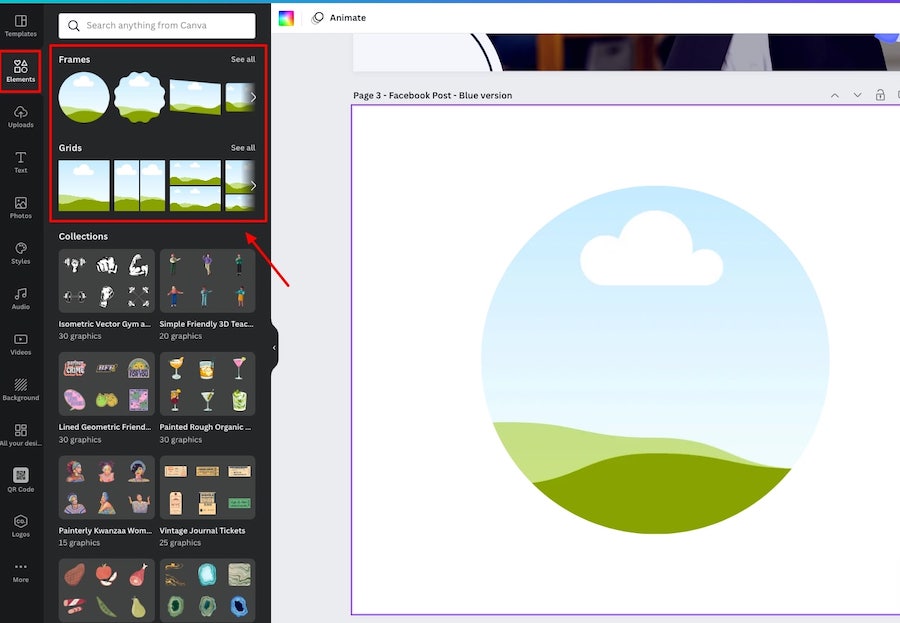
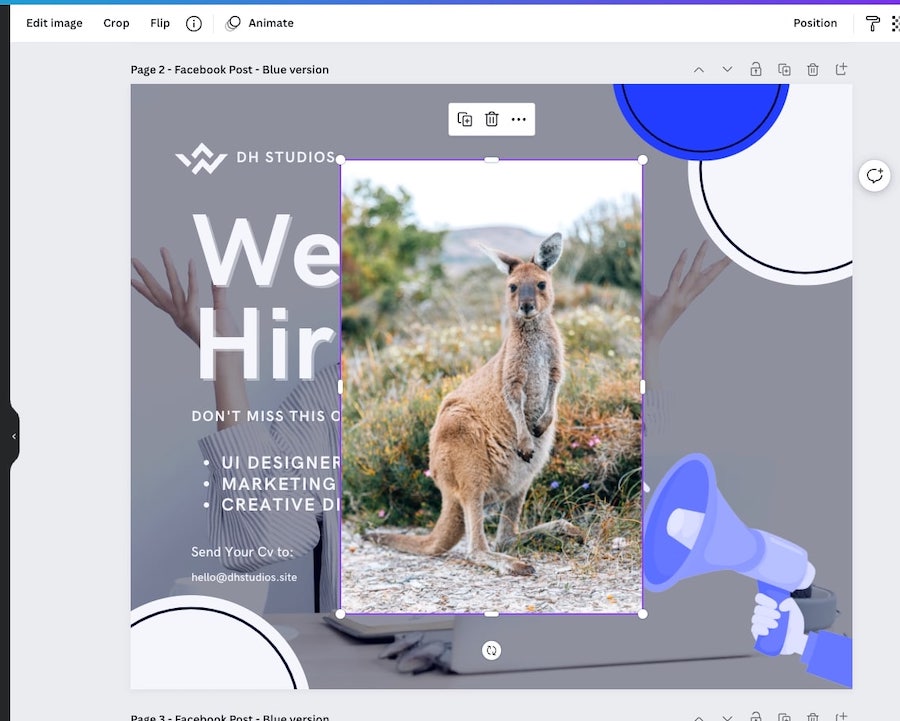
Frames/Grids:
The frames and Grid elements are shapes in which you can add images too. They offer a really quick to create interesting and unique designs.
To use these, all you need to do is add one to your page, then go to the photos tab, find a photo that works for you and drag it over the frame or grid and the image when then appear inside it:
Other elements includes:
- Graphs and charts
- Tables
- Stickers (animated elements)
- Gradients
- And much more.
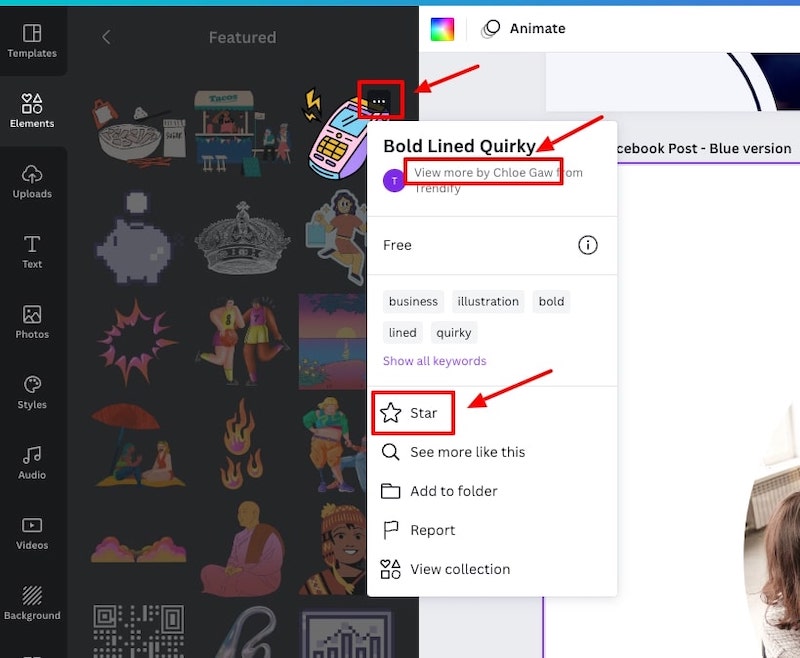
If you find some elements that you really like the style of, you can view the artist who created that element by clicking on the three dots on a particular element which will bring up more information including the author name.
Clicking on their name will take you to more elements that they’ve designed and added to Canva.
You can also click ‘Star’ and this will add an element to your ‘Starred’ folder. So you can go back to that folder at a later date and easily find all of your favourite design elements:
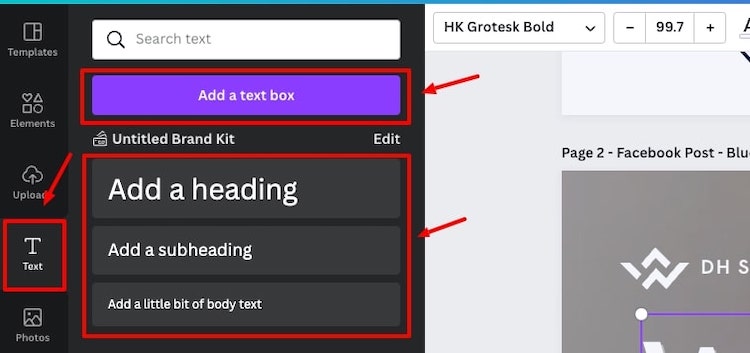
Text
The text elements on Canva are very easy to adjust and customize too. You simply go to the text tab on the left side of the editor, and you can add a heading, subheading, or body text element, and this will be added to the page.
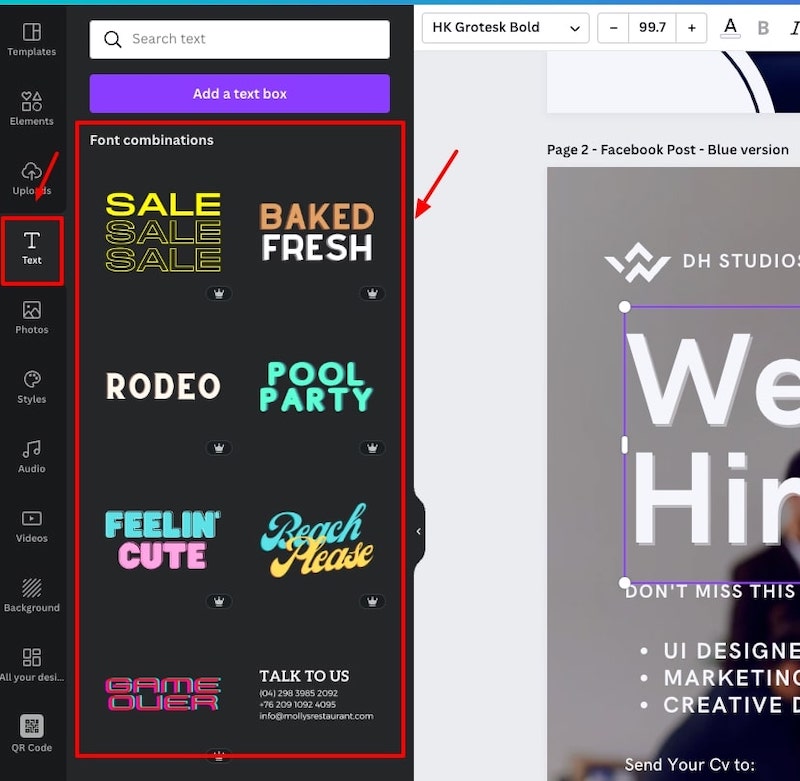
You can choose from a range of text presets and combinations that Canva has already together. These already have some text effect applied to them.
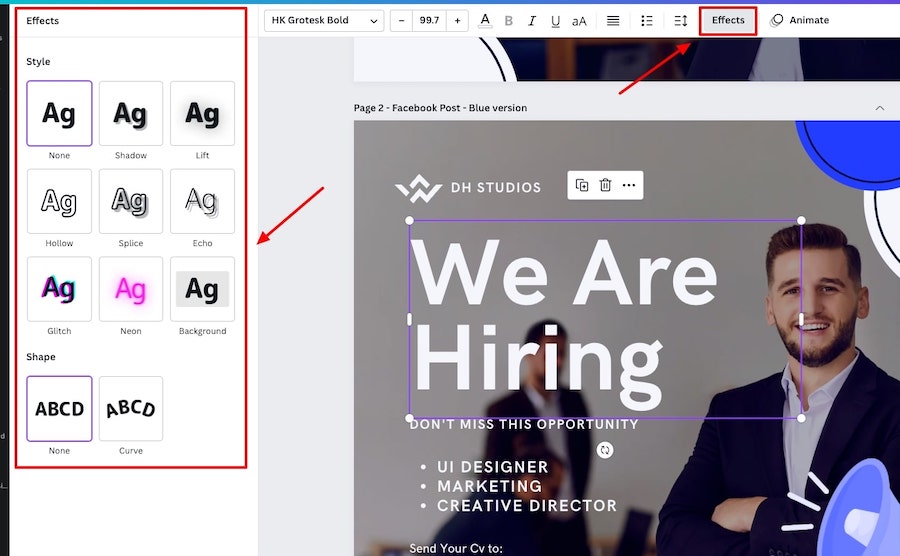
If you’re looking to spruce up a text element in your design you can select it, and then go to the effects area. You’ll see a whole range of options here.
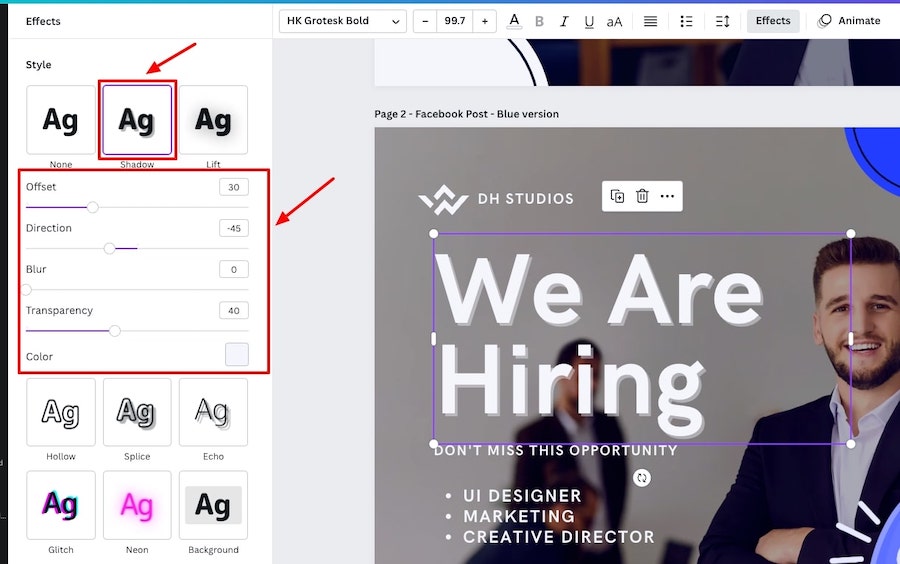
For example, you could select ‘Shadow’ which adds a drop shadow effect to your selected text element and you get a few additional customizations options such as being able to change the opacity, the color, and more:
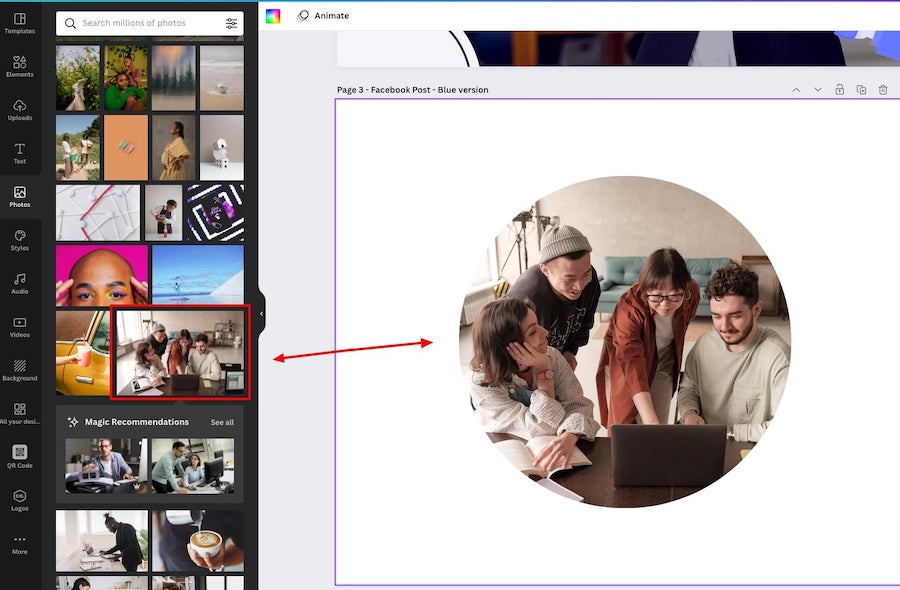
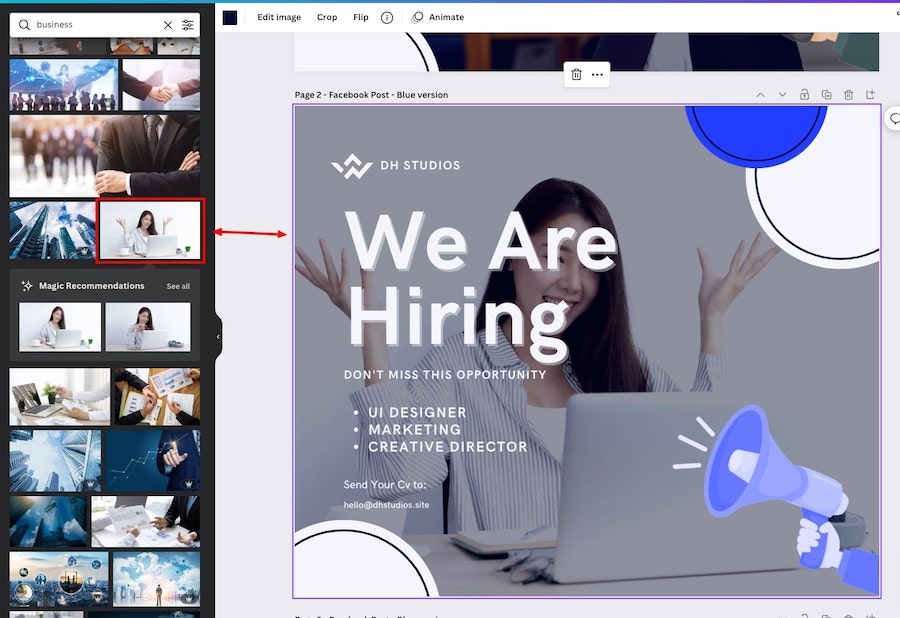
Photos
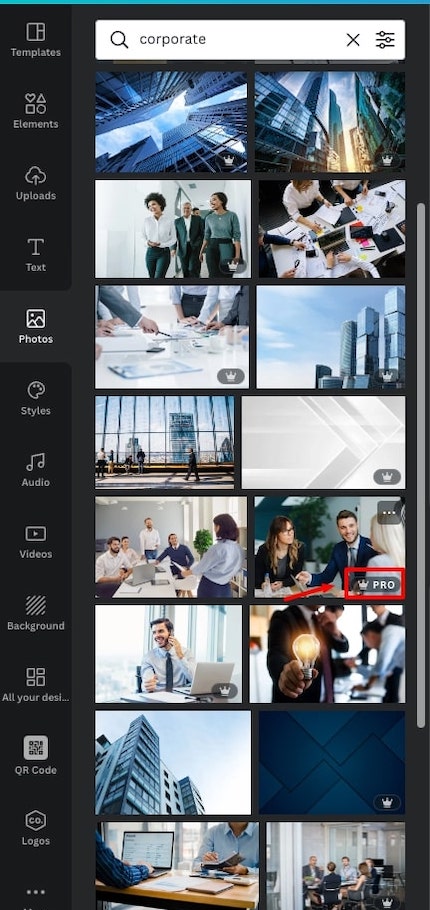
Canva has a huge library of stock photos that you can utilize for your designs. Many of which are free to use for free Canva users.
You can put in a search term to find specific, and Canva also has some theme suggestions as well as trending photos to help you find the photos that you’re looking for:
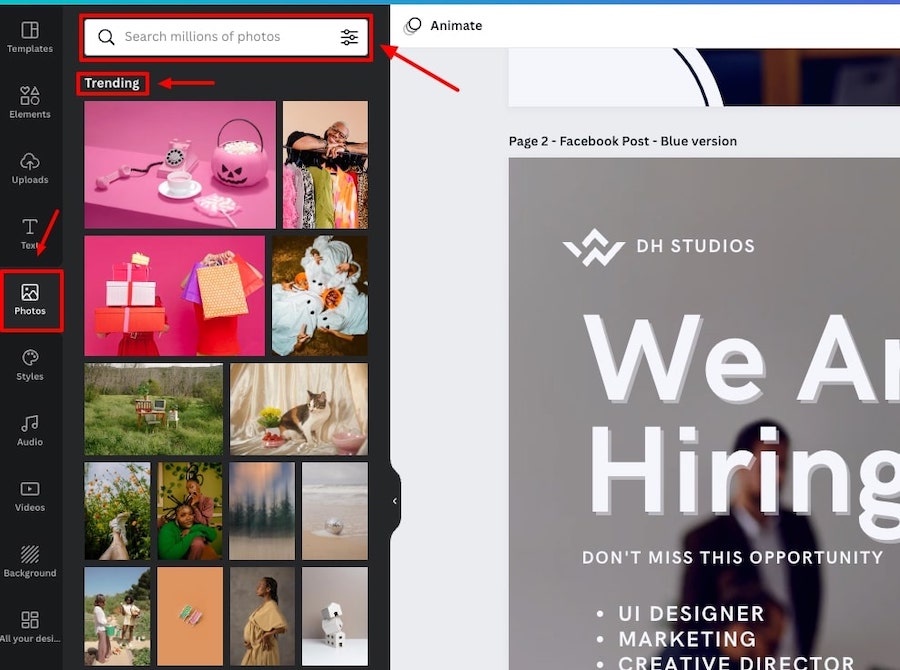
You can click on a photo to add it to your design, or drag it onto the canvas so the image becomes the background for your selected page:
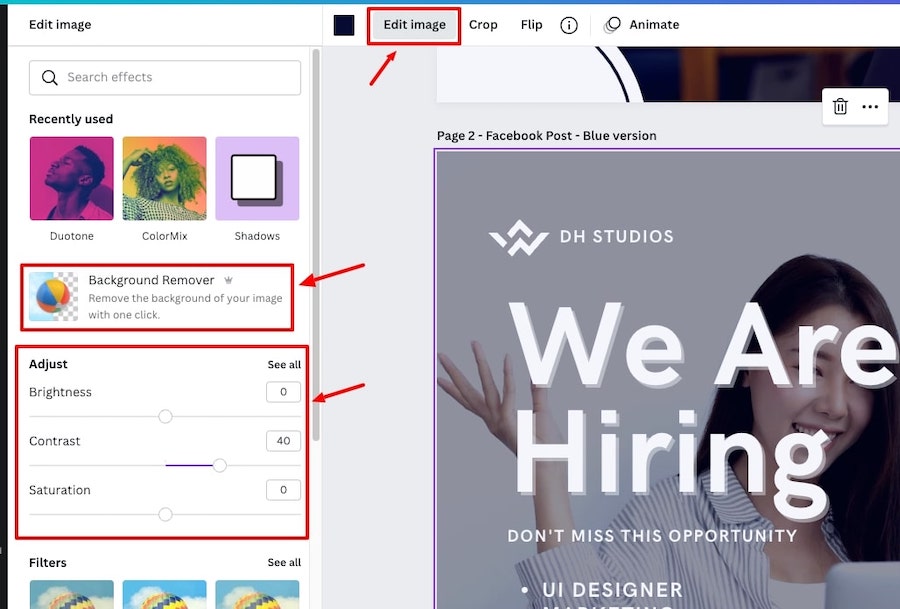
To add effects to a photo click on ‘Edit image’ and you’ll see various options on the left side of the editor such as ‘Adjust’ which allows you to edit the brightness, contrast, saturation, and a few other adjustments to the image.
There’s also the background remover tool, which is only available for Canva Pro users at the moment (we’ll cover this in the Canva Pro section):
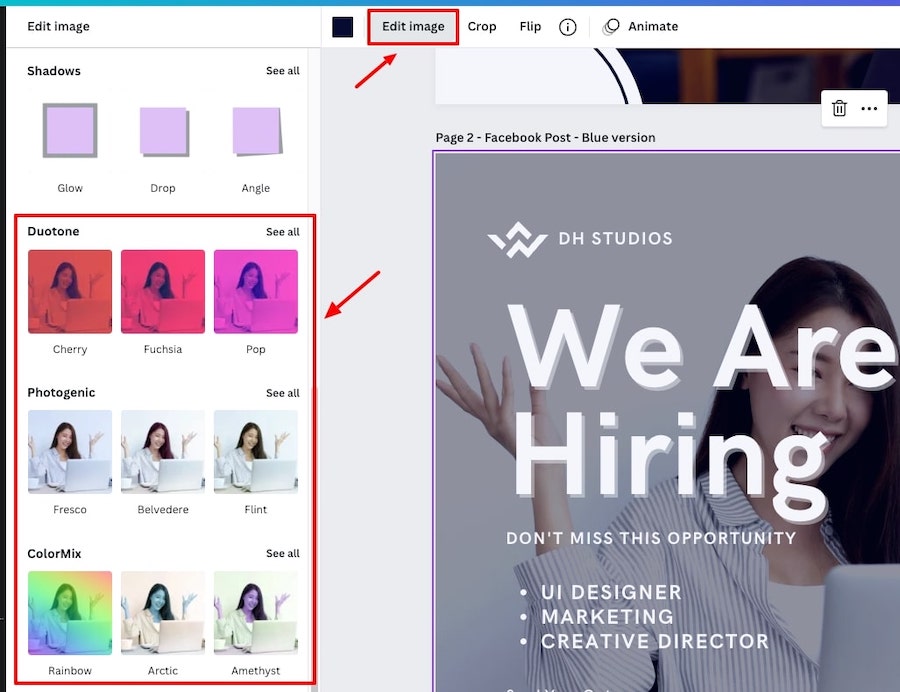
You can apply filters to the photo and add color effects such as Duotone and Colormix:
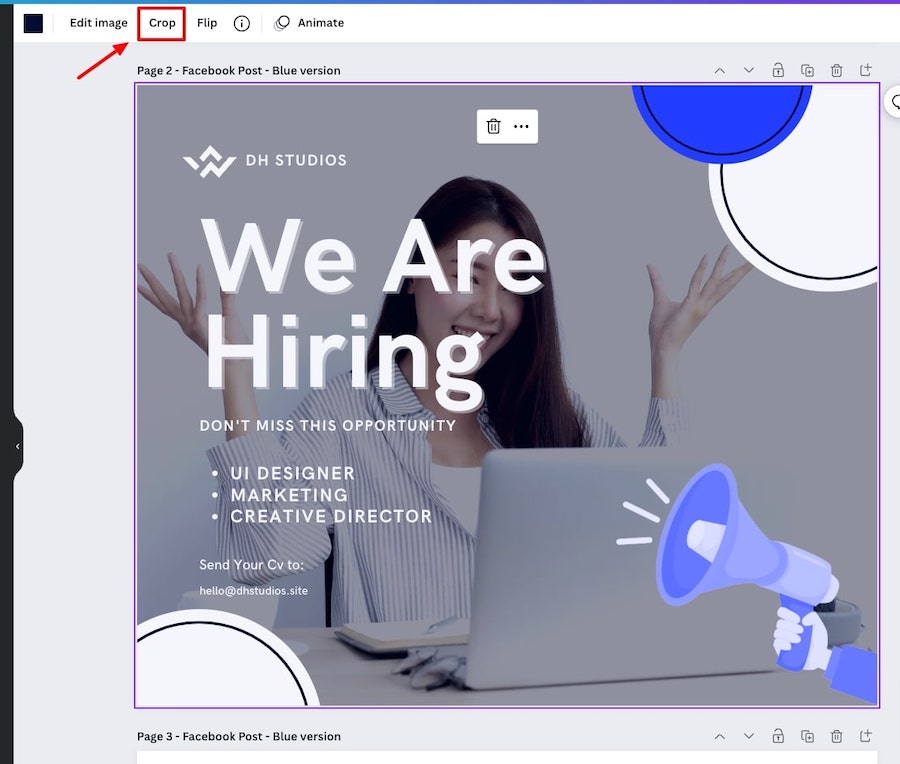
And you can crop photos too if you only want to use a specific section of the photo:
If you want to use photos from other websites in Canva without having to download them and then re-upload them to Canva, you can simply right click on that image, click ‘copy image’, then navigate back to the Canva editor and click command/control + V.
The image will appear in Canva for you to use (just make sure you’re allowed to use that image before you do this):

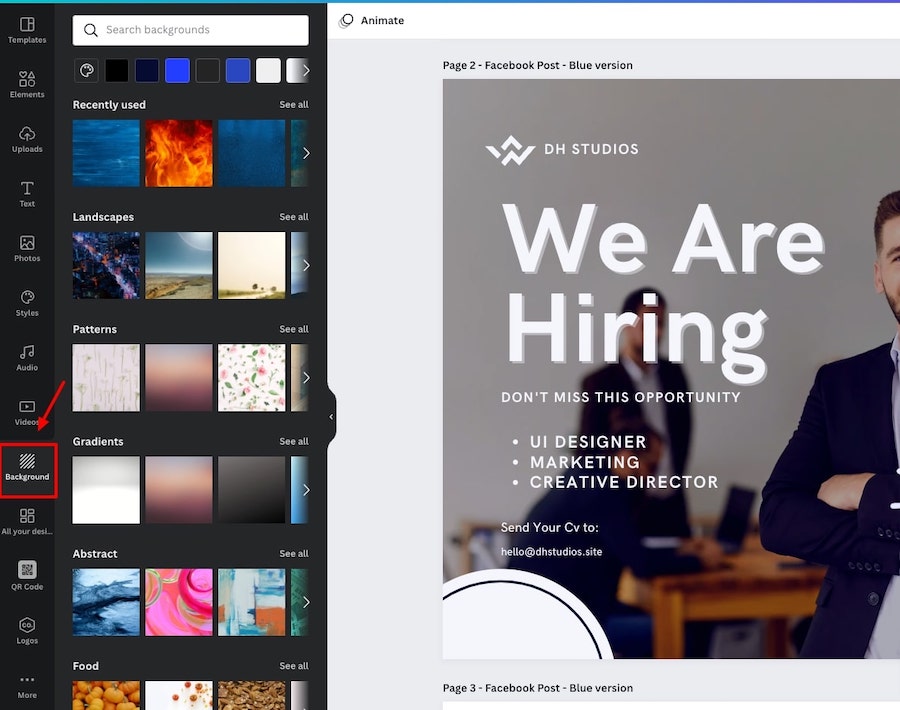
Backgrounds
In the backgrounds tab you unsurprisingly have a huge number of background images that you can use for your designs.
The are all categorized into themes such as landscapes, food, nature, etc. to make easy for you to find the kind of background you need. You can also search for one if you have something specific in mind.
The backgrounds can be customized in the same way that any other image can be on the Canva.
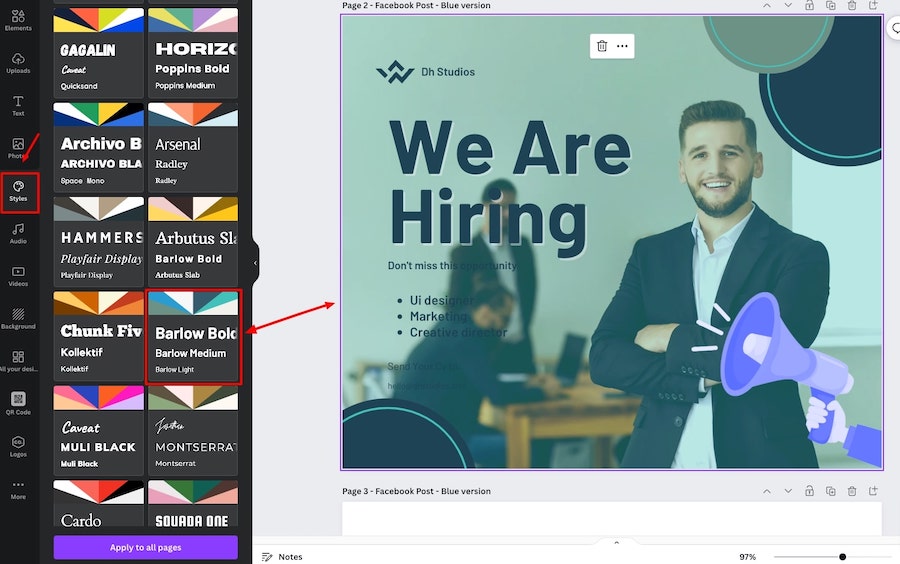
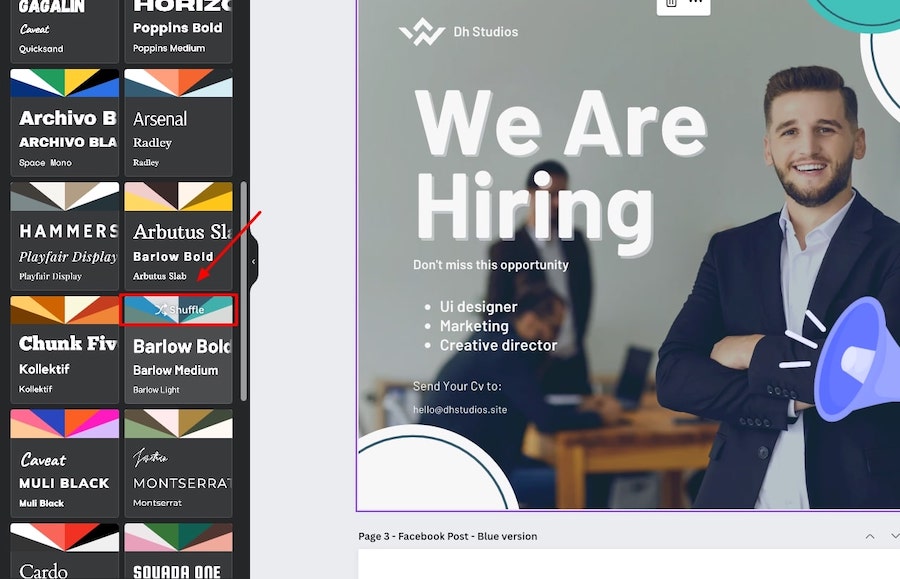
Styles
If you’re in need of inspiration when it comes to color palette of your design, or even the font combinations that you should be using the ‘Styles’ tab in the Canva editor will be really useful for you.
They have a range of suggested color palettes, font sets, and also combinations of all these things that you can select and it will automatically apply those suggestions to your page or all the pages of your design if you choose that option:
There’s also the ‘Shuffle’ button which allows you to use the selected suggested color palette and font combinations but switch them around to see how they work best with your design:
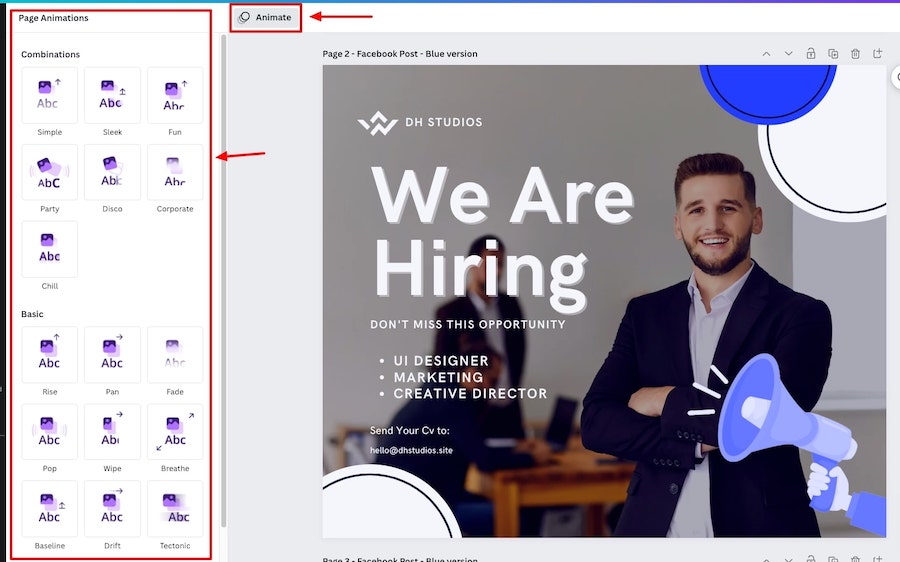
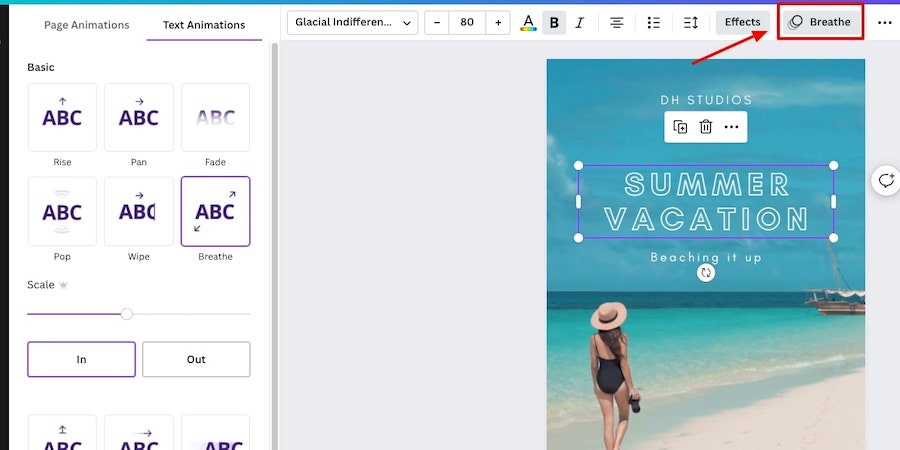
Animations
If you want to animate a design it’s very simple to do as well. You can either animate a whole page by clicking to the side of a page, and then going to the ‘Animate’ area the top of the editor.
You can then select one of the animations available and this will be applied to all the elements on the selected page:
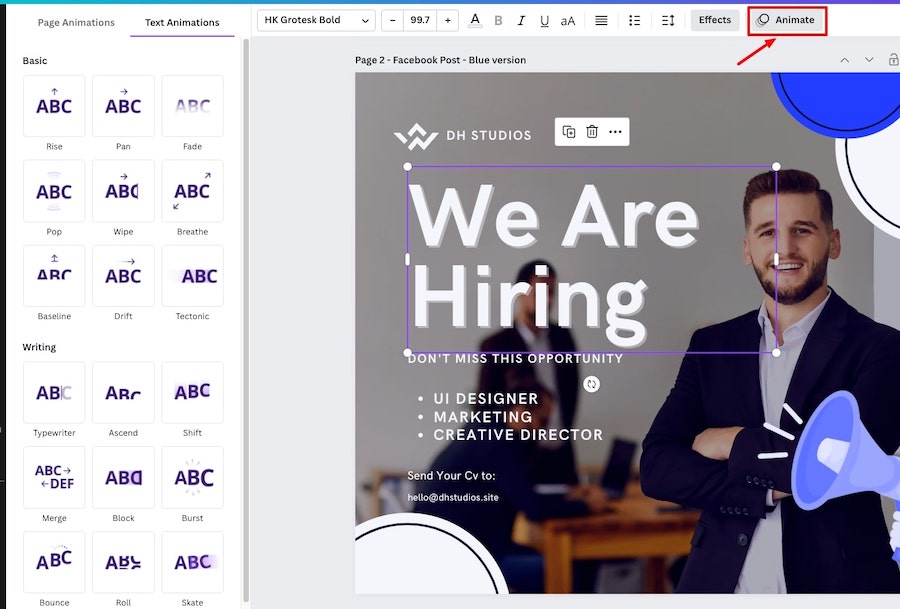
You can do the same for individual elements too, so rather than animating everything on a page it will only apply to the selected element:
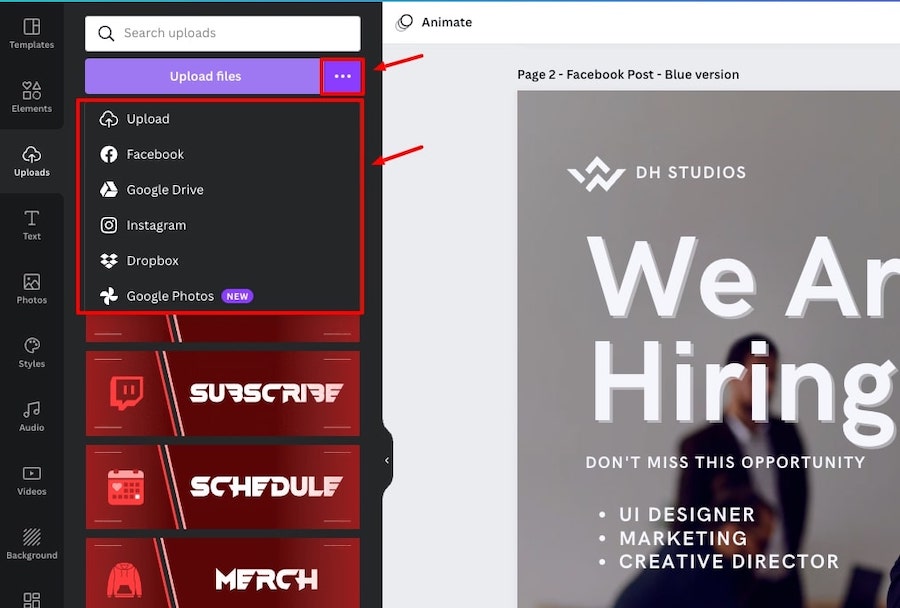
Uploads
If you have your own images, videos, or audio that you want to upload to Canva you can add them to your uploads area.
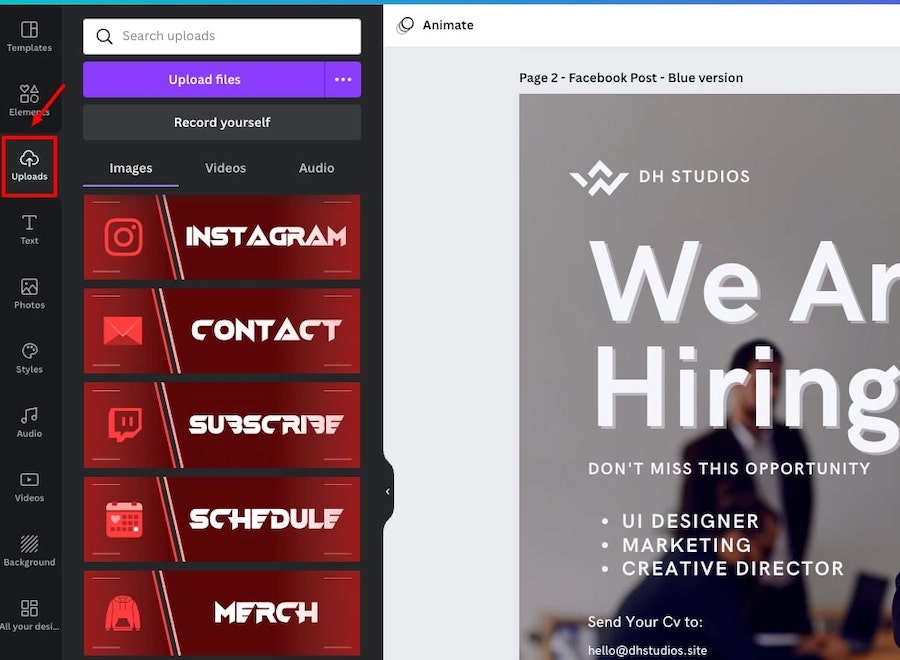
You can even upload files directly from other platforms including Dropbox, Facebook, Instagram, Google Drive, and Google photos:
The elements you upload can be customized in the same way as any other Canva element.
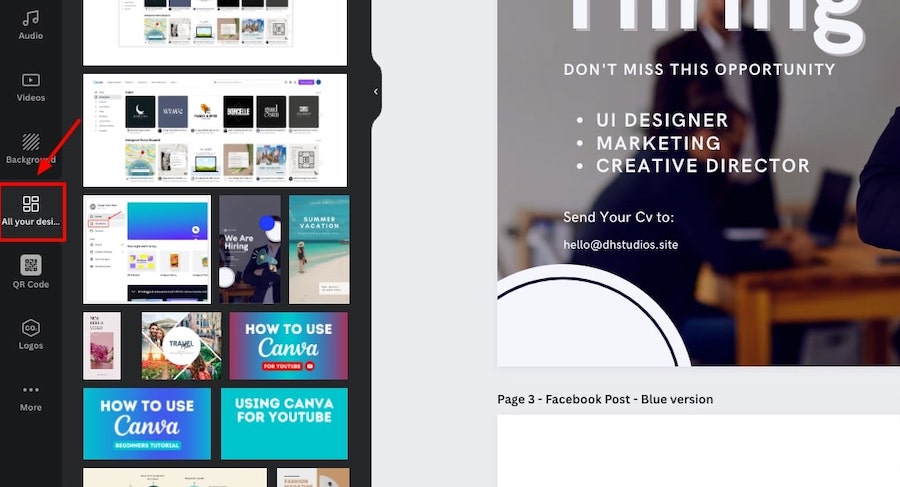
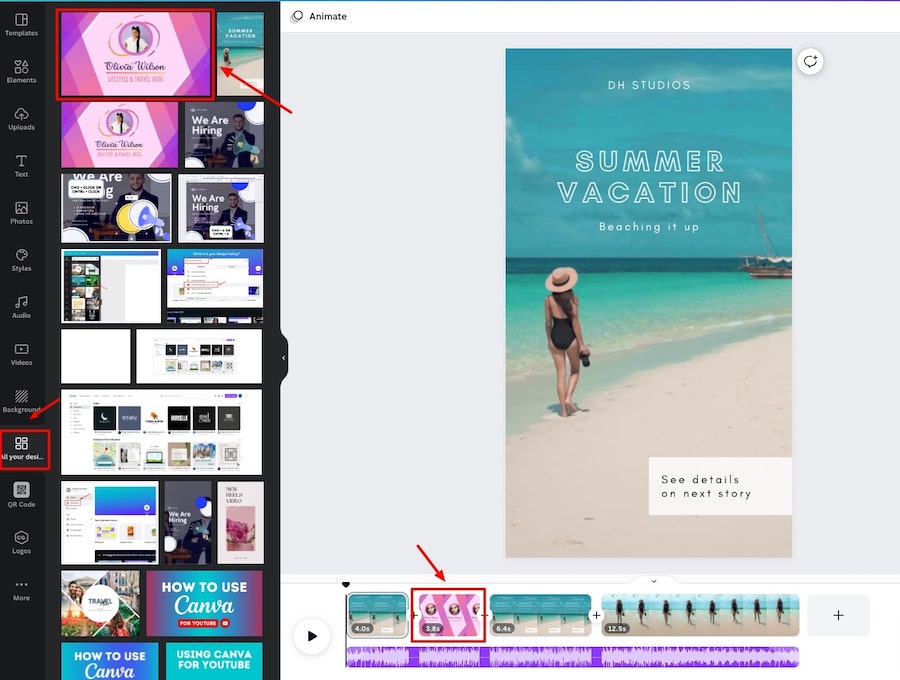
Utilize previous designs
If you have made designs before, these will be under the ‘All your designs’ tab. So, if you want to create a similar design you add a previous one to your page and modify it, or grab elements from it that you want to use for your new design:
Related articles:
- How to make a transparent background in Canva
- How to upload fonts to Canva
- How to change the color of a logo in Canva
- How to create a text mask in Canva
- How to make a gradient in Canva
- 40+ Gradient letters in Canva
- 20+ Bubble letters in Canva
- How to make silver and gold letters in Canva
- How to make metallic letters in Canva
- How to make glitter letters in Canva
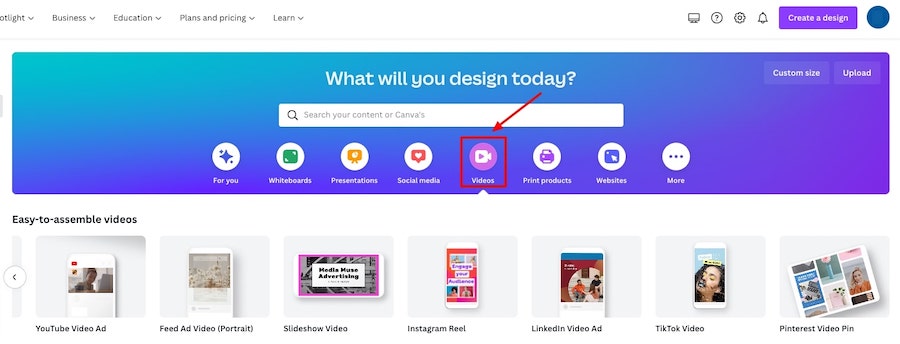
Step 5: Creating videos
To create videos in Canva, you can start off by choosing your video format with a blank canvas.
If you navigate to the videos tab on the Canva homepage you’ll see a range of video options including the standard 1920x1080px, mobile video, slideshow video, Instagram reel, and several others:
From a blank canvas you can add videos from Canva’s library (or upload your own videos), graphics, audio, etc. to start creating your video.
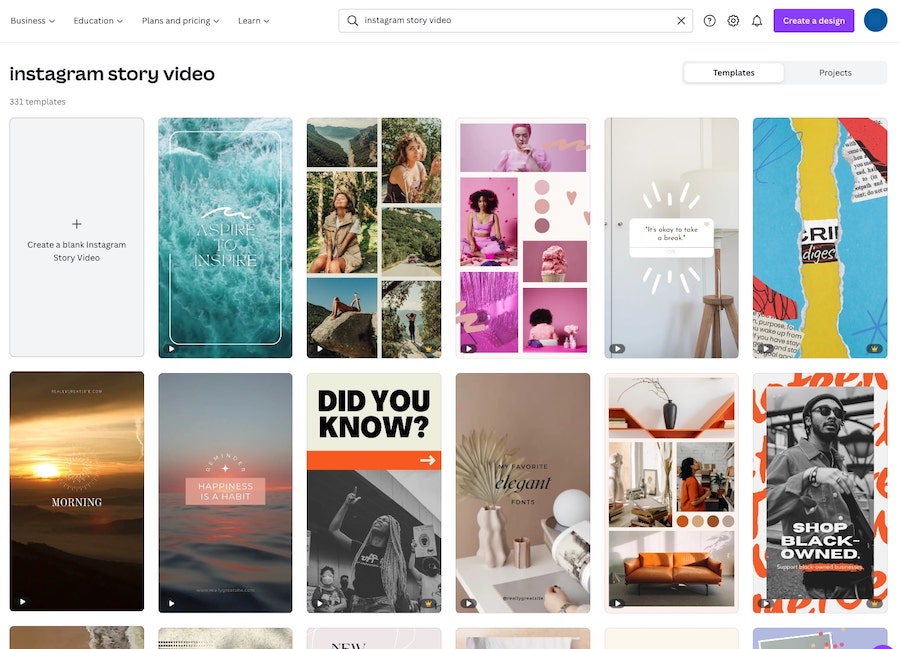
Alternatively, if you have a specific format in mind already e.g. an Instagram story video, you can search for templates, and choose one that you like to start off your video creation:
The editing options available will be the same regardless of what video format or templates you choose.
To show you how to edit and create a video we’ll utilize a template.
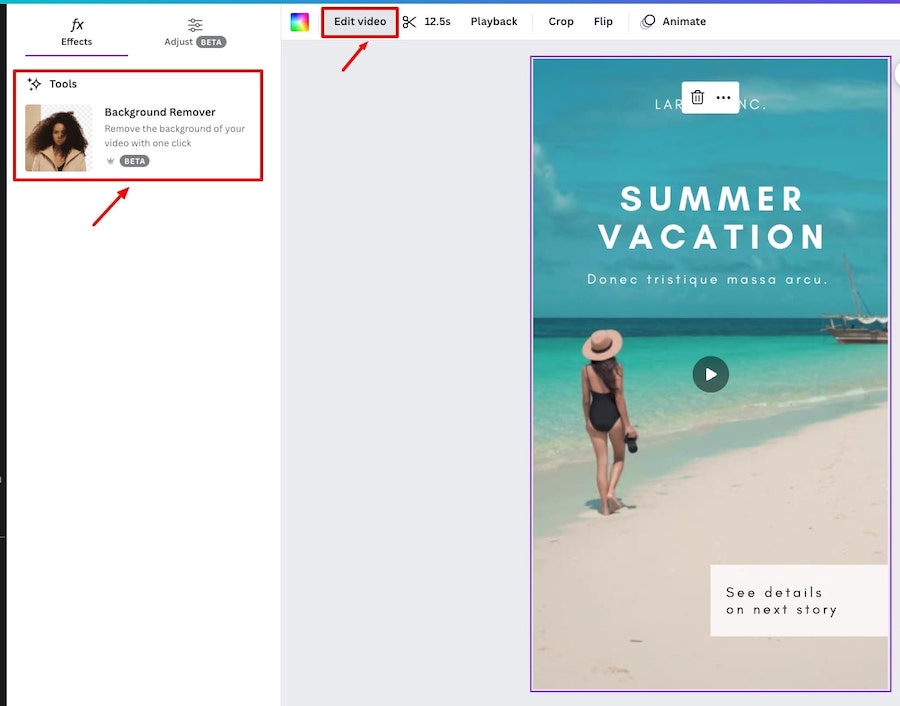
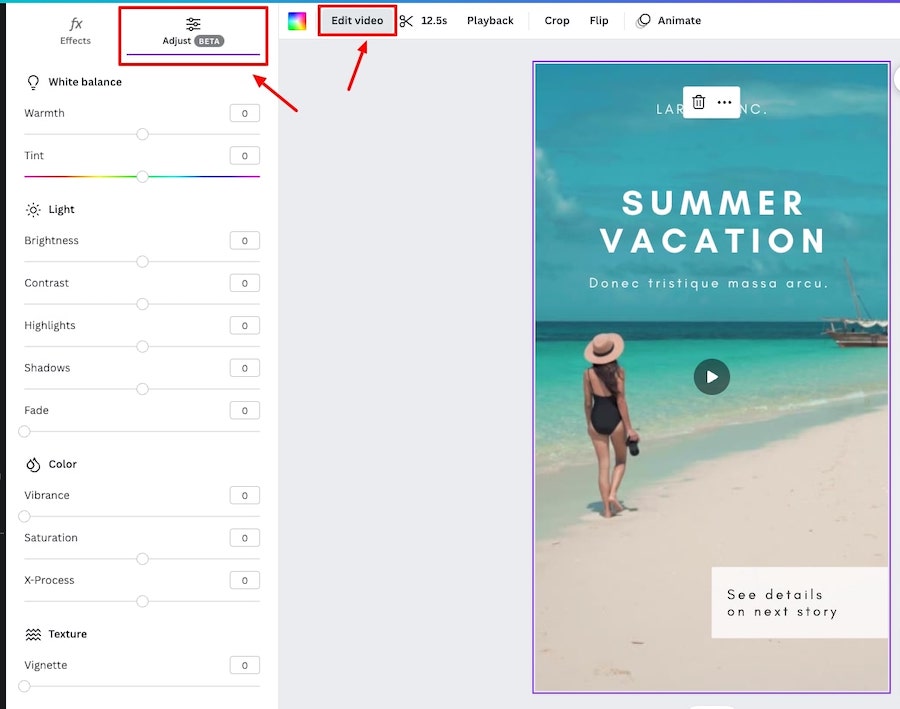
When you’re in the editor and you’ve selected a video element you’ll see the customization options above the editor, these will include the ‘Edit video’ section where you can remove the video background (Pro feature only) and also add light and color adjustments to the chosen video element:
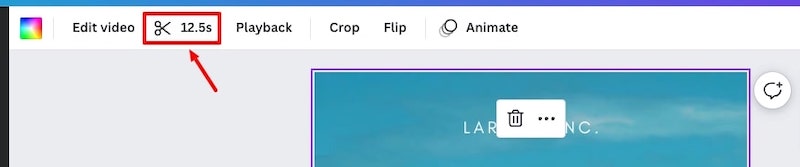
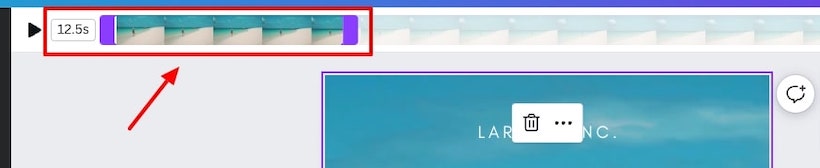
You can also trim the length of the video or choose which part of the video file you want to feature in your design:
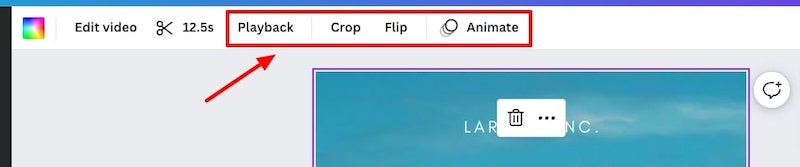
The other options on the top bar are the playback options (e.g. auto play or loop video), crop (to adjust which part of the video file you want to show within your design), flip, and animate (although the animations will only effect the non-video elements of your design such as text, graphics, etc.):
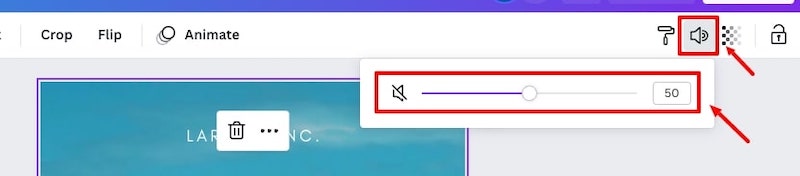
You can adjust the audio volume (if there is audio) from the top bar as well:
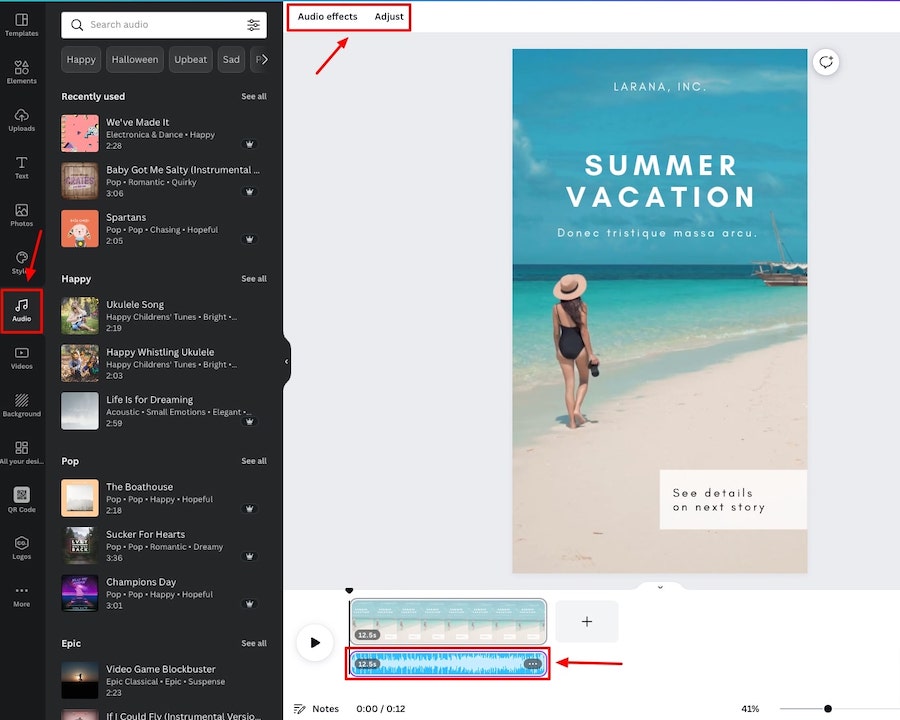
Speaking of audio, Canva has a huge library of audio files that you can use for your video designs. A lot of their audio library is available to Pro users only but you can access a decent amount for free as well.
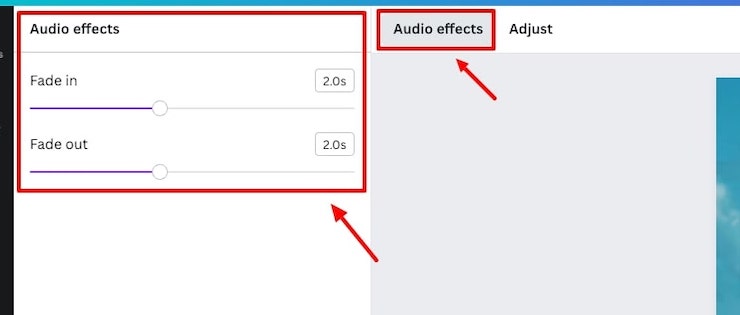
Once you’ve found an audio file that you like you can simply drag it onto your canvas, and you will get the options to adjust it and add effects to it:
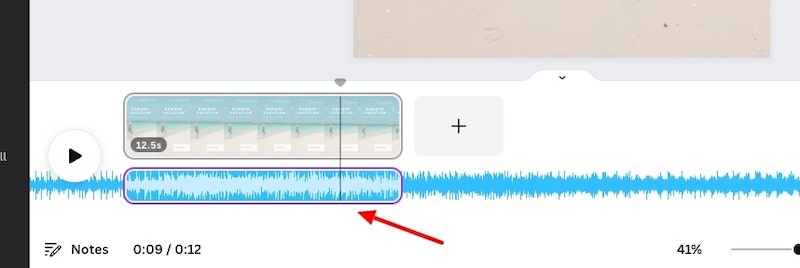
Depending on the length of your video you will be able to adjust the audio file or choose a specific section of it to match up with your video:
And the effects that you can do at the moment include a ‘Fade in’ and ‘Fade out’:
At the bottom of the editor is the video timeline. Here you have the preview button so you can see how you’re video is looking as you’re editing it, and can also trim the video and audio elements from here too:
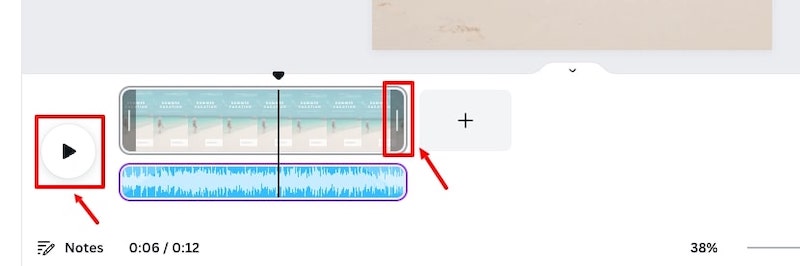
There’s also the ‘add page’ button which adds a new scene to your video (You can upload a new video file to add to this page or grab a video from the ‘Video’s tab):
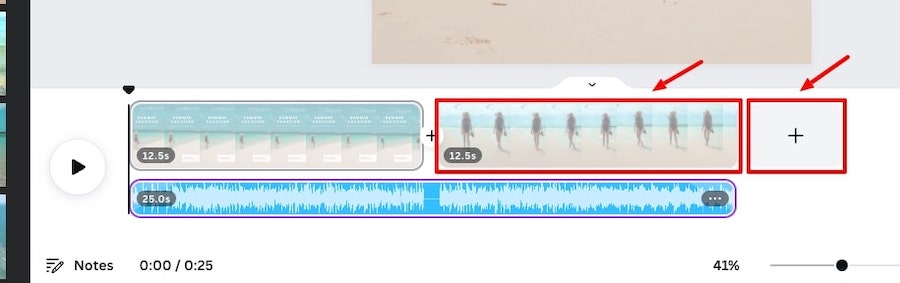
And if you click the button icon between two pages, you’ll see you can add a transition element to go between the to parts of the video:
The transition options will appear on the left side of the editor:
When you’re happy with your video you can download it – usually this be as an MP4 file.
More elements you can add to your video
To spruce up your video you can add text elements, graphics, and stickers:
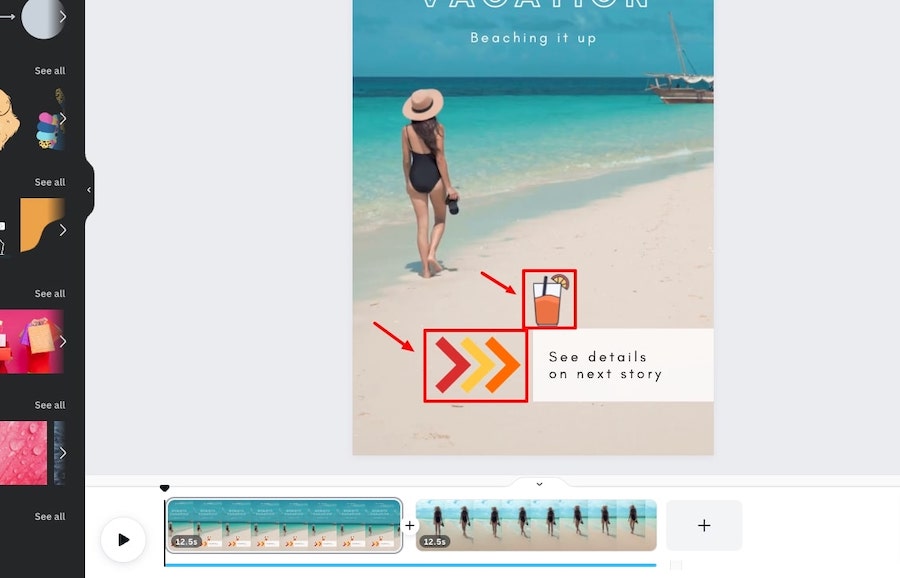
You can even add animations to specific elements too to make your videos even more engaging:
Another useful tip when you’re creating video in Canva is to use reuse video elements that you’ve already created. For example, if you’re creating YouTube videos and you always use the same video intro, you can go the ‘All your designs’ tab, find that particular design and add it to your video timeline:
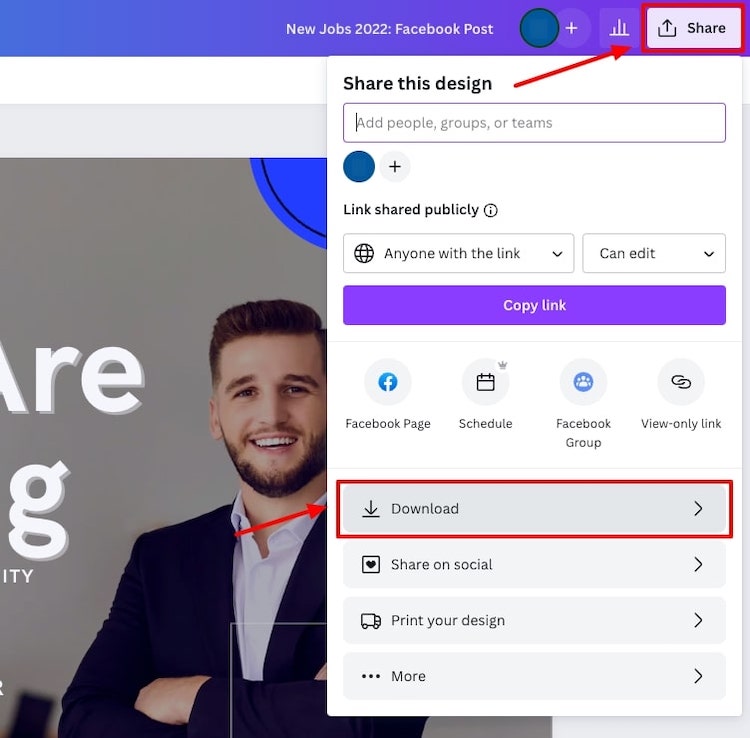
Step 6: Downloading your designs
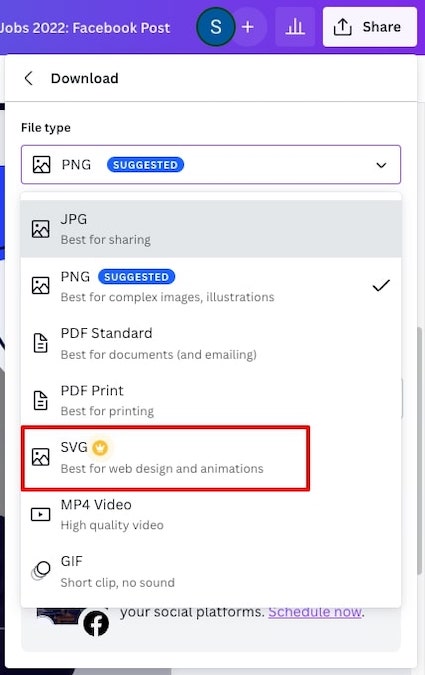
To download a design from Canva, click the ‘Share’ button at the top right of the editor, and then click ‘Download’:
You can then choose the format that you want for your download (e.g. PNG, JPG, etc.), if you’ve created a design that has some animation you’ll want to select the GIF or MP4 format for your download.
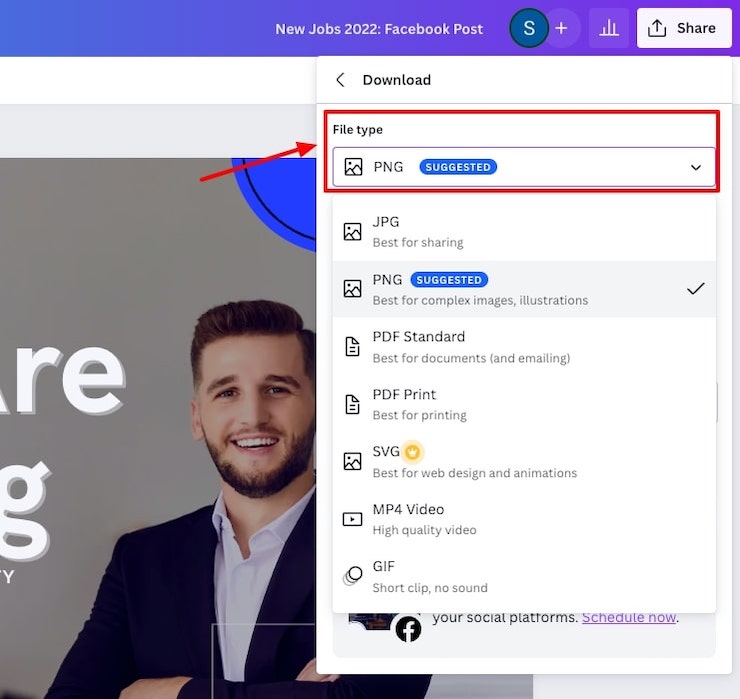
If you have multiple pages in your design, you can choose to only download a specific page:
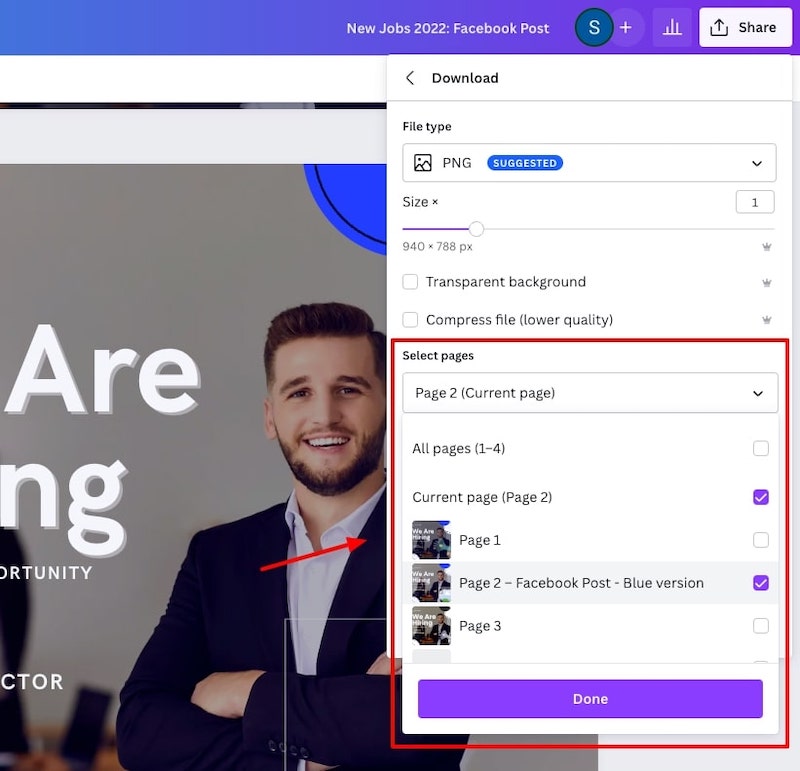
You’ll notice the crown icon next to a few options in the download area. These are options that are only available to Canva Pro users – we’ll cover these a bit later on.
Step 7: Sharing your designs
You can share your designs in several ways on Canva, either to individuals or straight to social media platforms.
To do this via the editor area, simply click on the ‘Share’ button again.
You can either invite someone to view or edit the design by entering their email under ‘Share this design’ or you can make the design ‘public’ copy the link to the design file and share it to anyone you like:
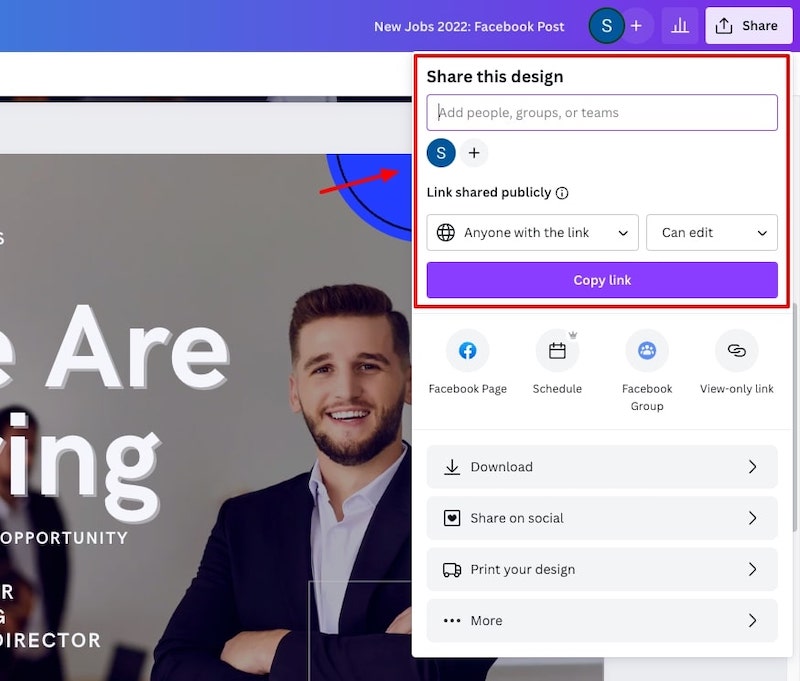
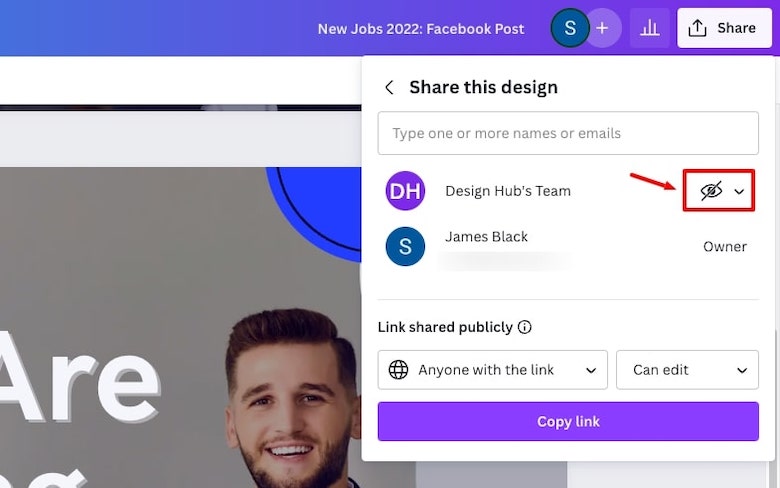
If you’re a free Canva user you can still be part of a team, and if you are part of a team you can share your designs with them too by clicking the ‘+’ icon and then choosing the team you want to share it with:
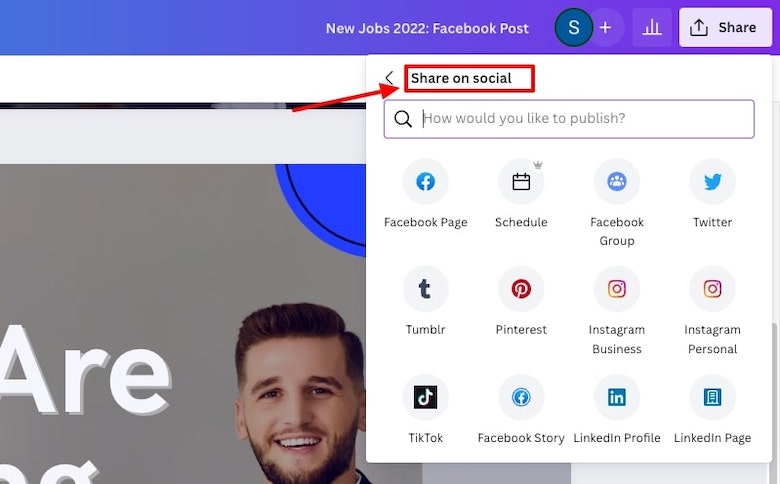
You can also share your designs directly to various social media platforms including Facebook pages, Facebook groups, Instagram, and several others:
Step 8: Organizing your designs
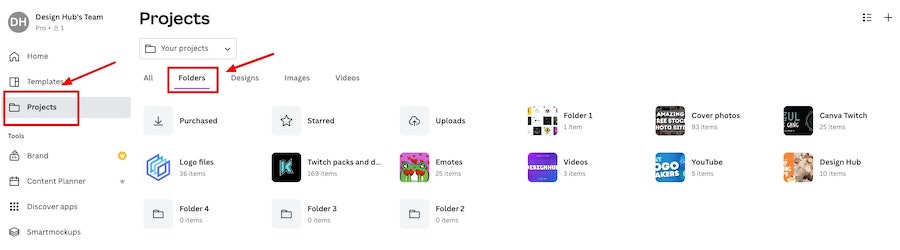
From the Canva homepage, you can go to the ‘Projects’ area via the left side menu, navigate to the ‘Folders’ tab and you can create some folders to help organize the designs you’ve made or plan to make:
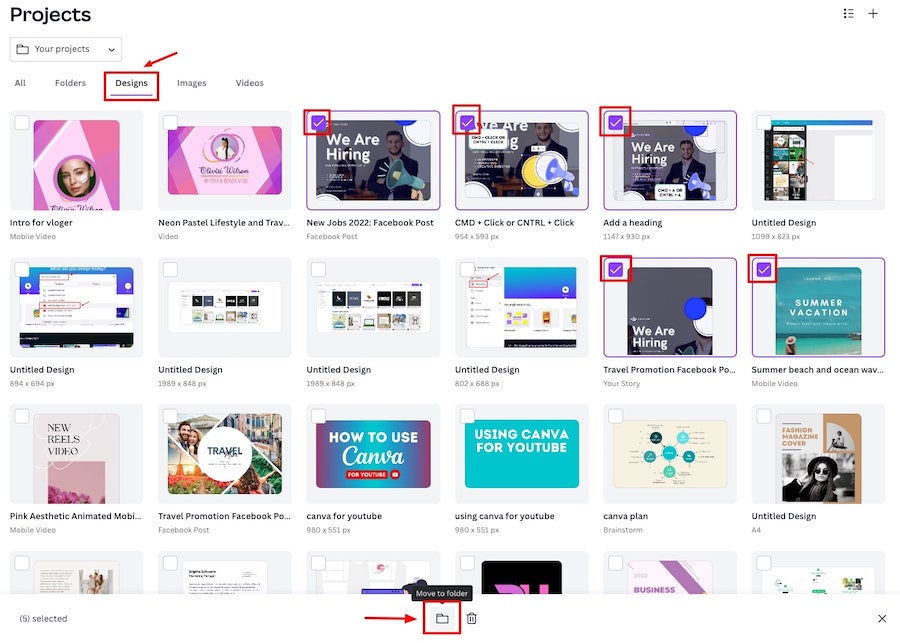
To add designs to a folder you can go to the ‘Designs’ tab, then select one or multiple designs, click on the folder icon at the bottom of the screen, and then choose a folder to move those designs to:
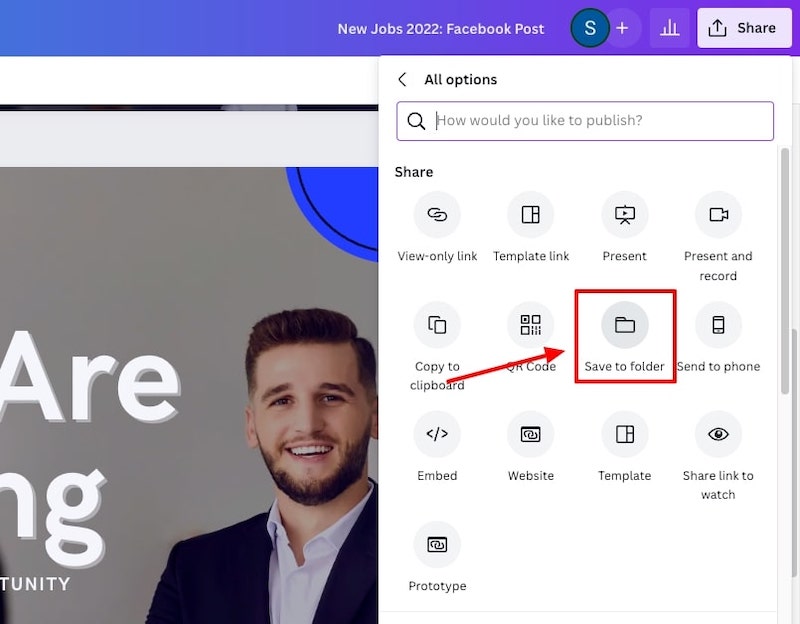
You can also add a design to a folder via the editor by clicking on the ‘Share’ button, clicking on ‘More’, and then clicking ‘Save to folder’ and selecting the folder that you want to add the design too:
We highly recommend creating folders for your designs, especially if you plan to create a lot of them, they can pile up quickly.
Step 9: Using Canva’s integrations
Canva has a lot of integrations with other apps and products. We won’t cover all of them here so be sure to browse through them all in your time, but we’ll cover some of most commonly used ones to help you get started with them.
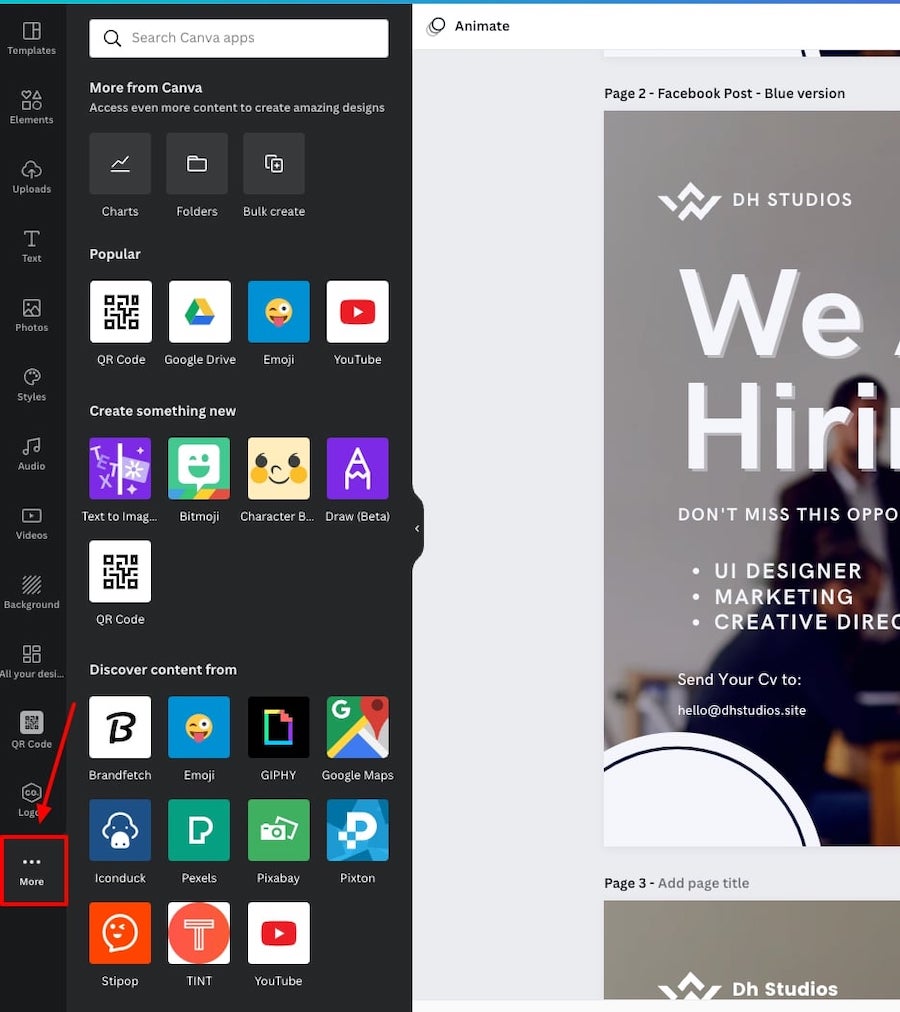
When you’re in the Canva editor you can navigate to the ‘More’ tab on the left side panel and this will show you all the integrations that you can utilize whilst editing a design in Canva:
You can select the integrations that you want to add to your editor simply by clicking on them.
Two commonly used integrations are the Pexels and Pixabay ones, and these give you access to even more stock photos and videos that are available on these platforms, and these are available to free users too:
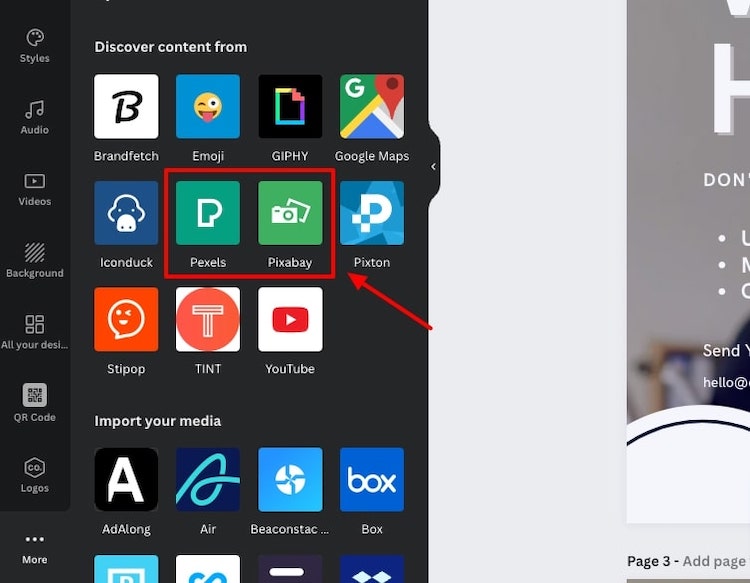
Here are some other commonly used and interesting integrations or add-ons:
- YouTube – add YouTube videos to your designs
- GIPHY – Add GIFs from GIPHY’s library
- Canva Draw – scribble or sketch on your designs
- QR code – add QR codes to your designs
- Stipop – Add stickers from Stipop’s library
Import integrations
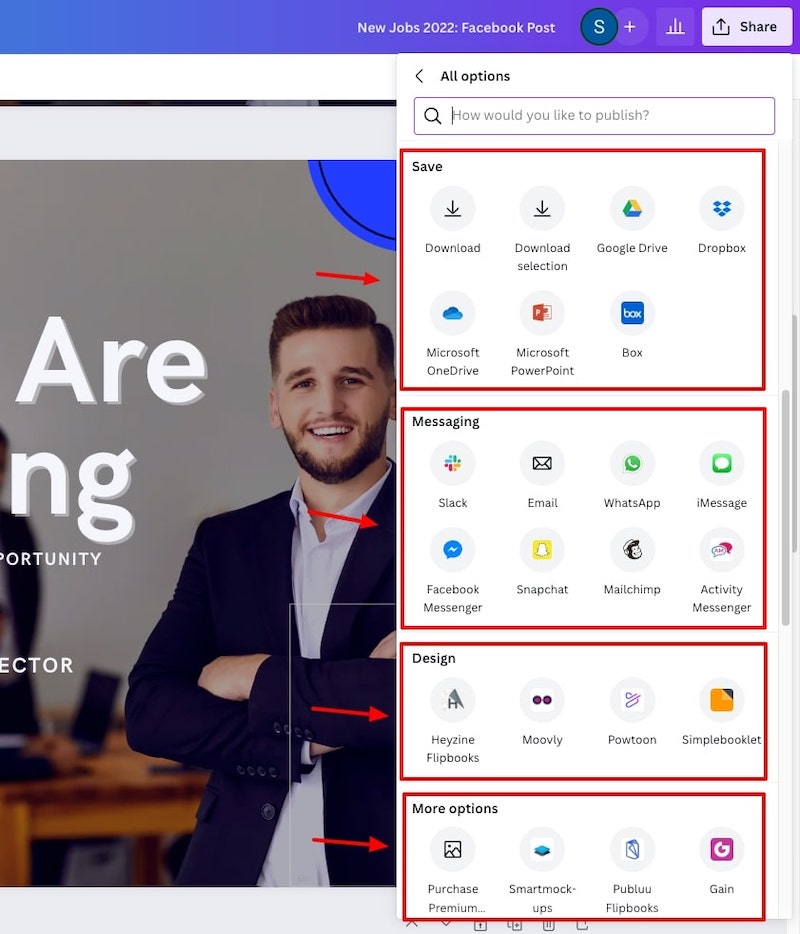
Canva also has integrations that allow you to import your Canva designs with other products that you might be using.
We’ve already mentioned the social media ones, but there are plenty of others. Again we won’t cover them all here, so be sure to investigate them all for yourself.
To see all of these import integrations, go to the ‘Share’ button via the editor, and click ‘More’. You’ll see all the products that can share your Canva designs to:
One of our favourite import integrations is Smartmockups, this allows you to import your Canva designs directly to your Smartmockups account where you can create professional-looking mockups to help advertise your designs.
If your a Powtoon user, you can also import your Canva designs to be used in your Powtoon account to help you create amazing animations and videos
You can also import your Canva designs directly to your Mailchimp account if you use that platform for your email campaigns:
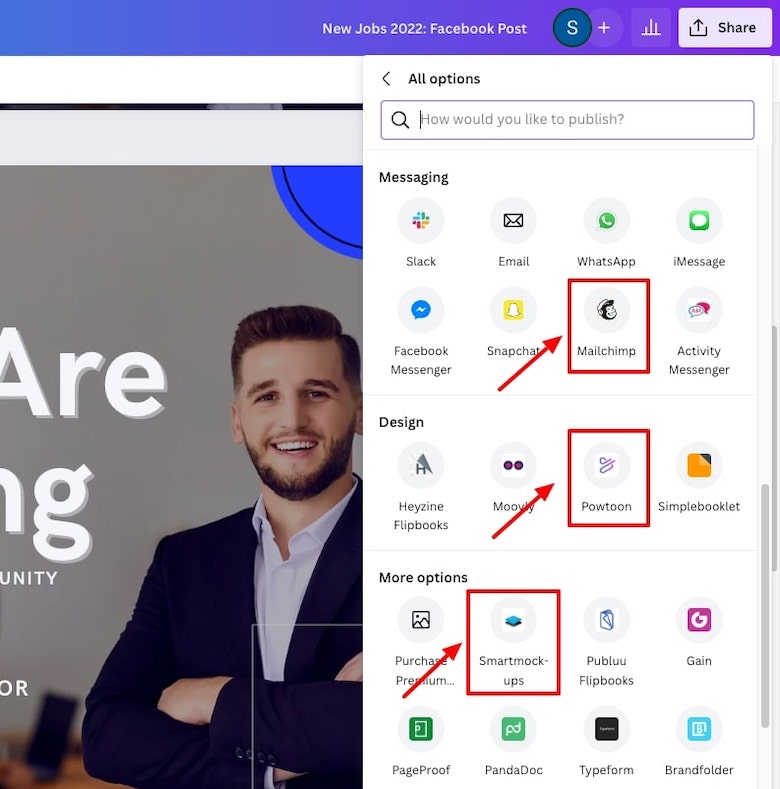
Here are some other import integrations that we think could be useful for Canva beginners:
- PandaDoc – proposals, contracts, and other docs
- HeyZine – create animated flipbooks
- OptiSigns – Digital signage
Related articles:
- How to create mockups with Canva
- How to draw on Canva
- How to export Canva presentations as PowerPoint presentations
Step 10: Use shortcuts
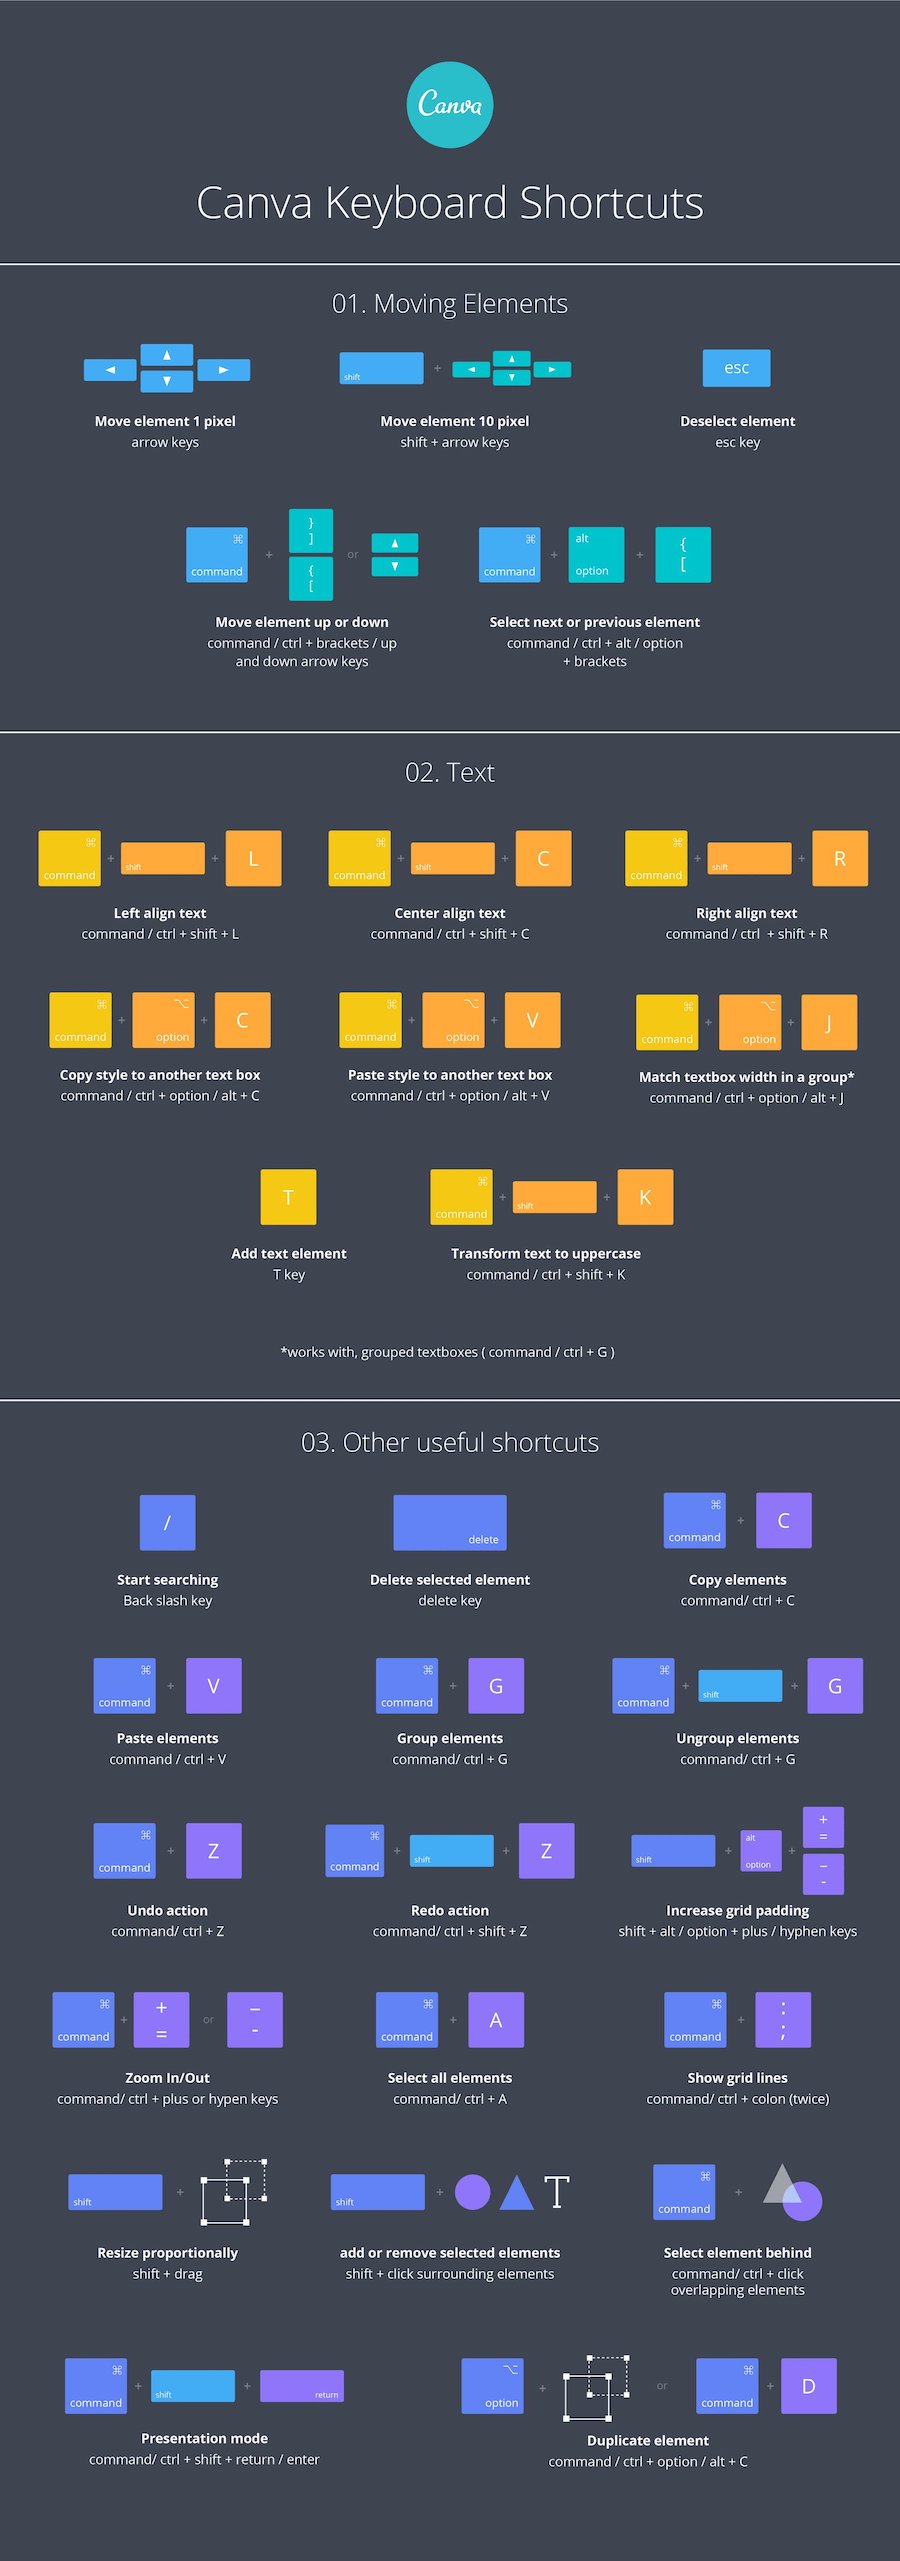
We’ve mentioned a few of these already, but as you get used to using Canva you can use these common shortcuts to make your workflow even faster:
- Zoom in: Command/control +
- Zoom out: Command/control –
- Delete: Delete key
- Create a text box: T key
- Select all: Command/control + A
- Move 1 pixel: Arrow keys
- Move 10 pixels: Shift + arrow keys
- Undo: Command/control + Z
- Redo: Command/control shift + Z
- Copy: Command/control + C
- Paste: Command/control + V
Here’s a full breakdown of all the Canva shortcuts:
Related articles:
Part 2: Using Canva Pro features
For those of you considering upgrading to Canva Pro, here are some of the most useful features for beginners.
Pro templates, elements, photos, and more
With Canva Pro you’ll get access to the full range of design templates, elements, photos, videos, audio files, and fonts on Canva.
There is plenty on offer with a free Canva account but having full access gives you almost endless possibilities and inspiration when it comes to creating amazing visuals:
Background remover
Canva Pro also allows you to use the background remover. This is extremely useful if you want to use elements from photos or bitmojis and add them on top of other designs.
If you select a photo in Canva, you simply need to go to ‘Edit photo’ and select the background remover, and it a matter of seconds the background will be gone:

You can now also remove the background from videos which is an incredible feature. It works the same way, if you have a video element selected, you simply need to go to ‘Edit video’ and select the video background remover:

Design resize
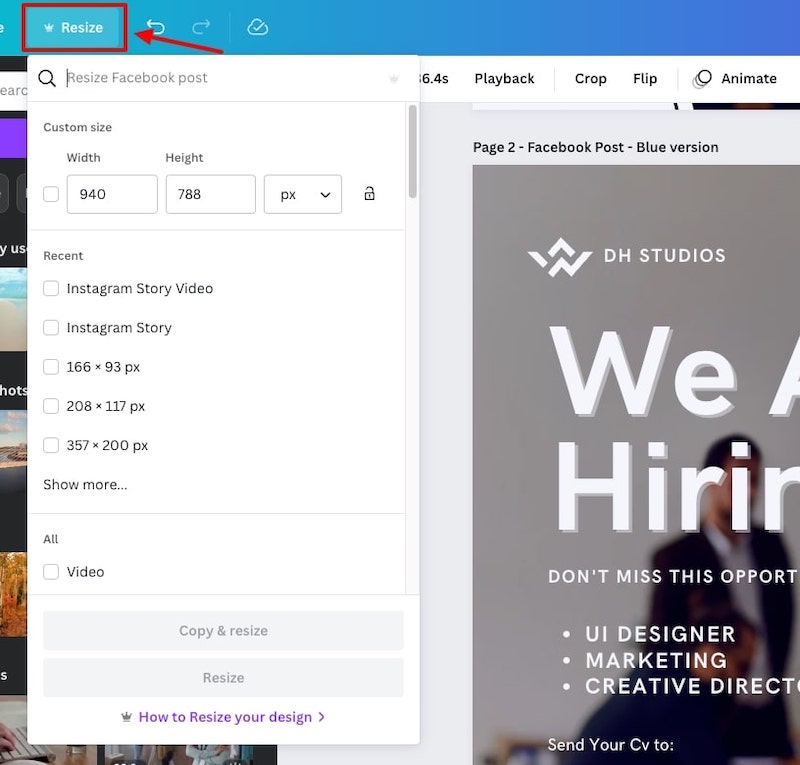
If you plan to create multiple design assets in the same style e.g. Instagram post, Instagram story, Facebook post, etc. you can quickly resize a design you’re working on to be copied in your new chosen format.
All you need to do is select the page you want to resize, click on the ‘Resize’ button and choose the new format you want that design to be produced in. You can even put in custom dimensions if you want:
Additional download options
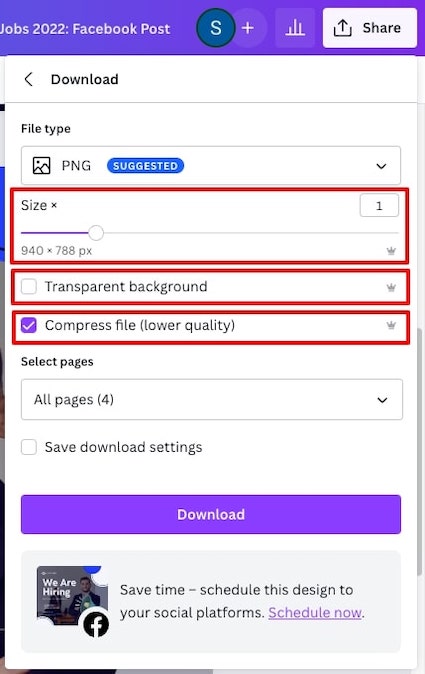
When you’re downloading a design, having a Canva Pro account gives you access to even more download options.
This includes being able to download designs with a transparent background, file compression (for smaller file sizes), SVG files, and also the ability to change the dimensions of a design before you download it:
Upload your own fonts & logos
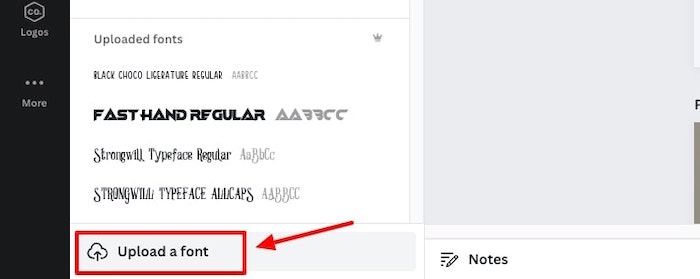
If you have fonts that you want to use that aren’t available on Canva, with a Canva Pro account you can upload your own.
You simply need to go to the font area in the editor, and click upload to add your own fonts to your Canva account:
Version history
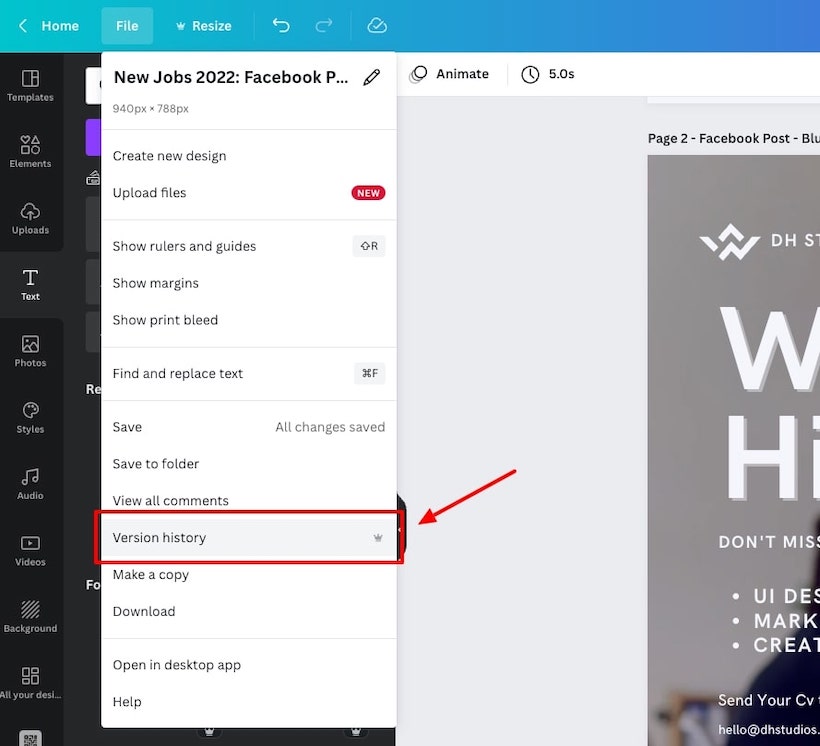
If you do a whole bunch of changes to a design but in the end you’re not too happy with the changes you’ve made, Canva Pro gives you access to the version history of your designs so you can revert back to a version you’re happy with.
To access this from the editor all you need to do is go to ‘File’ and click on ‘Version history’ and you’ll be able to see all the older versions of that design that you can revert back to:
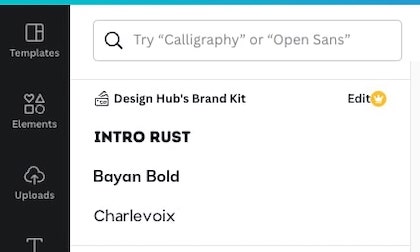
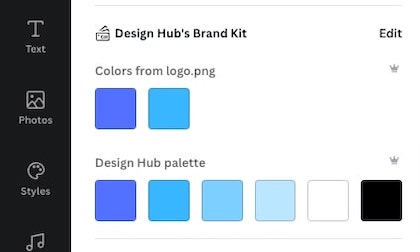
Brand kit
You can create multiple brand kit’s with a Canva Pro account. It’s a useful area to add your brand color palettes, logos, and fonts:
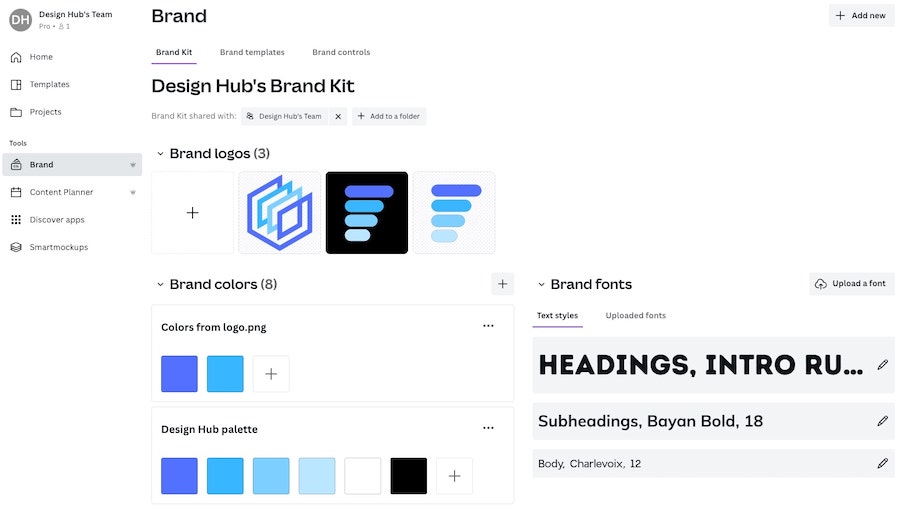
When you’re in the editor area, you can quickly access your brand assets if you’re changing the color of an element or the font of a text element.
It just saves you so much as you don’t have to search for you brand colors or fonts every time you want to use them:
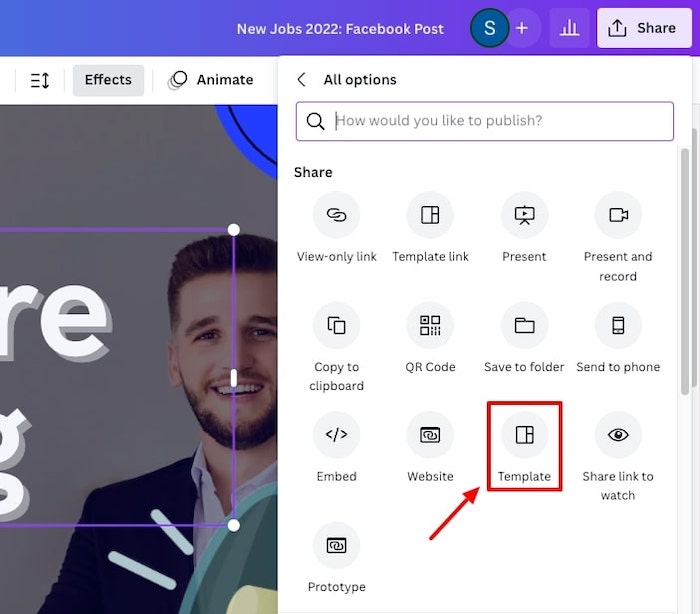
Save your designs as templates
If you’re looking to optimize your workflow on Canva even more, you can create design templates for designs that you will create often.
For example, you might often share quotes on Instagram, so you could create a template for Instagram quote posts, and then use it every time you plan to create a new one.
To turn a design into a template, all you need to do is go to ‘Share’ > ‘More’ > ‘Template’ and save that template in a relevant folder:
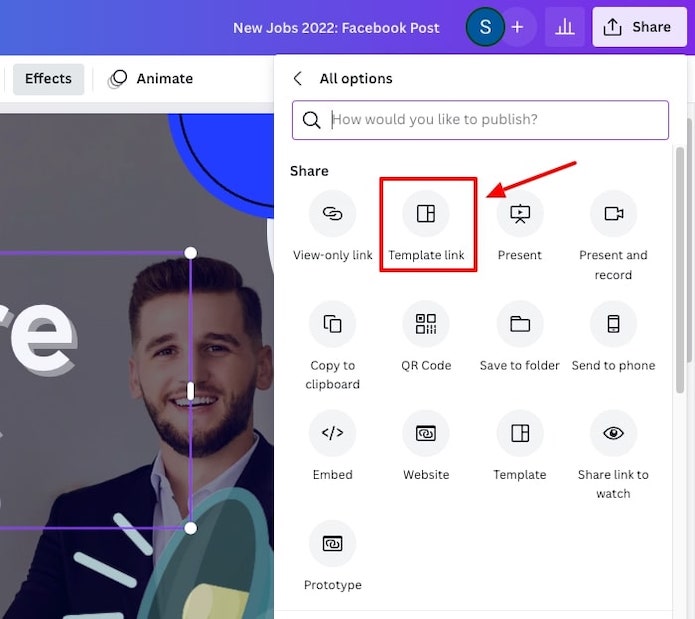
You can also create templates to share or sell.
Anyone who gets the link to your template will be able to access and edit it themselves within their own Canva account.
To create a link to your template, simply go to ‘Share’ > ‘More’ > ‘Template link’ and this will create a custom link that you can share with anyone who you want to give access to the template.
Content planner
If you plan to create a lot of social media content on Canva, the Content Planner pro feature is going to be a game changer for you.
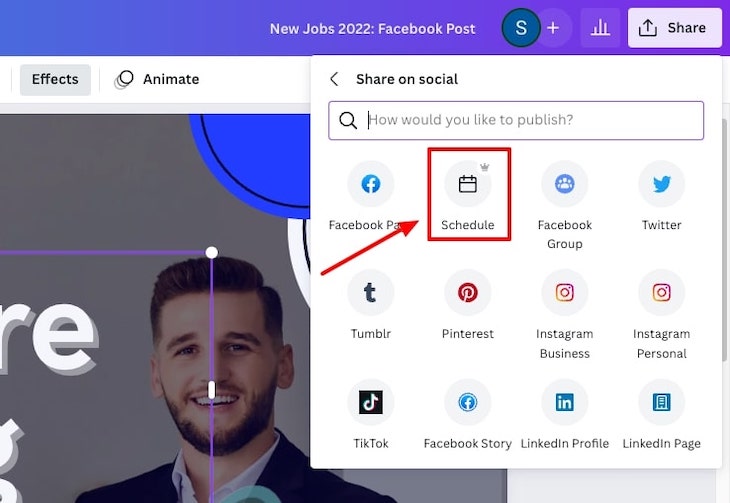
Rather than using external social scheduling tools such as Buffer, you can do it all within your Canva account. Simply create a design in Canva, go to ‘Share’ > ‘Share on social’ > ‘Schedule’ and then follow the steps to schedule that design to go out to your social platforms:
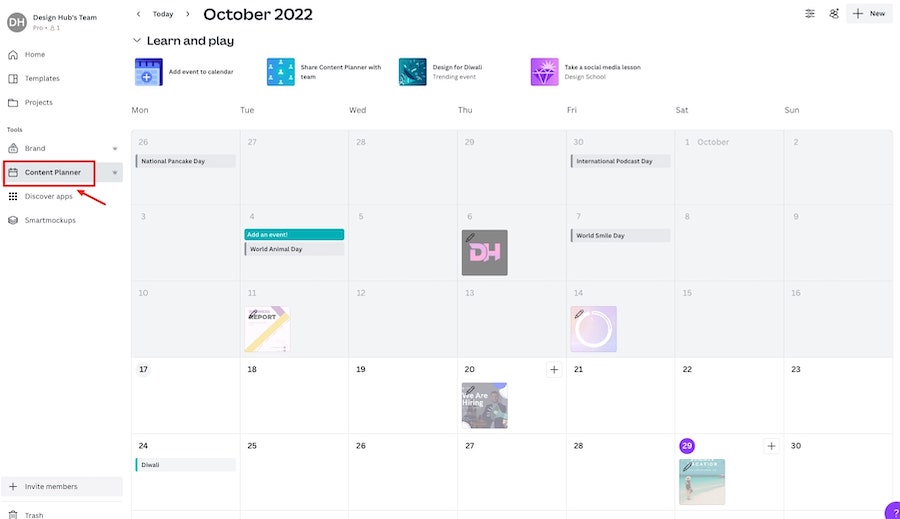
You can then navigate to your content planner via the Canva homepage to see what post you have scheduled. It’s such a huge timesaver for users who are active on social media:
Extra storage
With a free Canva account you get 5GB of storage, which is not bad at all. However, if you upgrade to Canva Pro you get up to 1TB of storage.
So, if you plan to create lots and lots of designs or upload many of your own files, videos, and images, it’s well worth upgrading so you can store all of it in the Canva cloud.
For the full range of Canva Pro features, check out the Canva pricing page.
Related articles
Part 3: What to use Canva for
Here’s just a taste of what you can use Canva for:
| Social media content | YouTube graphics |
|---|---|
| Facebook content | Banners |
| Instagram content | Thumbnails |
| Pinterest content | End screens |
| Twitter content | Lower thirds |
| TikTok content | Watermarks |
| Branding | Streaming graphics |
|---|---|
| Logos | Overlays |
| Website banners | Banners |
| Downloadable assets | Panels |
| Sidebar banners | Emotes |
| Blog graphics | Badges |
| Marketing/Advertising | Print materials |
|---|---|
| Banner ads | Workbooks |
| Presentations | Menus |
| Reports | Planners |
| Catalogues | Calendars |
| Infographics | Stickers |
| Digital assets | Freelancer / Consultant docs |
|---|---|
| eBooks | Service listing sheets |
| Swipe files | Testimonial booklets |
| Magazines | Welcome kits |
| Mockups | Brand identity kits |
| PDFs | Price listing sheets |
Selling your designs
You can also sell your Canva designs on websites like Etsy and Creative Market. It’s a good option for those of you looking to create a side income.
Here are a couple of helpful videos from people who are doing just that:
Related articles
- Canva logo maker review
- How to make a logo with Canva
- Creating Twitch graphics with Canva
- How to make Twitch emotes with Canva
- Creating YouTube graphics with Canva
- How to make a 3D pop out effect in Canva
- How to create a mirror effect in Canva
- Canva text effects and elements
- Canva letter frames: 30+ custom text masks
- How to use frames in Canva
Part 4: How to use the Canva app
Canva’s mobile app offers many of the same tools, templates, and functionality as the browser version. So, if you’re someone who likes to use your mobile for most things it could be a good option for you.
Here’s a video that gives you a good introduction to the Canva mobile app:
Wrapping things up
So, there you have it, that’s how to use Canva for beginners.
No matter what your experience is with design software you should have no problems learning how to use Canva, it’s such a user friendly tool.
Enjoy creating! Oh, and if you have any questions, comments, or have suggestions for other great tips for new Canva users, leave a comment below!
