
If you’re unsure how to create text masks in Canva then this is the article for you.
We’ll take you through how to do it using letter frames in the 3 simple steps.
Let’s get started.
How to create a text mask in Canva:
Optional steps:
Step 1: Find your letter frames
To start things off you need to find the letter frames for your text masks.
There are quite a few letter frames already available on Canva, we’ve put together a template that contains all the letter frames we could find on Canva, you can access that via this link.
We also created 30+ custom letter frames that you can find in this article: Custom Canva letter frames.
Alternatively, you can simply go to the ‘Elements’ tab in the Canva editor and search for ‘letter frame’:
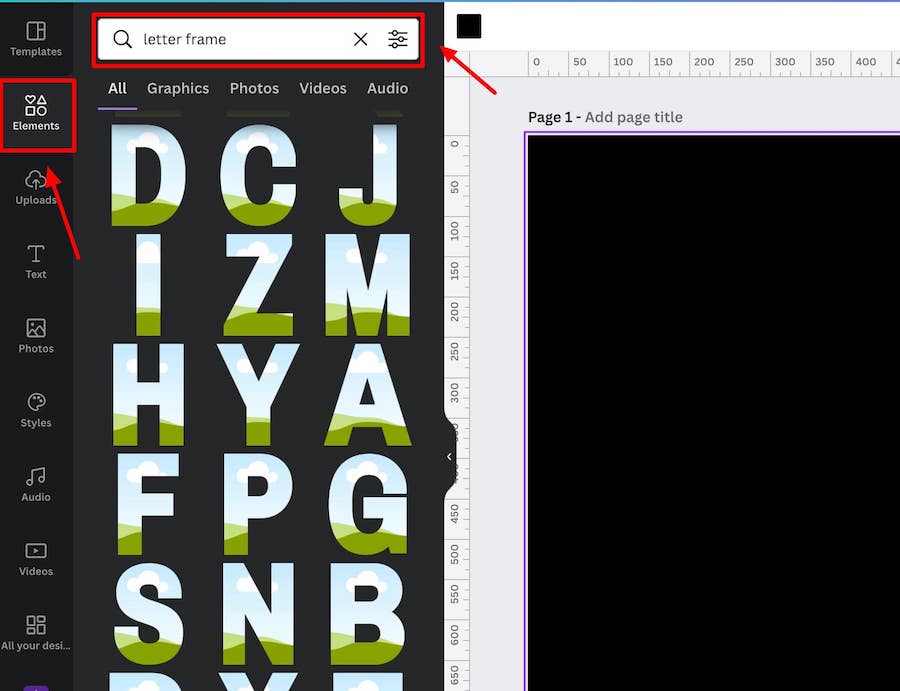
You’ll likely have to scroll down a bit to find the letter frames you want in the same style or you can narrow your search to find the exact letters you need e.g. “letter D frame”.
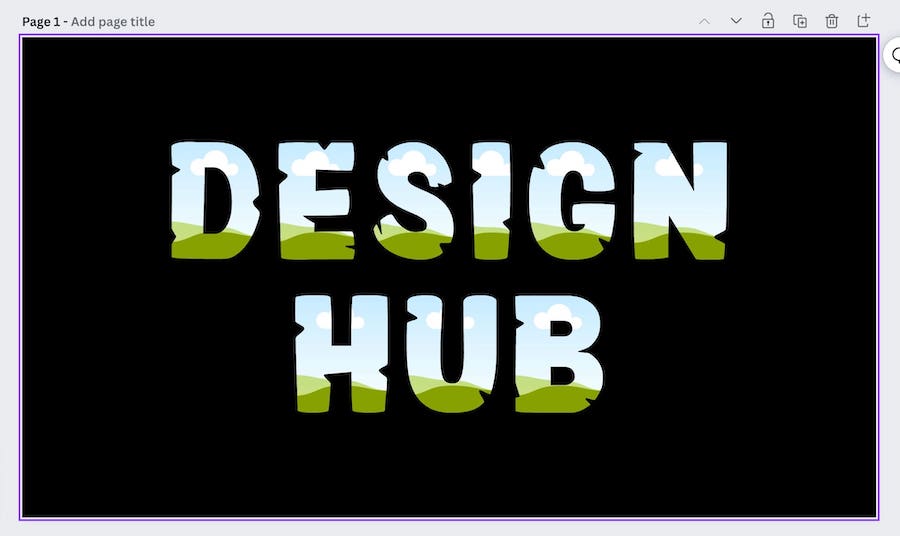
Step 2: Select the letters to make up your word(s)
Now you simply need to add the letter frames you want to make up your text masks, and position them on the canvas:
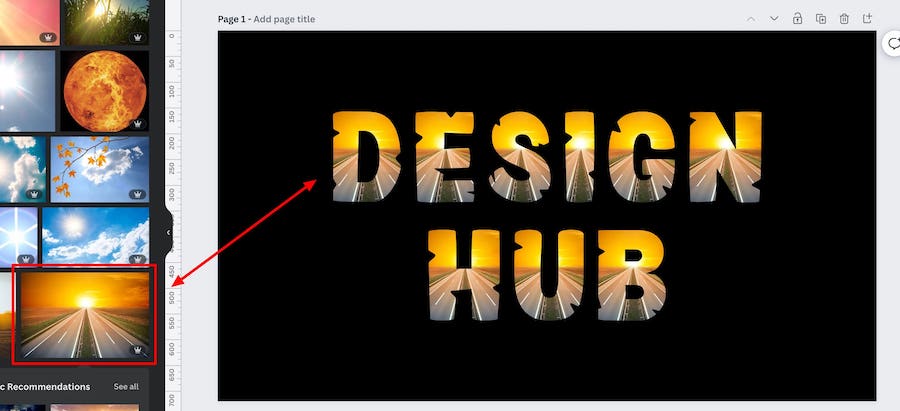
Step 3: Drag photos into the frames
The last step is to drag photos into your letter frames (you can also add gradients, patterns, and even videos!).
You can upload your own photos or go to the ‘Photos’ tab and search for suitable images, and then simply drag them one by one into the letter frames on your canvas.
Just make sure to drag them directly over your letter frames so they snap in place when released:
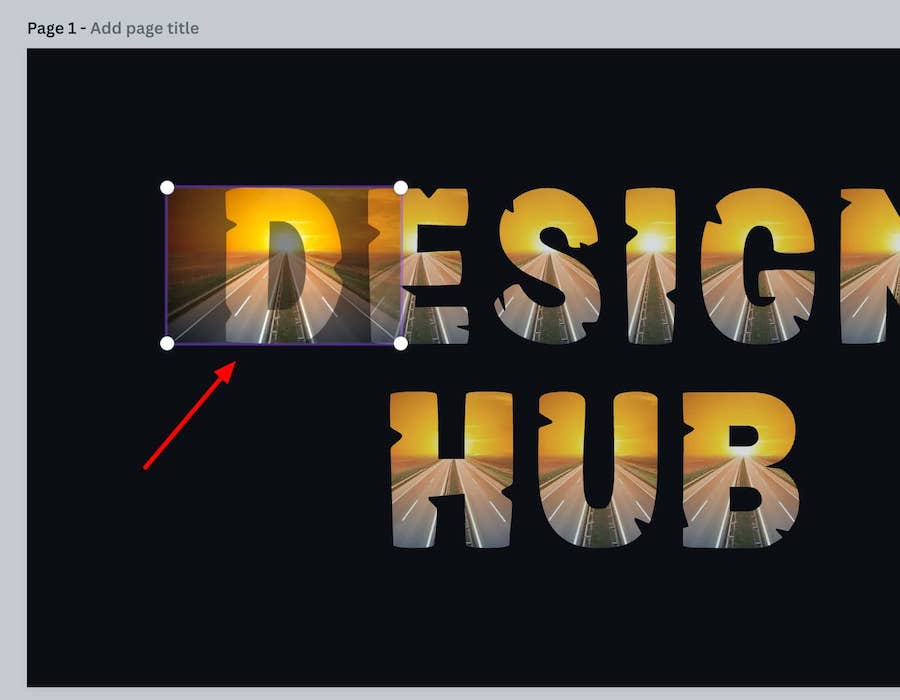
To ensure you get the exact look you’re after you can also double click on a photo in a letter frame to reposition or resize it within the frame:
Optional steps
If you want to spruce up your text masks even more, or create some cool looking effects then here are some ideas for additional steps:
Create a continuous image

Click on a link below to jump to a specific text effect:
- Select a photo you like (wide horizontal images work best)
- Drag it and add it to the first letter frame in your word
- Double click on it so you can resize the image within the frame
- Resize the image so it covers the width of your word and align it so the left side of the image lines up with the first letter frame

- Repeat the steps with every letter frame in your word and you’ll create the ‘continuous image’ effect
- And that’s it
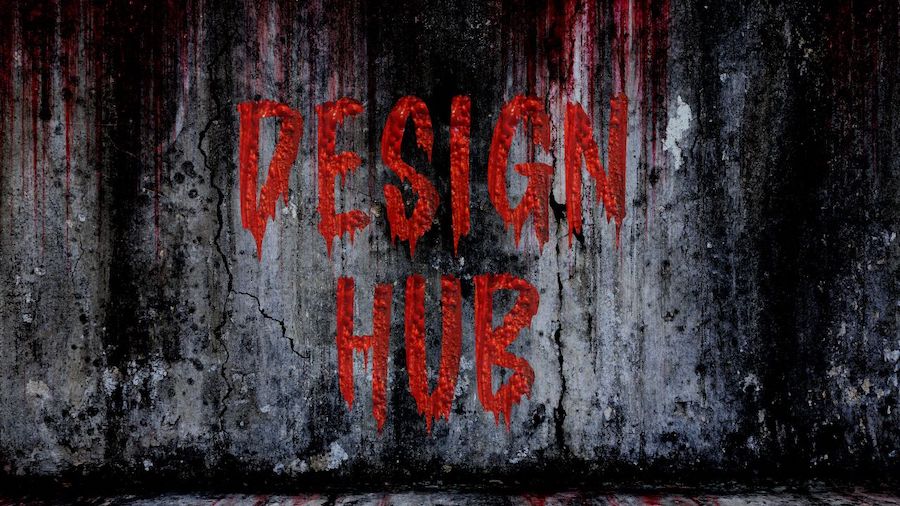
Create a drop shadow effect
Here’s how:
- Group your letter frames and then center them on the canvas
- Copy the group of frames and paste
- Group the copied frames and then center them so they are covering the original frames perfectly
- Change the color of the copied frames to what you want
- With the arrow keys move the copied frames down 5 to 10 pixels, and 5 to 10 pixels to the right or left
- Move the group of copied frames down one layer so they’re behind the original frames
- And you’ve made a drop shadow effect
- You can also make the copied layer slightly transparent if you think that makes it look better
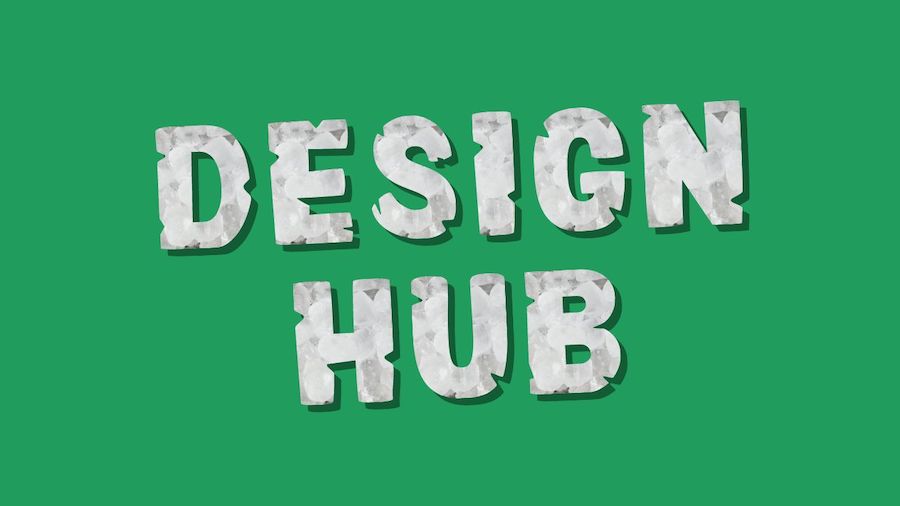
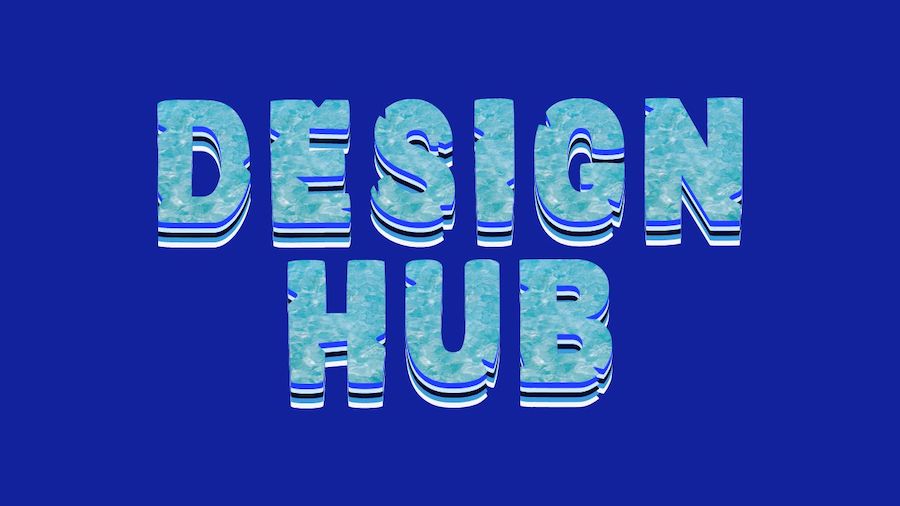
3D effect
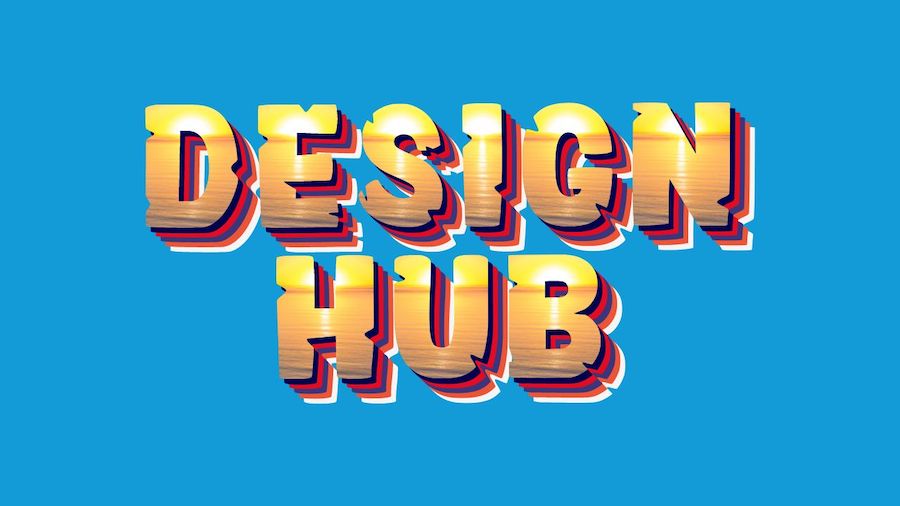
Here’s how:
- Group your letter frames and then center them on the canvas
- Copy the group of frames and paste
- Group the copied frames and then center them so they are covering the original frames perfectly
- Change the color of the copied frames to what you want
- With the arrow keys move the copied frames down 5 pixels, and 5 pixels to the right or left
- Move the group of copied frames down one layer so they’re behind the original frames
- Repeat with however many layers you want but add a further 5 pixels to every additional layer that you add i.e layer 2 is 5 pixels down + right, layer 3 is 10 pixels down and right, layer 4 is 15 pixels down and right, and so on
- And that’s your 3D effect created
We also followed similar steps to create this version (we just moved the copied frames down in this version not to the right or left):
Outline effect

Here’s how:
- Group your letter frames and then center them on the canvas
- Copy the group of frames and paste
- Group the copied frames and then center them so they are covering the original frames perfectly
- Change the color of the copied frames to what you want your outline to be
- With the arrow keys move the copied frames 5 to 10 pixels down, and 5 to 10 pixels to the right
- Move the group of copied frames down one layer so they’re behind the original frames
- Repeat this process another three times but do the following:
- 5 to 10 pixels down and 5 to 10 pixels to the left
- 5 to 10 pixels up and 5 to 10 pixels to the right
- 5 to 10 pixels up and 5 to 10 pixels the left
- And you’ve created an outline effect
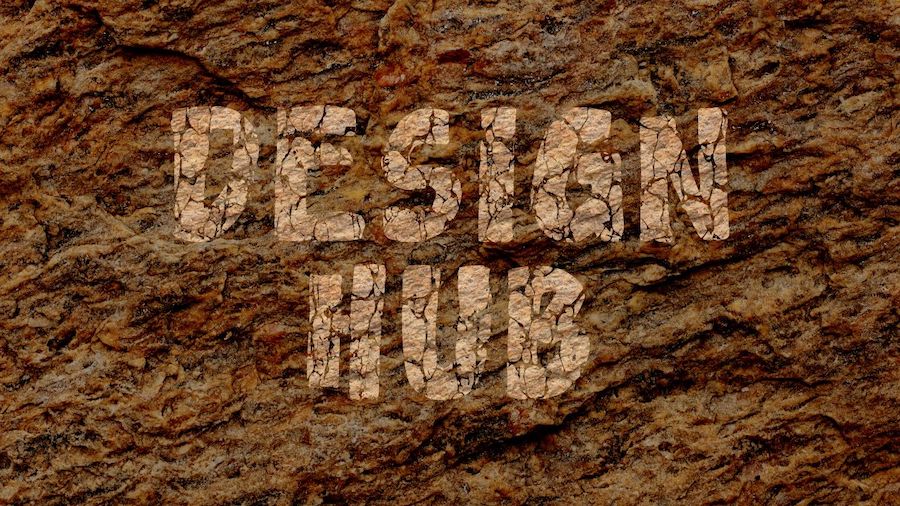
Mockup/Textured effect
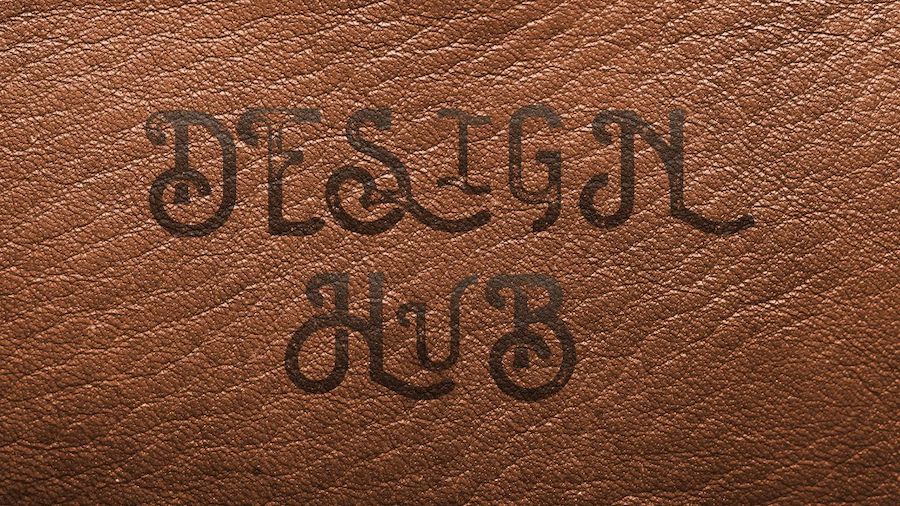
Here’s how:
- Add a photo of a texture or surface as the background of your design (e.g. rocky surface, leather, etc.)
- Change the brightness of the background image to darker or lighter depending on how it looks (Select the image and go to ‘Edit image’ > Brightness filters)
- Add photos to the letter frames that work well with the background photo you’ve selected
- Make your letter frames slightly transparent
- And you’ve created a mockup/textured effect
Here are a couple more examples of mockup/textured effects that we made:
Related articles
- How to use Canva: Beginners tutorial
- Canva tips and tricks
- Canva text effects and elements
- Canva tutorials
- How to use frames in Canva
- How to make a gradient in Canva
- Gradient letters Canva
- Bubble letters in Canva
Wrapping things up
If you want to quickly access all the letter frames on Canva organized into sets then go to this template we created. You can also use some of the 30+ custom Canva text masks we made!
We hope this article helps and inspires you.
Enjoy creating! If you have any questions or suggestions leave a comment below.


