
Want to create eye-catching designs with glitter letters in Canva but not sure how? This is article will show you how it’s done.
We take you through the exact steps you can take to make glitter letters in Canva, as well how to make overlays, find glitter letter elements, and more.
Let’s get into it.
Jump to a specific section:
Creating glitter letters with letter frames (text masks)
Here are the simple steps you can take in Canva to quickly create glitter letters.
Note: If you want more free letter frame options than what you can find by searching on Canva, check out this article – 30+ Custom Canva letter frames.
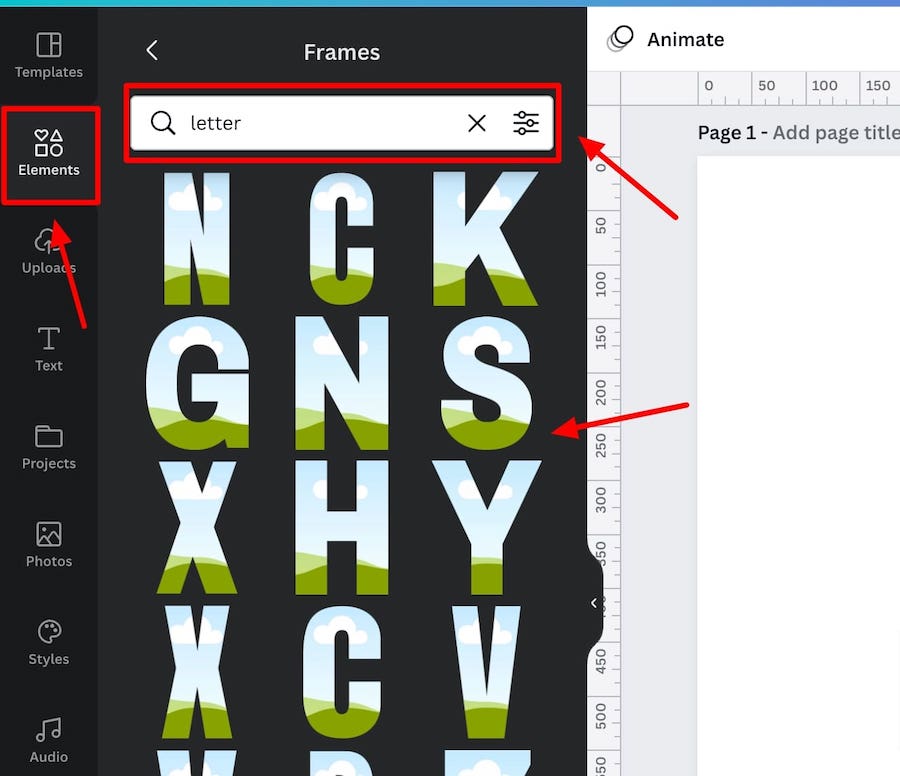
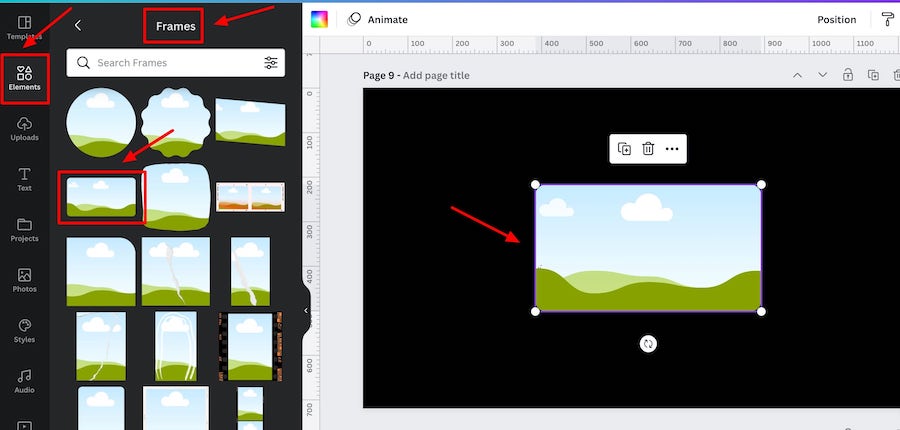
Step 1: Add letter frames to the canvas
Once you’re in the Canva editor, go to the ‘Elements’ tab on the left side panel, scroll down until you find ‘Frames’ and click ‘See all’, and search for ‘letter’ in the frames section:
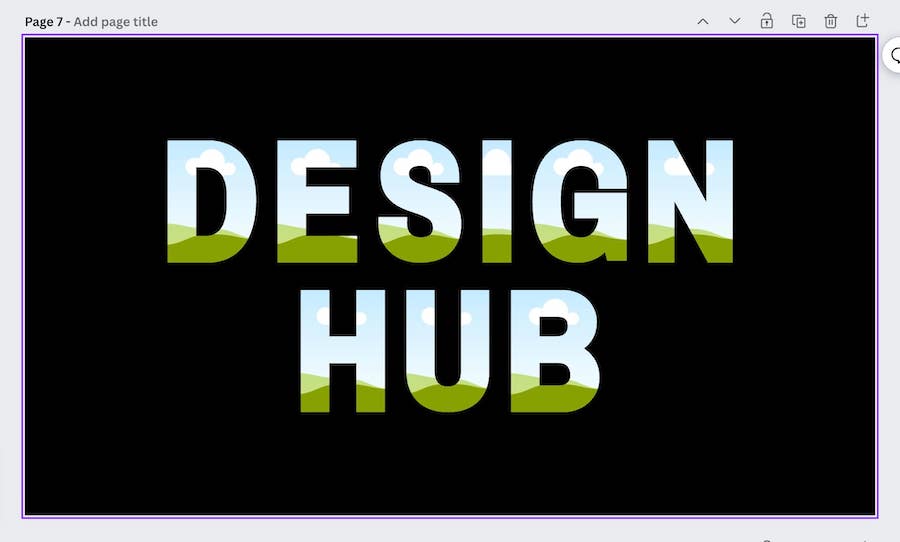
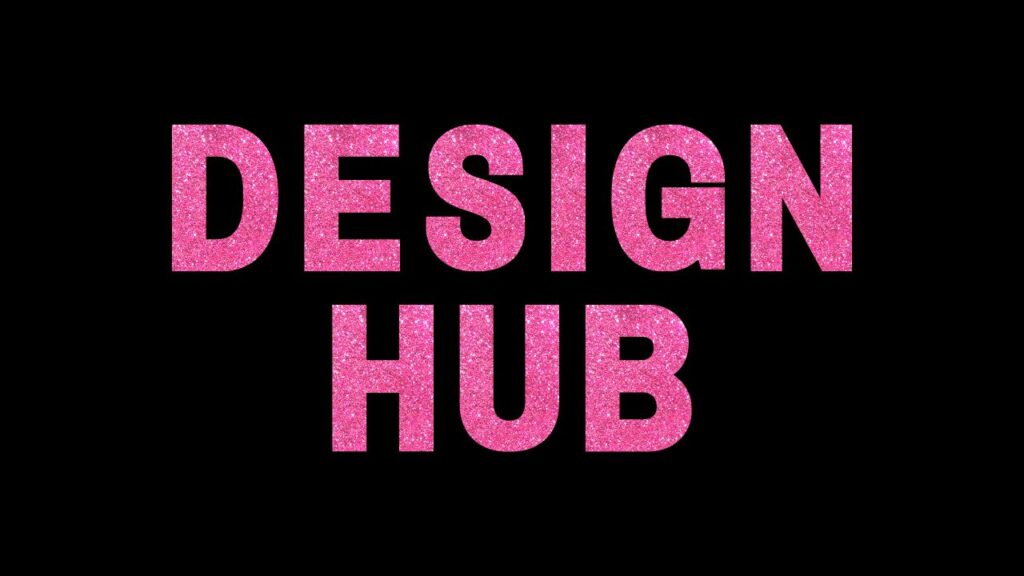
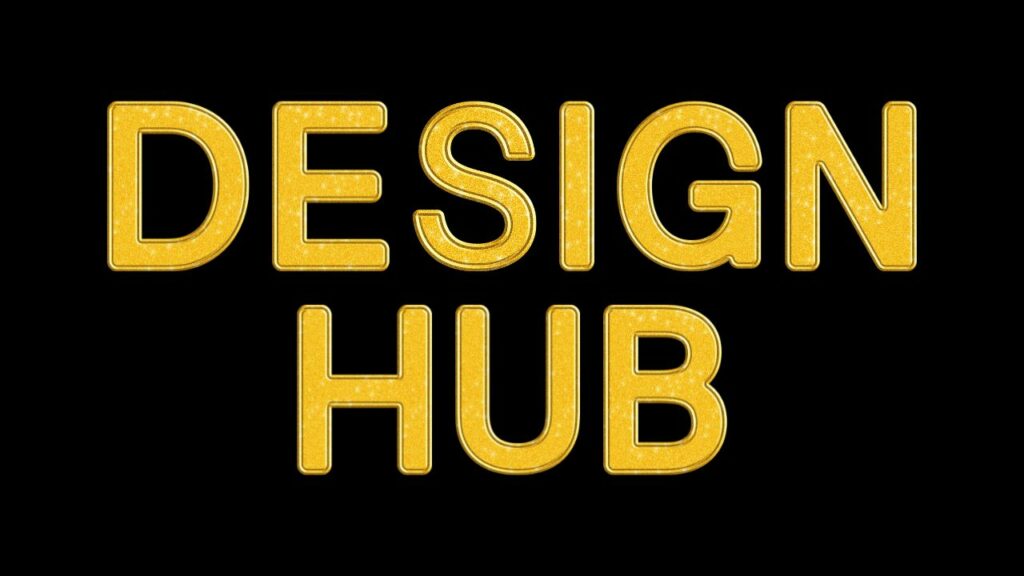
Choose the letter frames you need to make up the word you want for your design, for example we added letters to make up our brand name ‘Design Hub’, and then arrange the letters on the canvas:
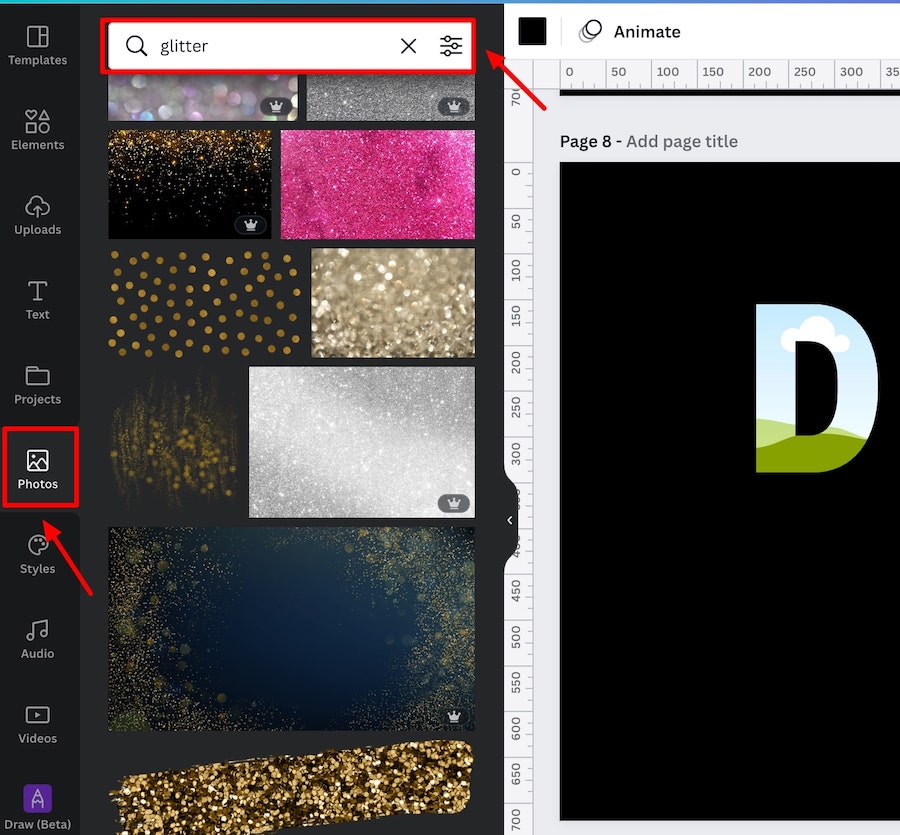
Step 2: Find a glitter image
The next step is to find a glitter image to add as the text mask on your chosen letter frames. Navigate the ‘Photos’ tab on the left side panel and search for ‘glitter’.
You can also add extra words in your search phrase to get more options e.g.:
- glittery
- glitter texture
- glitter silver
- glitter gold
- glitter background
- glittering
- blue glitter
- red glitter
- glitter dust
- shiny glitter
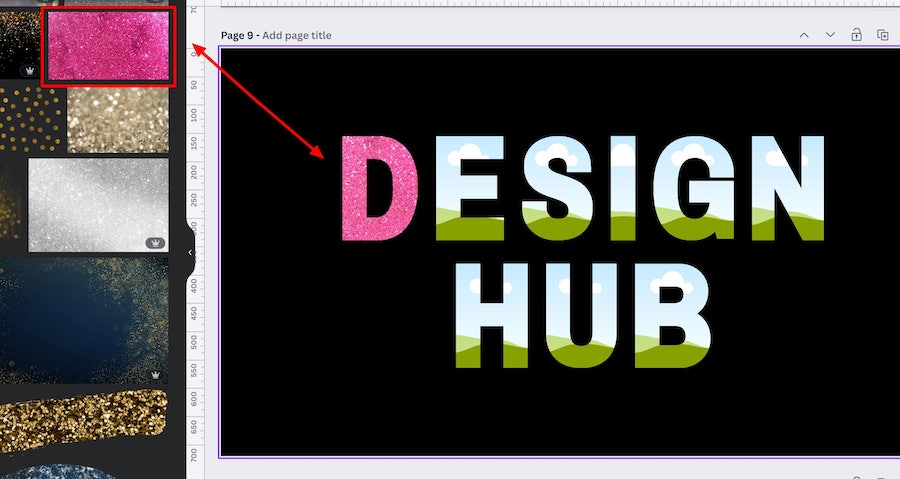
Step 3: Add the photos to your letter frames
Once you’ve found your photo(s) you simply need to drag them from the left side panel over the letter to add them to the frames as text masks:
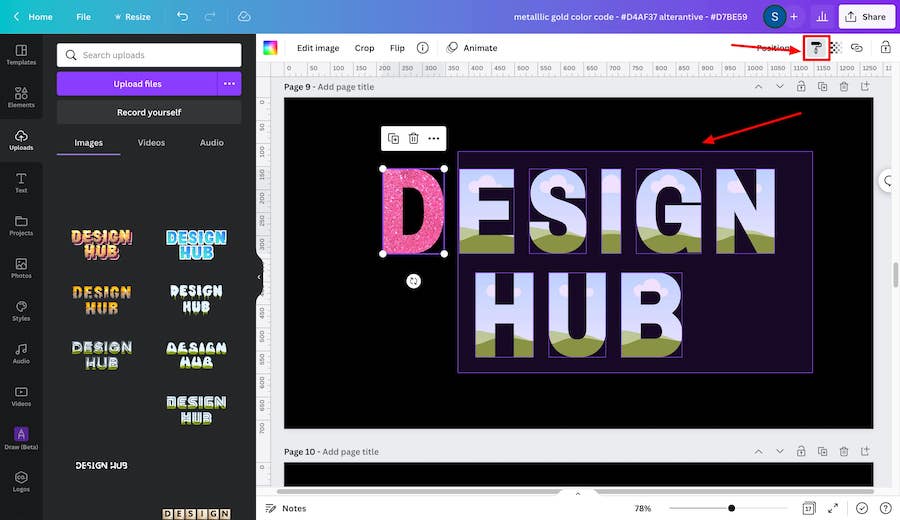
If you have a lot of letters and want to speed up the process you can add a photo to one of the letter frames, and then copy the ‘style’ and apply it to all the other letter frames on the canvas by selecting the letter frame that contains the photo, and clicking on the ‘Copy style’ button at the top right of the editor:
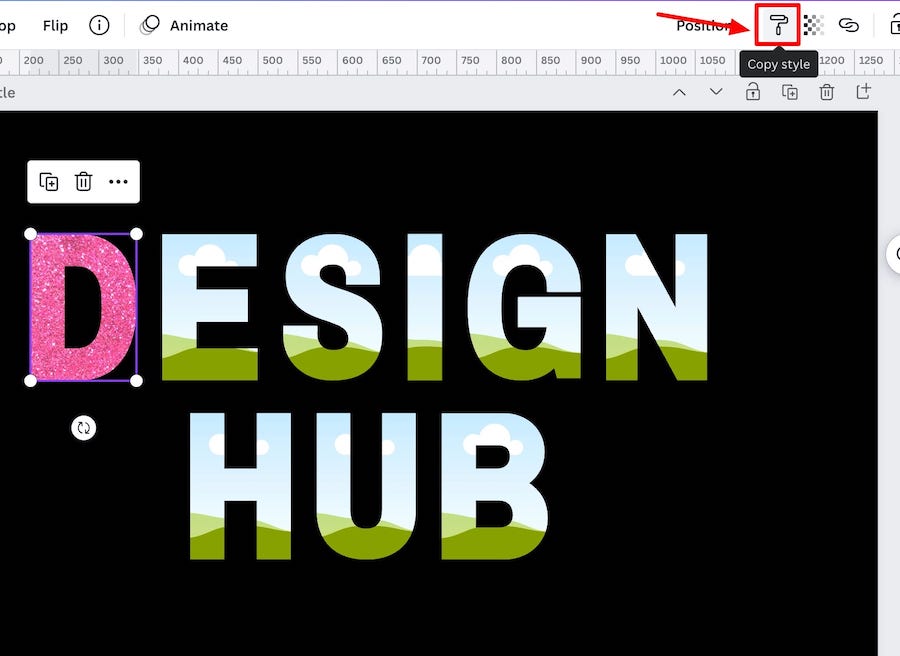
Then click and drag your cursor to select all the other letter frames, and the style will be applied to all of them:
Step 4: Adjust the photos in the frames
Now all that’s left to do is to adjust the photos within the letter frames. To do this, simply double click on an image in one of the frames and adjust it to your liking:

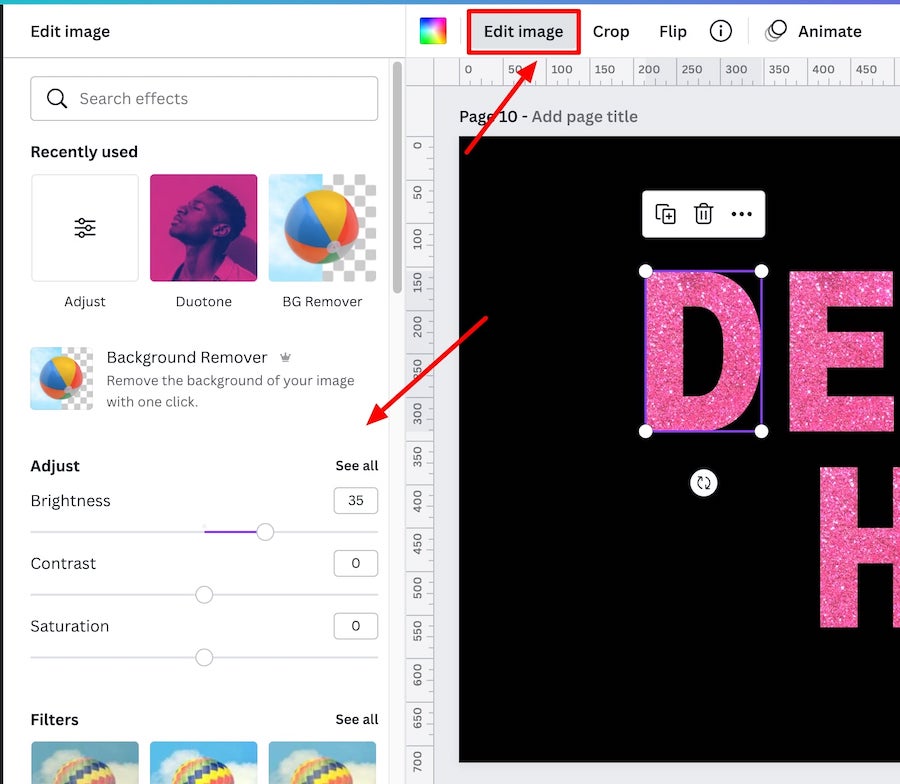
You can also click on an image in one of the letter frames and click on ‘Edit image’ via the panel above the editor and this will give you even more customization options such as being able to change the brightness, add filters, and much more:
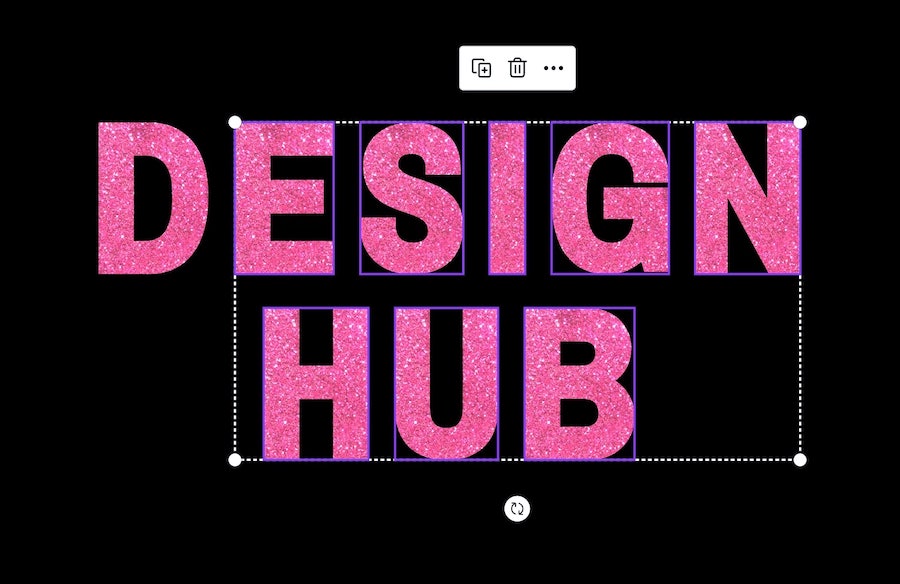
And that’s it. You’ve created glitter letters using letter frames in Canva:
Creating glitter letters with shapes and frames
In this method we can utilize frames in Canva again but in a slightly different way. Essentially, we use them as overlays over shape elements and text elements. Here’s how:
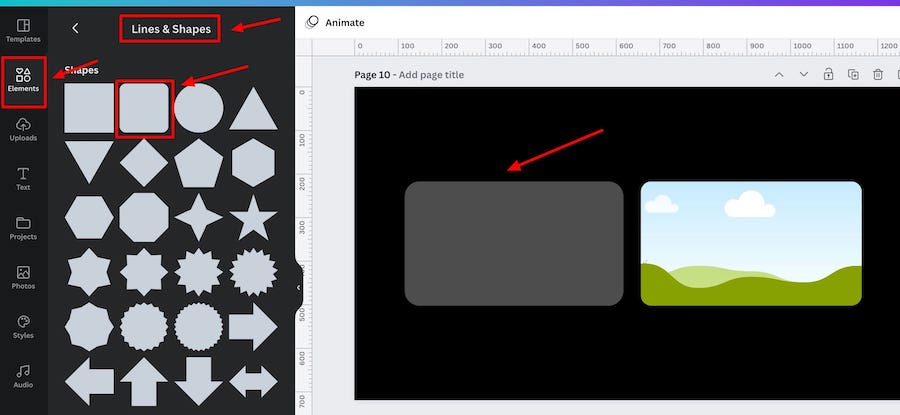
Step 1: Find a frame that you like and a shape element to match
Navigate back to the frames area via the left side panel and find a frame shape that you like (one that you will be able to match up with a shape element exactly. We chose this one:
Then add a shape element that you can make into the exact same dimensions as your frame (you can find the shapes elements in the ‘Elements’ tab too):
Step 2: Add text over the shape element
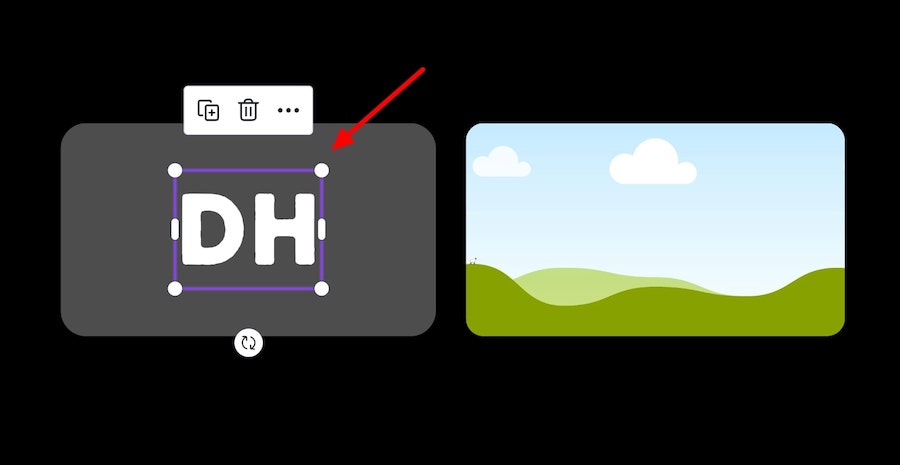
Press T to add a text box to the canvas or go to the ‘text’ tab via the left side panel and click ‘Add a heading’. This will add a text box to your canvas.
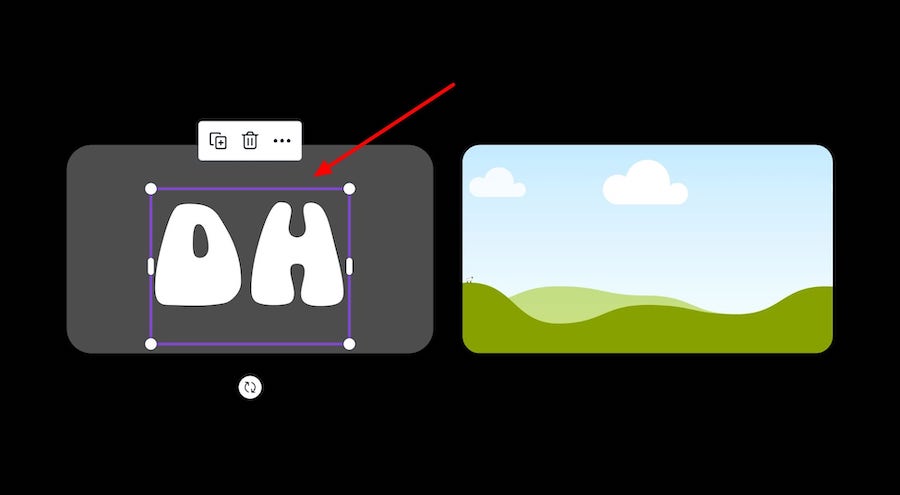
Change the text to what you want e.g. we change it to ‘DH’, and then drag it over the shape element so it’s sitting exactly in the middle of it:
Then change the text to the size that you want it to be, and choose the font and color:
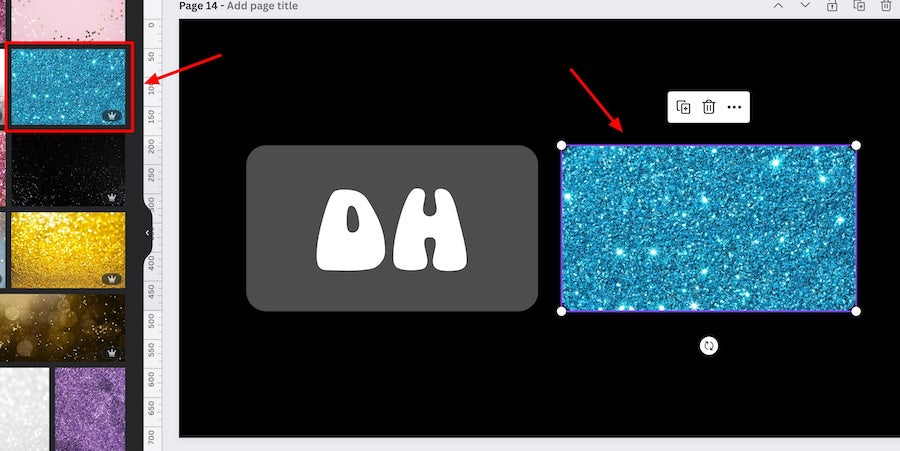
Step 3: Add a photo to the frame
Now it’s time to add a photo to the frame. So, search for a glitter photo in the photos tab and add one that you like to the frame element:
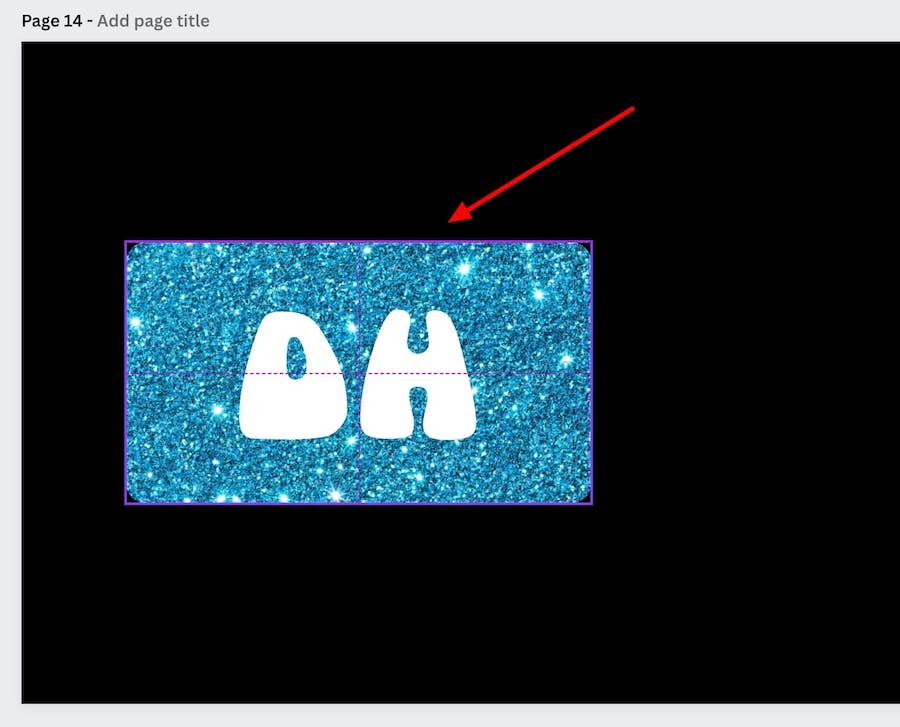
Step 4: Move the frame on top of the text & shape
The next step is to move the frame element so it’s sitting over the text and shape element perfectly:
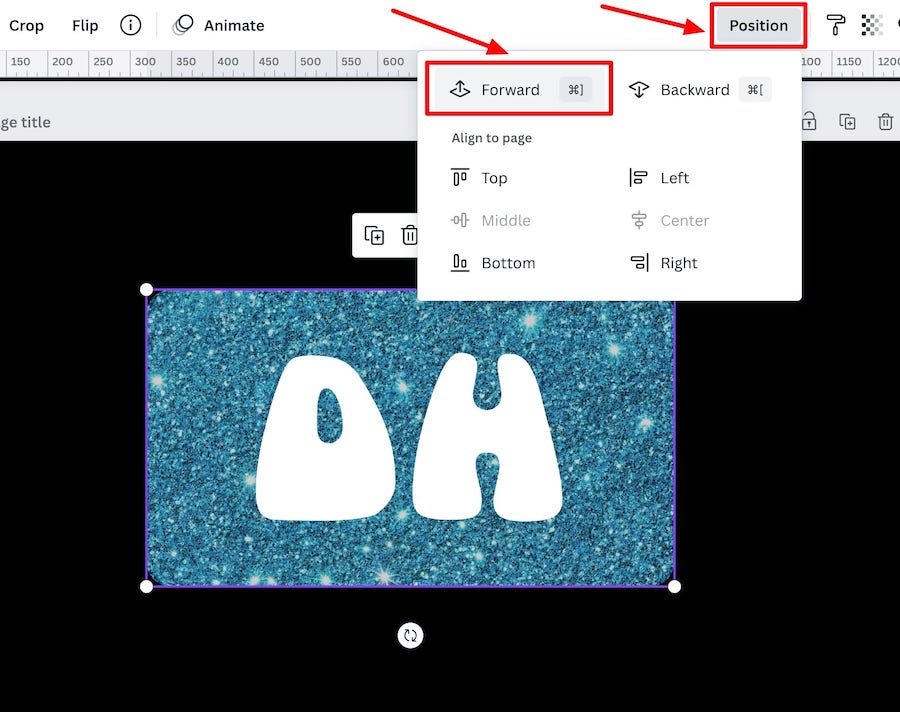
You may have to adjust the layering to ensure the frame is sitting at the top by using the ‘Position’ options i.e ‘Forward’:
Step 5: Make the frame transparent
The last step is to make the frame element slightly transparent so we can see the text element below it. To do that simply select the frame, click on the transparency button and change it to what works best:
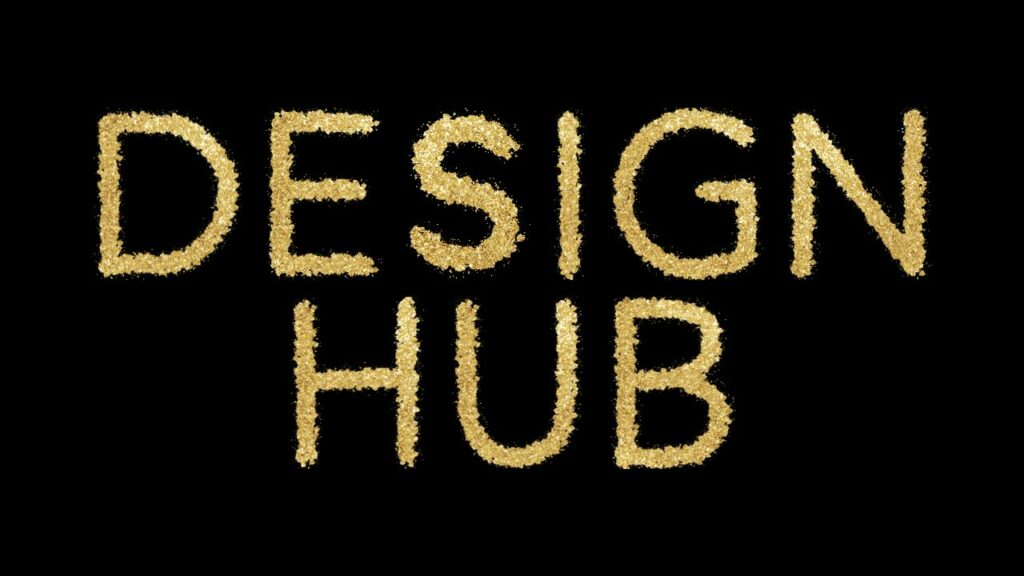
And that’s it. You’ve made another design with glitter letters in Canva:

Related articles
- Canva Font Combinations: Ultimate Guide & Resource
- How to create a text mask in Canva
- How to use frames in Canva
- How to create a 3D effect in Canva
- How to make a gradient in Canva
Create glitter letters using letter elements
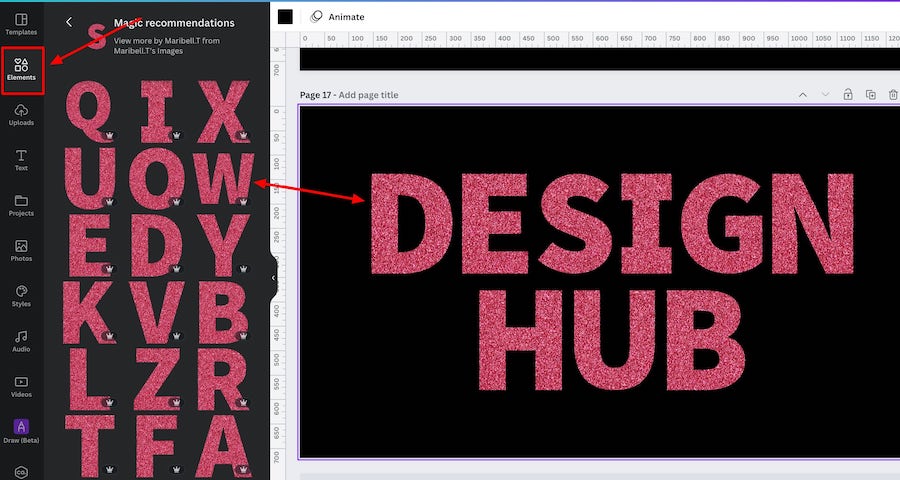
If you don’t want to use text elements or frames, you can search for glitter letter elements in Canva. There are quite a few to choose from.
We’ve put together a template with some of the glitter letter sets we found on Canva. You can access it via this link.
Step 1: Search for letter elements
Open a new or existing design, navigate to the ‘Elements’ tab on the left side panel and put in some search phrases to find your glitter letter elements.
Here are some good search terms:
- glitter letter
- glitter font
- glitter alphabet
- shiny glitter litter
- glitter gold letter
Step 2: Add the letters you need to the canvas
Find a set of letter elements that you like, and add them to your canvas to make up your word:
Glitter letter element sets
Here are just some of the glitter letter element sets that we found. You can access all the sets we found in this Canva template.
Note: All of the letter glitter elements below and in the template are available to Canva Pro users only so you’ll need a Canva Pro account if you want to use them. You can do a 30-day free trial though!
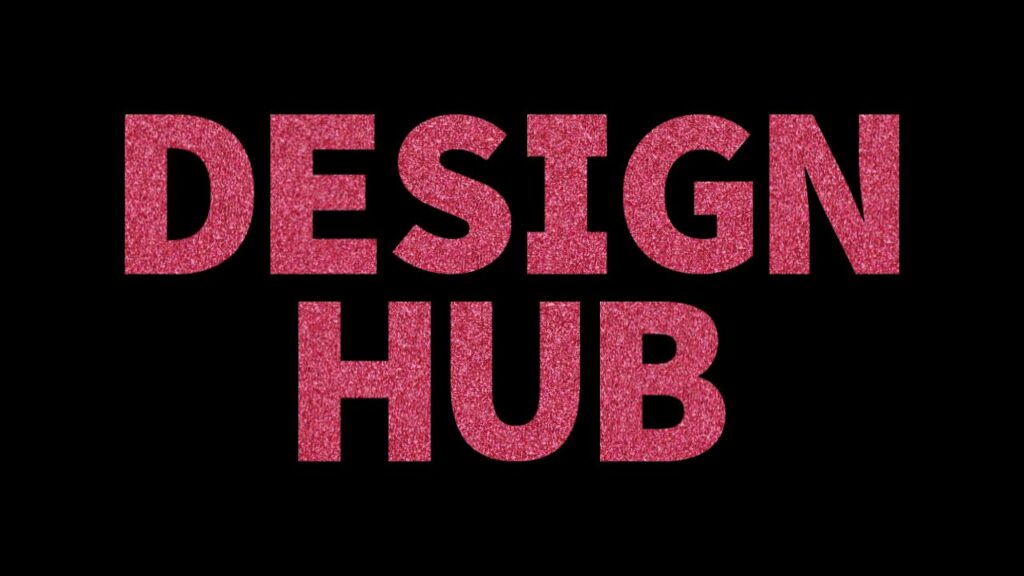
Glitter letter element set
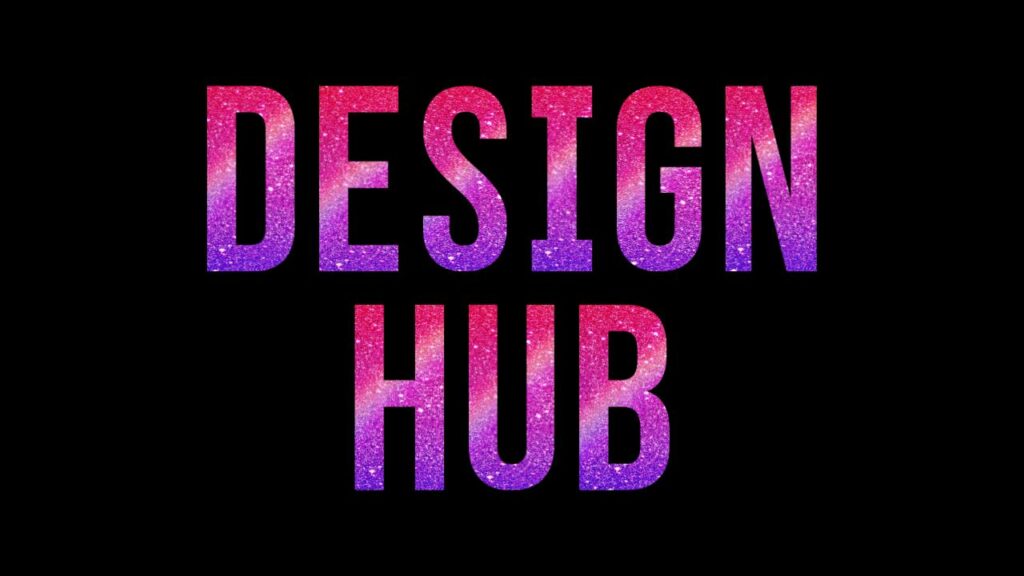
Use these glitter letter elements today. Note: only available to Canva Pro users.
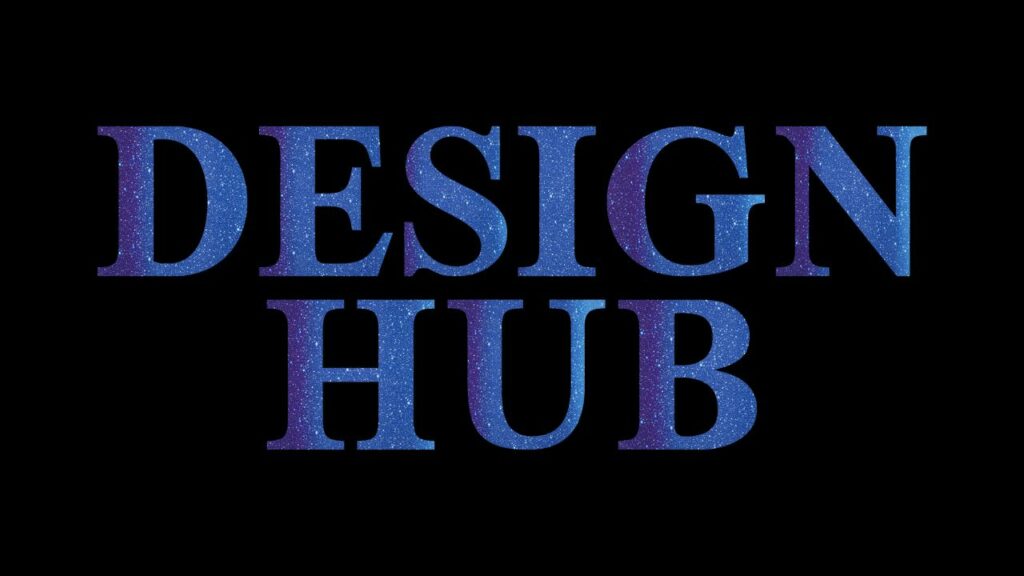
Glitter letter element set
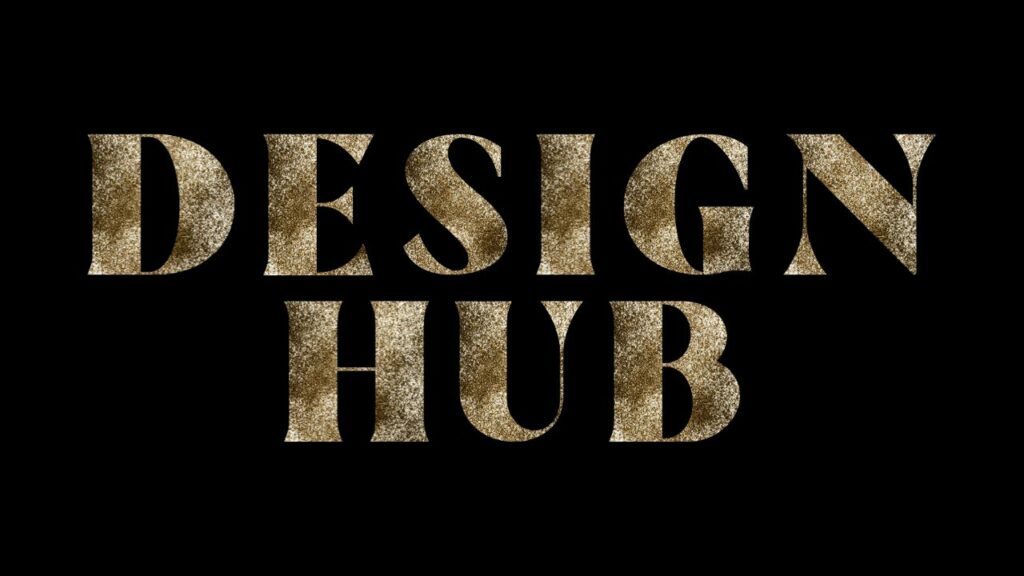
Use these glitter letter elements today. Note: only available to Canva Pro users.
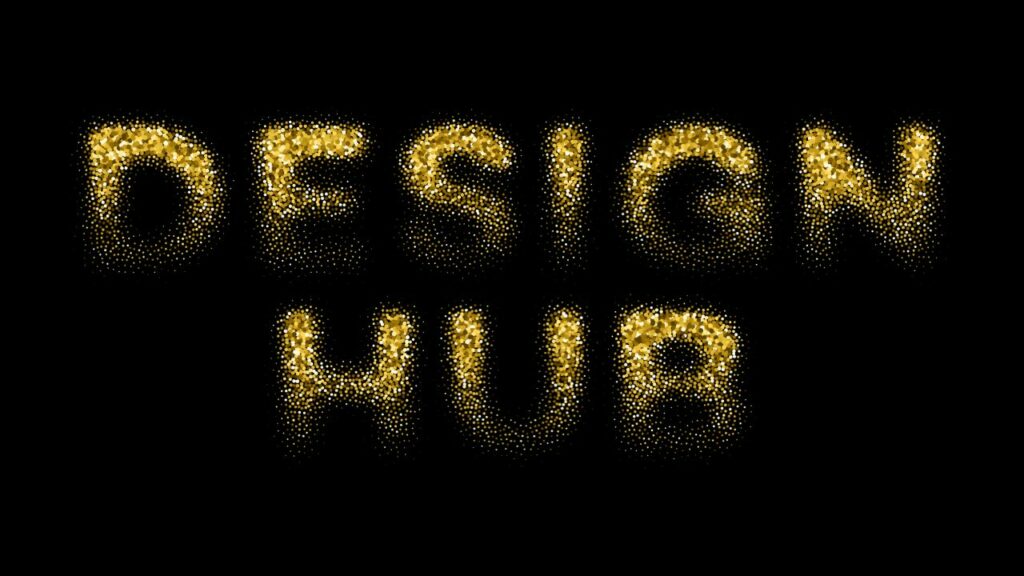
Glitter letter element set
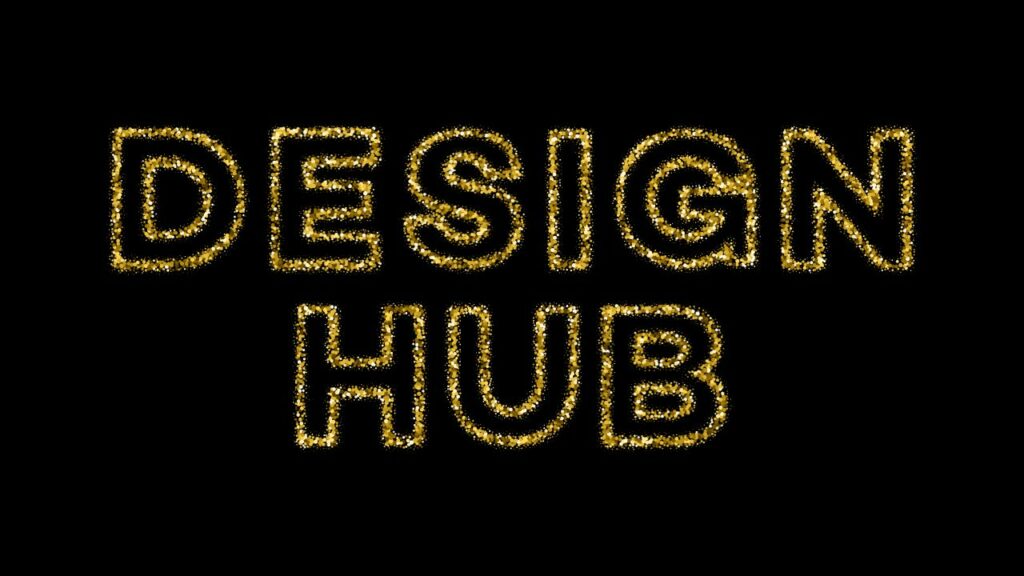
Use these glitter letter elements today. Note: only available to Canva Pro users.
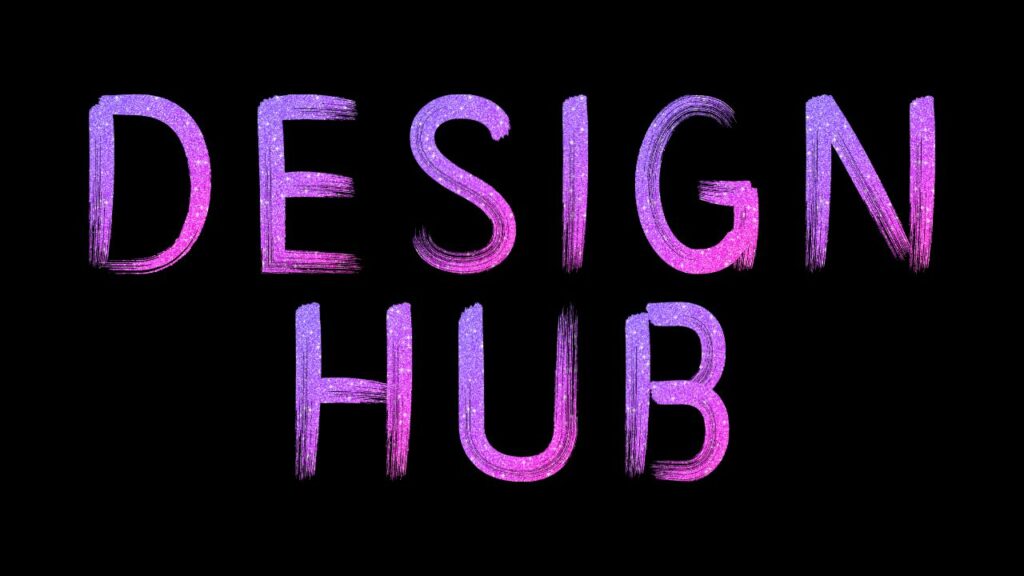
Glitter letter element set
Use these glitter letter elements today. Note: only available to Canva Pro users.
Glitter letter element set
Use these glitter letter elements today. Note: only available to Canva Pro users.
Glitter letter element set
Use these glitter letter elements today. Note: only available to Canva Pro users.
Glitter letter element set
Use these glitter letter elements today. Note: only available to Canva Pro users.
Glitter letter element set
Use these glitter letter elements today. Note: only available to Canva Pro users.
Glitter letter element set
Use these glitter letter elements today. Note: only available to Canva Pro users.
Glitter letter element set
Use these glitter letter elements today. Note: only available to Canva Pro users.
Related articles and pages
- Canva text effect and elements
- Bubble letters in Canva
- Gradient letters in Canva
- Canva tutorials
- How to use Canva
- Canva tips and tricks
- How to make gold letters in Canva
- How to make metallic letters in Canva
Wrapping things up
There you have it, that’s how you can create glitter letters in Canva.
We hope this article helps and inspires you.
Enjoy creating! If you have any questions or suggestions leave a comment below.
