Are you looking to create some incredible looking overlays for your stream but don’t have the design skills needed to create your own from scratch?
Well, we’re here to help.
In this article, we’re going to show you how you can easily create Twitch overlays for your stream with no experience with design tools, like Photoshop, needed.
Jump to a specific section:
- Overview
- Creating a Twitch overlay with Placeit
- Creating Twitch overlays with Canva
- Alternative tools (Free & Premium)
- Other good resources
- Using Photoshop
#1 Overview
These days there are quite a few online design tools that help you to create incredible looking designs without needing any design skills or background.
Two such tools are Placeit and Canva, and we’re going to show you how to create Twitch overlays for your stream with both these tools.
Before we get started there are a couple of alternative options for Twitch overlay designs that might be a better fit for you if you don’t want to create Twitch overlays yourself using online design tools:
- You could hire an experienced designer from Fiverr to create some for you
- You could buy pre-made templates and packs from a site like OWN3D
What are Twitch overlays and why use them?
Twitch overlays are graphics that sit over your live stream feed. Typically these will be webcam overlays, chat boxes, or stream information such as sponsors, social media handles, etc.
Having high-quality overlays creates a more engaging experience for your stream viewers, and can help set you apart from other Twitch streamers.
It also makes your stream look more professional and visually appealing (if you have a good design, of course!)

What makes a good Twitch overlay?
When you’re creating your own overlays, the following guidelines are usually a good starting point:
- Keep it simple and tidy
- Keep it on brand (colors, fonts, imagery, etc.)
- Don’t cram in too many features and elements
- Ensure it helps (not hinders) the stream experience for viewers
Twitch overlay size, dimensions, format:
Make sure when creating your overlays to stick to the ideal specifications:
- Dimensions: 1920×1080 pixels (16:9 ratio)
- File size: 10mb max
- Format: Can be JPG, PNG or GIF
#2 Creating a Twitch overlay with Placeit
Placeit is a template-based online design tool. You simply need to choose one of their pre-made designs and customize it to your liking.
They offer plenty of templates for streamers such as logos, banners, starting soon screens, panels, YouTube templates, and of course overlays.
Step 1 – Choose a template:
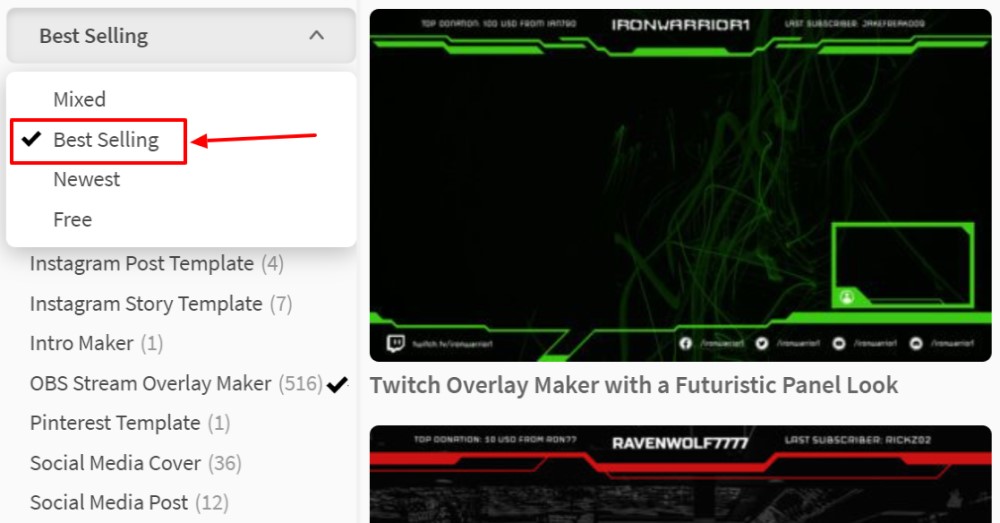
Navigate to the Twitch overlays section on Placeit, browse through them, and select a template that you like (there’s plenty to choose from):

There are a few things you can do here to make your search easier:
- Sort the templates in order of ‘Best Selling’ to have the most popular templates at the top. This option is under the drop-down menu on the left sidebar:
- If you like any of the templates you can ‘Favorite’ them. Doing so will add the template to your favorites page. To ‘favorite’ a template just hover on it and click the heart icon at the top right of the thumbnail (you’ll need to be signed into a Placeit account to do this):

- To see all the templates you’ve ‘favorited’ hover over your username at the top right side of the screen and click on ‘My Favorites’:

- If you’re looking for 100% free overlay templates you can also get these on Placeit. Again go to the drop-down menu on the left sidebar and click on the ‘free’ option to put all the free templates to the top of the list:

All the free templates have a ‘FREE’ ribbon at the top left side of their thumbnail.
When you’ve got your chosen template just click on it to go to the editor.
Step 2 – Customize your template:
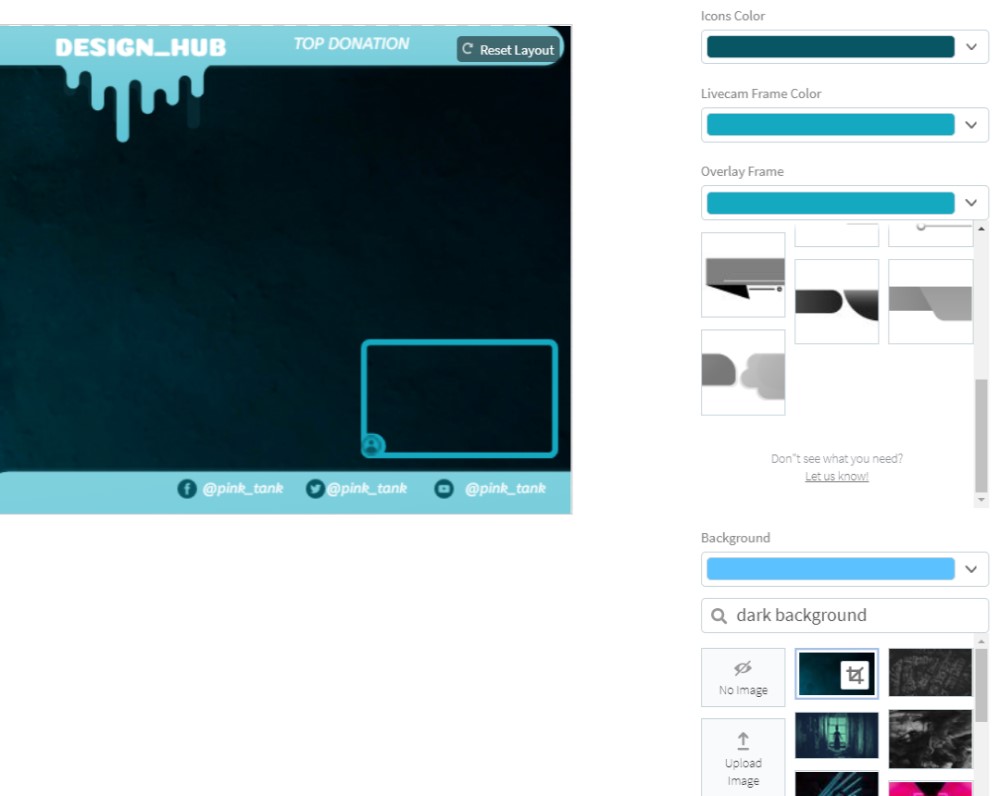
This is roughly how the editor will look when it loads (there may be some slightly different options depending on the overlay template you choose):

If you scroll down the page you’ll see some template presets (different versions of your chosen overlay template) and also similar templates to the one you’ve chosen:

Back up to the editor, on the left side you have a few customization options to go through:
- You can edit the text fields – including the text color and font type
- Add additional text fields
- Click the eye icon to hide a text field
- Upload your own image or logo
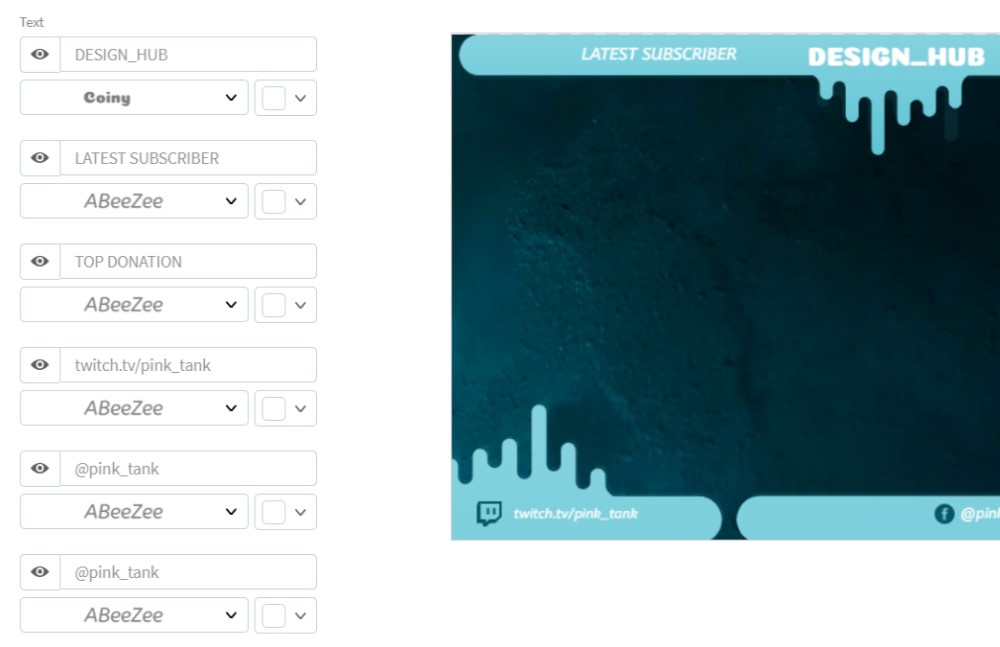
You can see any changes you make immediately.
If you want to save your edits and come back to them later you can do so, but you’ll need to create a Placeit account (free signup) to have this option.
You just click on the ‘Save Draft’ at the top right of the template editor and this will saved to your account for you to come back to later.
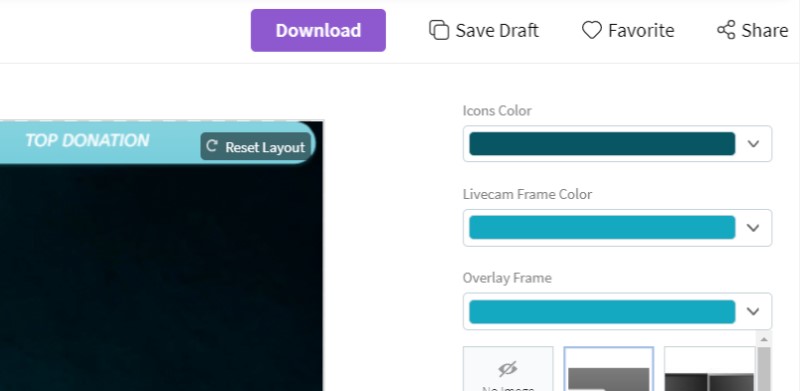
On the right side of the editor there are some more options:
- You can customize the:
- Icon colors
- Frame color
- Frame design
- Background color
- Background image (search and choose for a new one or upload your own)
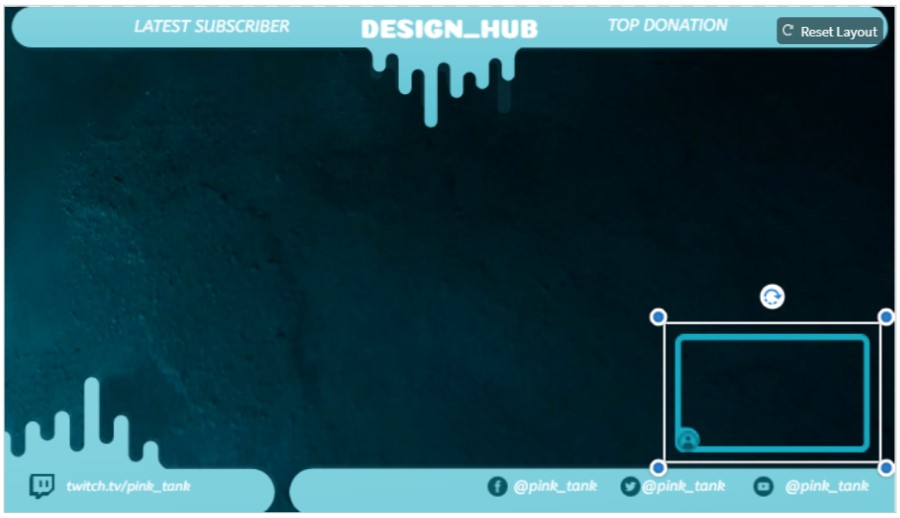
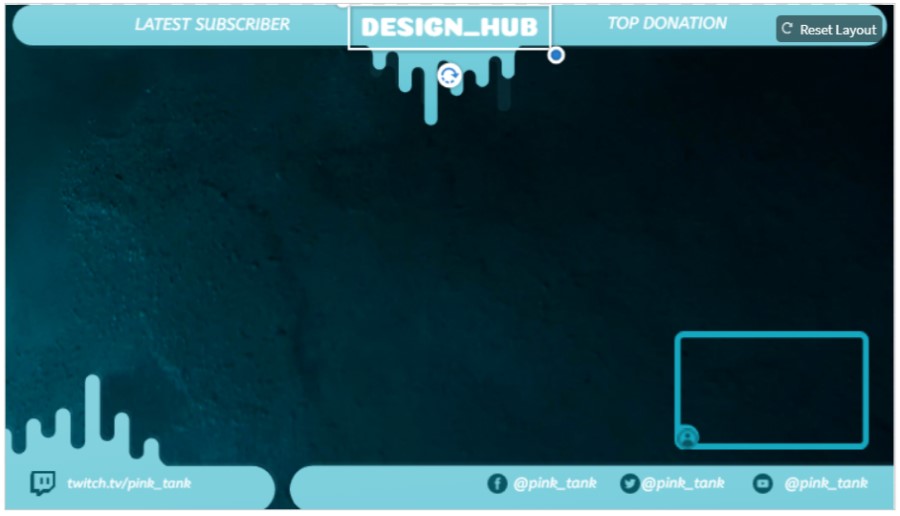
In terms of the actual elements on the design, the text and icon elements can be moved around and resized.
Step 3 – Download your template:
When you’ve completed your customizations and are happy with your design it’s time to download it.
There are a couple of options, you can do one of the following:

- Buy an individual template -Twitch overlays cost $2.95
- Get an unlimited subscription for $14.95 (monthly) or $89.69 (annual) which lets you download as many designs as you want.
- If it’s a free template you can download the template completely for free, all you will need is a free Placeit account
Placeit gives you two versions of your overlays. One with a background and one with a transparent background to make it easy to add to your streaming software.
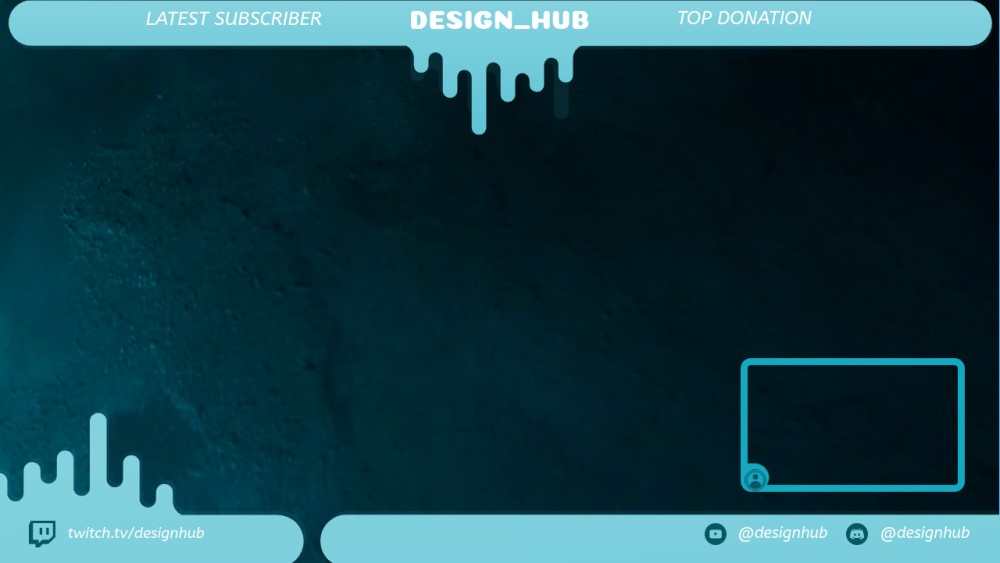
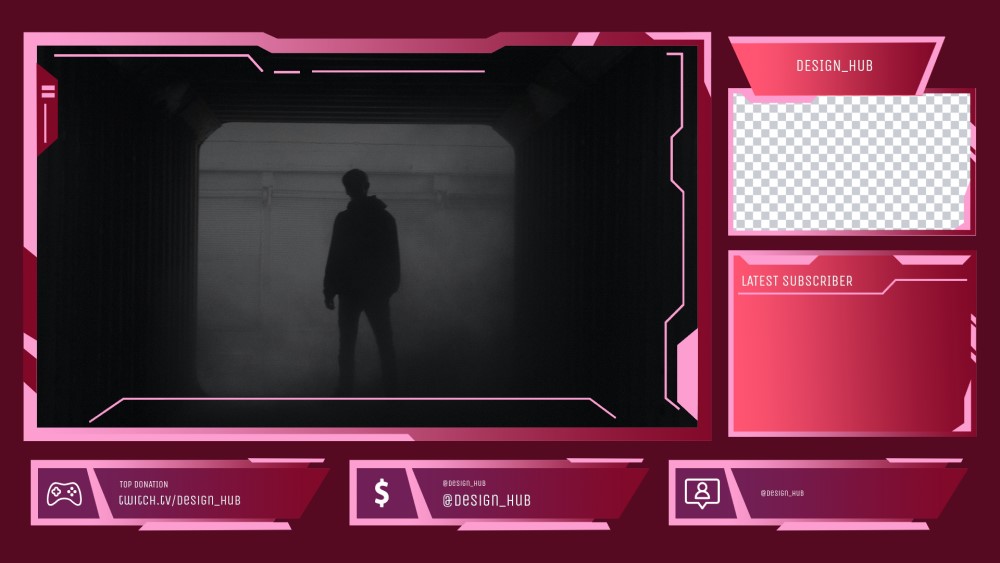
Overlays we made with Placeit:
This great-looking overlay took us about 2 minutes to make:
Commercial usage of the templates:
Thankfully Placeit has created a page that outlines their license in a ‘human-readable’ format so everything is pretty clear.
Anything you create on Placeit is copyright free and can be used for commercial purposes. You can even sell and trademark the designs you make on Placeit!
Obviously, this means you can use any Twitch overlay you create on your channel with no problems.
Check out the full details of the Placeit license here.
What else you can do on Placeit:
If you’re a streamer then Placeit has even more to offer you. You can easily create the following with their tool:
- Logos and animated logos
- Offline banners
- Starting soon screens
- Chanel banners
- Intros
- Merch designs
- And so much more
Click here to see all the Twitch templates on Placeit.
Conclusion:
If you want an easy way to quickly create incredible looking overlays for your Twitch stream then Placeit is a fantastic option.
We’d say the only downside with the tool is that it is a little bit basic in terms of the customization options and resizing some of the design elements is a bit tricky at times.
However, the huge number and quality of the templates they offer are great so you’re bound to find a lot of design templates that have the look and feel you’re going for with your stream!
#3 Creating Twitch overlays with Canva
Like Placeit, Canva is an online design tool for non-designers that has a huge variety of different templates and tools to help you create designs.
With Canva you can also create your own designs by modifying existing templates that they have provided but we’re going to show you how to create designs from scratch because it’s incredibly easy to do in Canva.
We won’t show you all the different ways to use Canva, so if you need a full run-through we recommend watching this video.
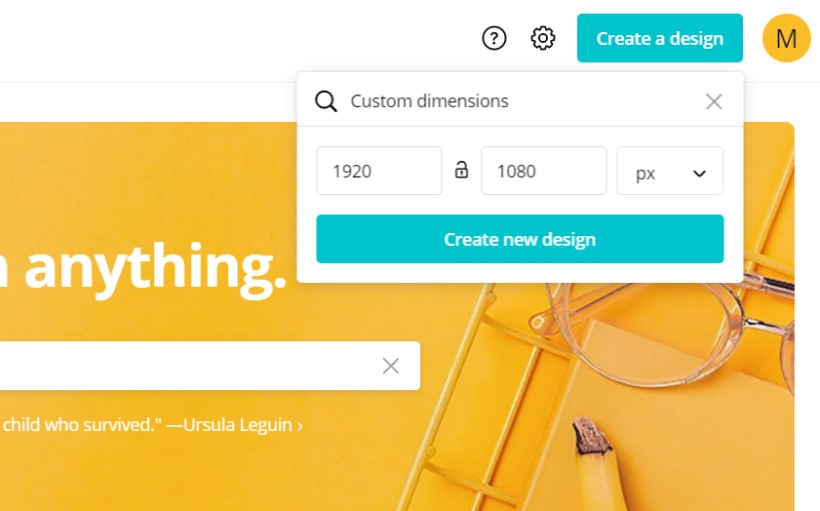
Step 1 – Click ‘Create a design’:
Go to the homepage on Canva and click the ‘Create a design’ button at the top right. Then click the ‘Custom dimensions’ option and put in 1920x1080px, and click ‘Create a new design’.
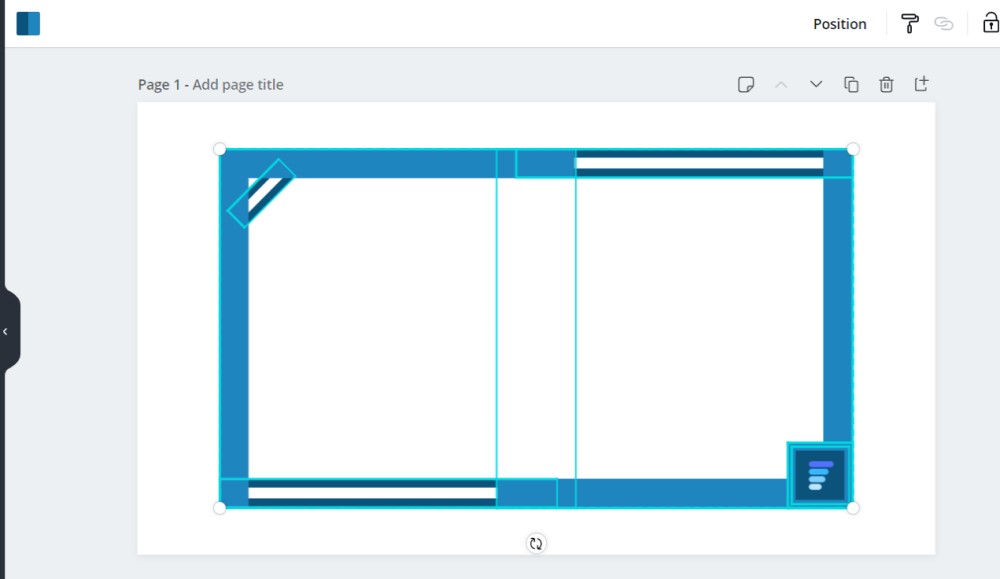
Step 2 – Create your webcam frame
On the left side of the editor click on ‘Elements’, go to the ‘Shapes’ category and find a rectangle that fits with the look you want for your webcam frame:

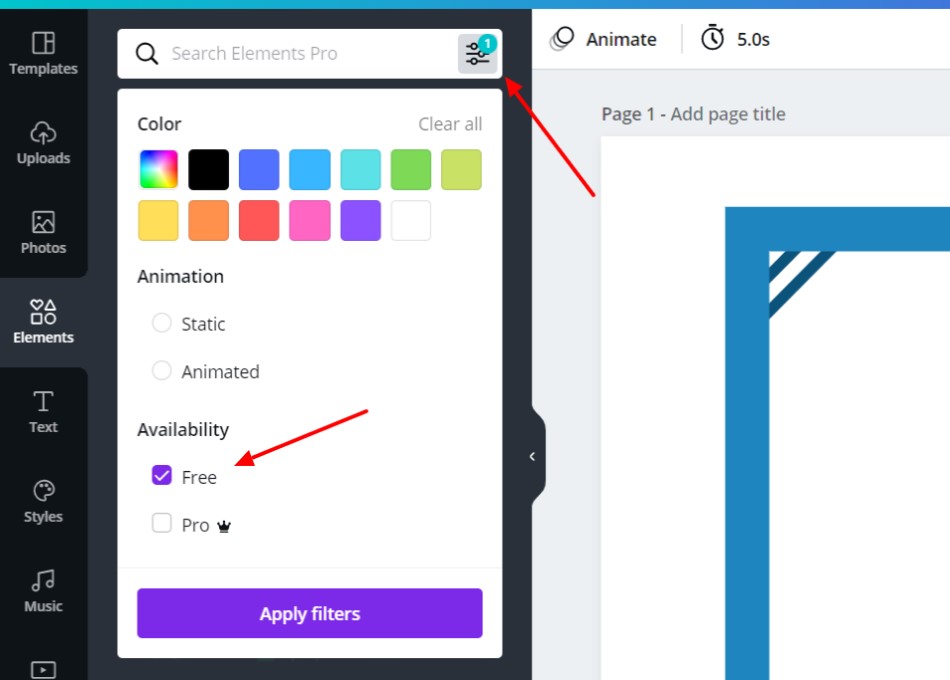
There are plenty of elements you can use to create a great looking webcam frame. Not all of the elements on Canva are free to use, some are for Canva Pro users only.
Note: To see only the free elements on Canva click the filter button in the search bar and select free elements only:
To ensure your webcam frame is the correct size, stretch it out to the edges of the canvas (1920 x 1080 px) and this will ensure that it is the correct dimensions:
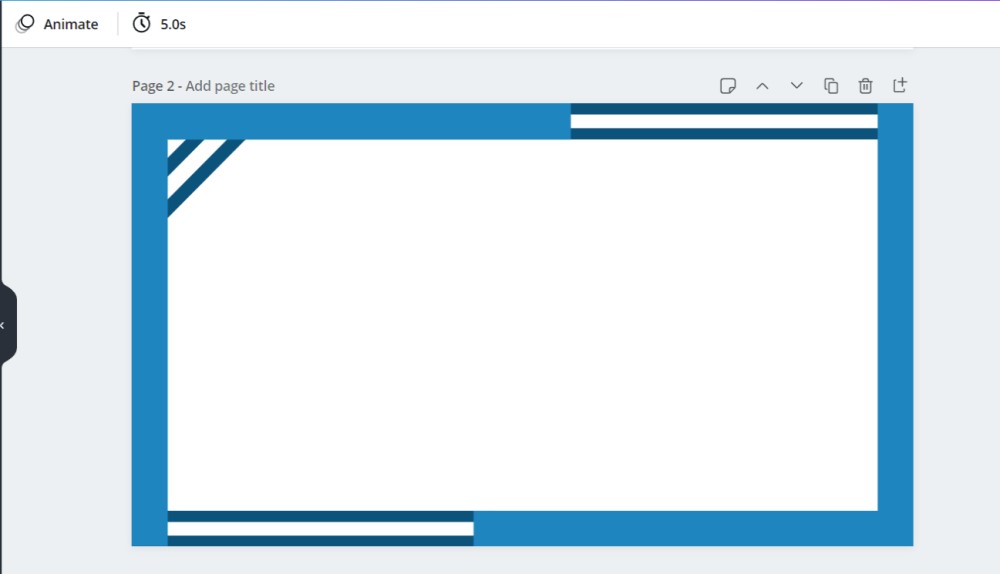
You can then select all the webcam frame design elements and resize them all together to make the webcam frame smaller:
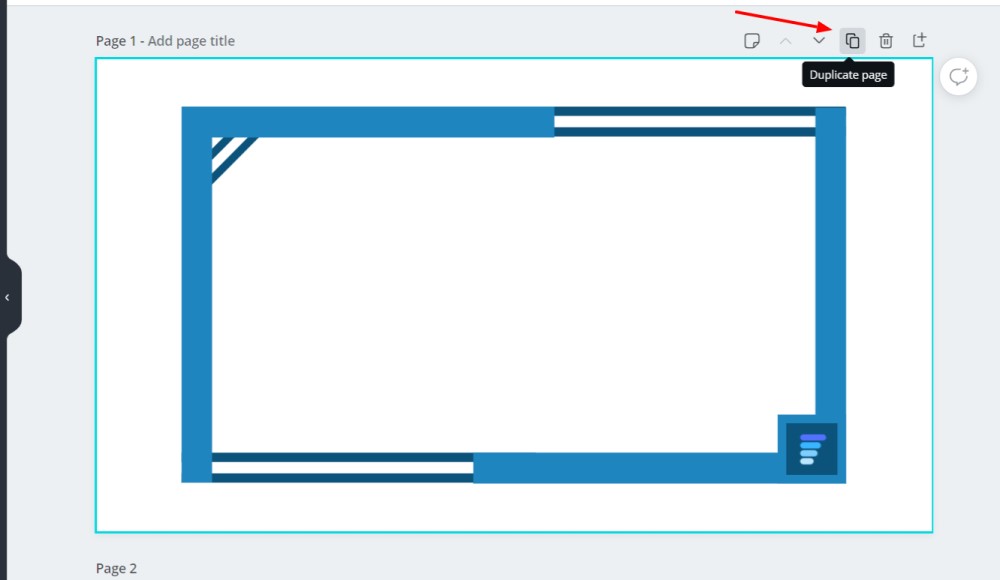
Once you’re happy with you’re webcam design, click on the duplicate page icon to create your next overlay:
Step 3 – Create your ‘Just Chatting’ overlay:
The reason we duplicated the page was so we could easily use the same elements and colors from our webcam frame on our ‘just chatting’ overlay.
We recommend you do the same to keep things looking on brand and consistent.
Spend some time modifying the design elements until you’re happy with your ‘just chatting’ overlay and click the ‘Duplicate page’ button again:

Step 4 – Create your ‘Gameplay’ overlay:
To create a simple gameplay overlay, modify duplicated just chatting overlay. We did a few simple modifications and copied our webcam frame and pasted it into the gameplay overlay design:

Everything in the designs we have done so far was 100% free to use, minus the Twitter and Discord icons in the gameplay overlay which are only available to Canva Pro users.
However, you can easily find those icons elsewhere and upload them to Canva if you want them for your design.
Step 5 – Create your lower third overlay:
The last design we’re going to create is a lower third overlay. Again, you simply need to duplicate your last design and then modify it to easily create a lower third overlay:

If you want to get a bit fancy you can even animate your lower third.
To add animation all you have to do is click on the background of the page you want to animate, click on ‘Animate’ in the toolbar, and select one of the animation options (there are several free options):

Overlay Designs we made on Canva:
Here’s the final designs we made on Canva:


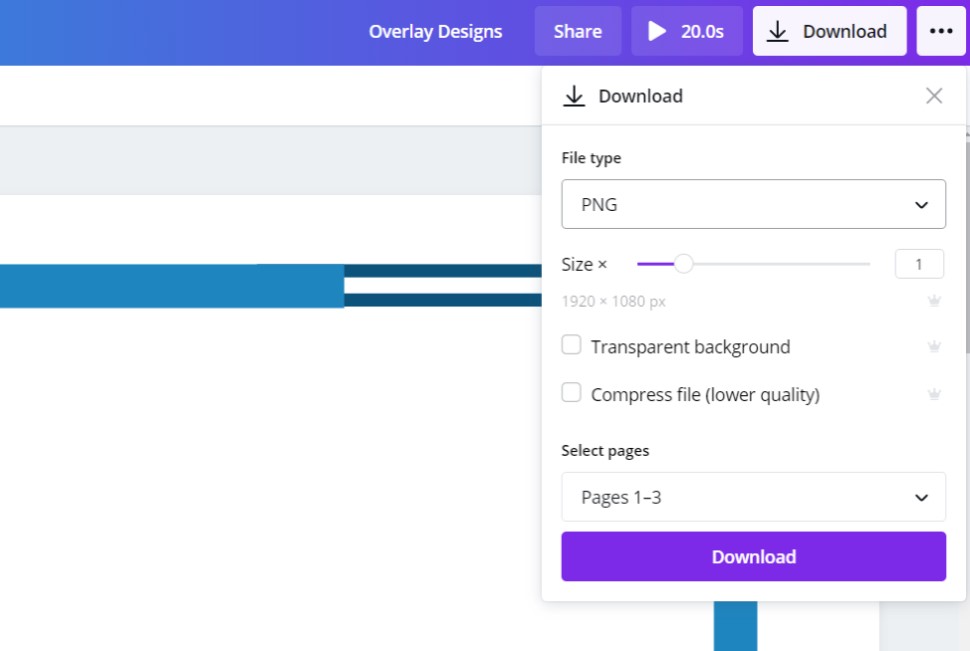
Step 6 – Download your designs:
When you’ve done all the customizations and are happy with your final overlay designs it’s time to download them.
You can select the pages with your static (non-animated) designs and download these together as a zip file. We recommend you download them as PNGs to get the best possible quality:
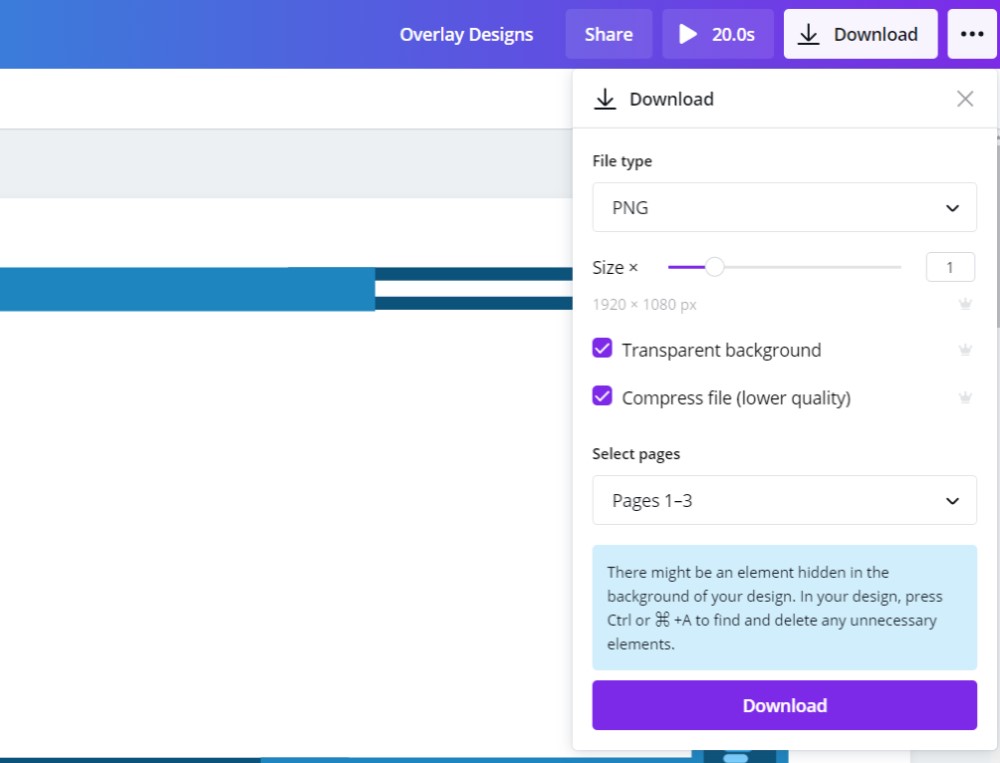
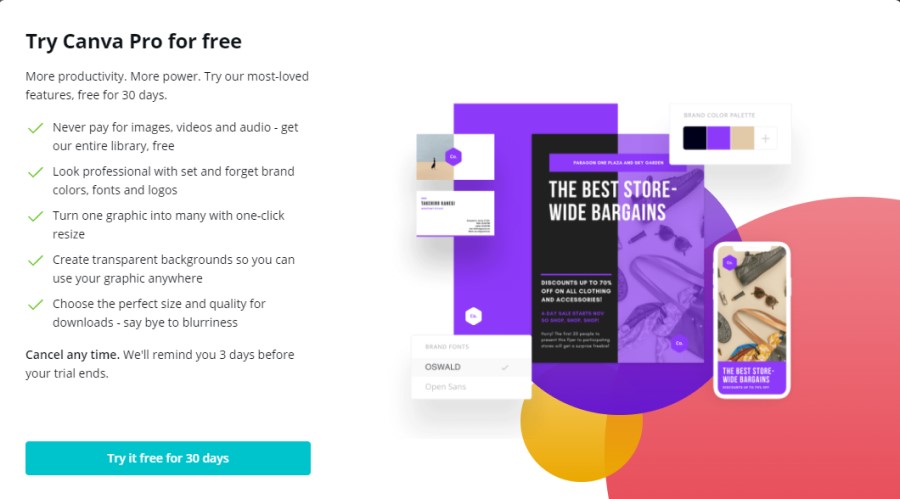
If you want to download your designs with transparent backgrounds you’ll need to have a Canva Pro account (you can try it for free for 30 days). However, if you don’t want to try out Canva Pro, we’ll show a free method a bit further down.
Canva Pro also allows you to compress the files so the file sizes are much smaller:
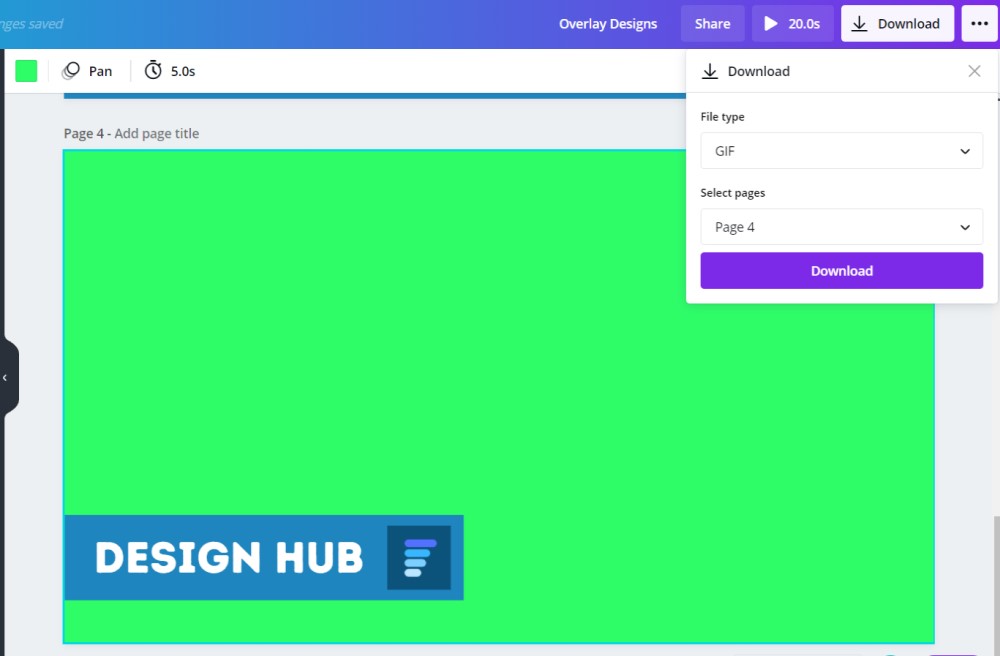
When it comes to downloading your animated lower third (or any animated design you want to use on a livestream) you’re going to need to do an extra step.
It’s not possible to download a GIF or mp4 file from Canva with a transparent background. However, if you make the background a bright green color, you’ll be able to use chroma key in your OBS and remove the green area of your design:
If you’ve used any premium elements you’ll either have to pay for them or subscribe to Canva Pro to get unlimited access. You can currently get a free 30-day trial of Canva Pro.
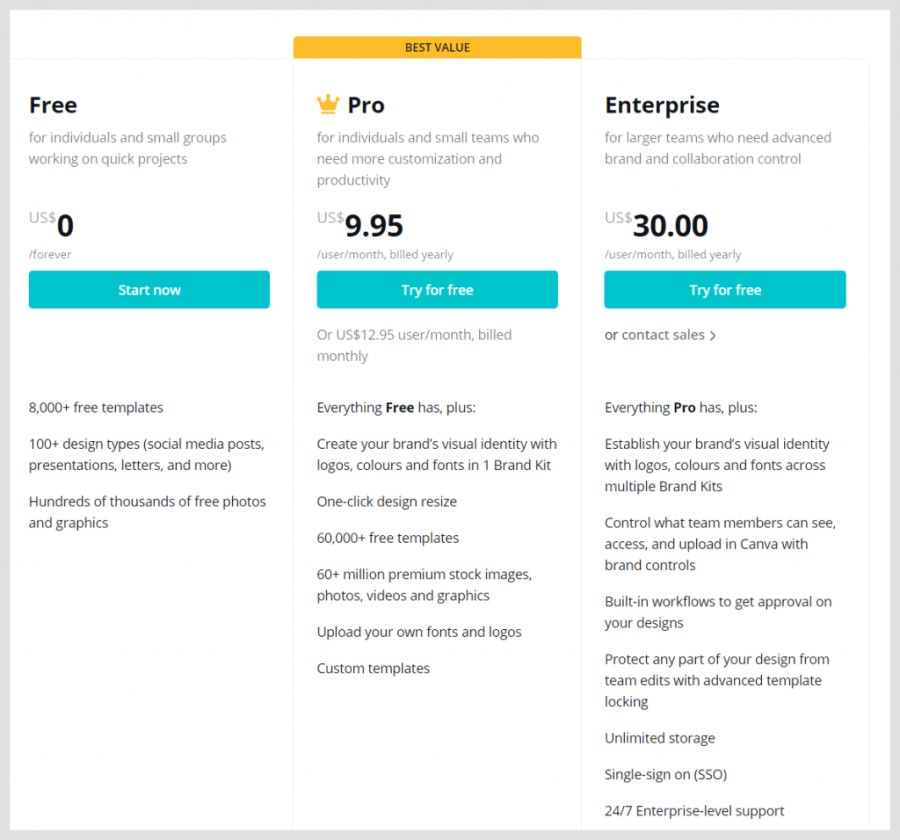
This is the pricing breakdown for Canva Pro:
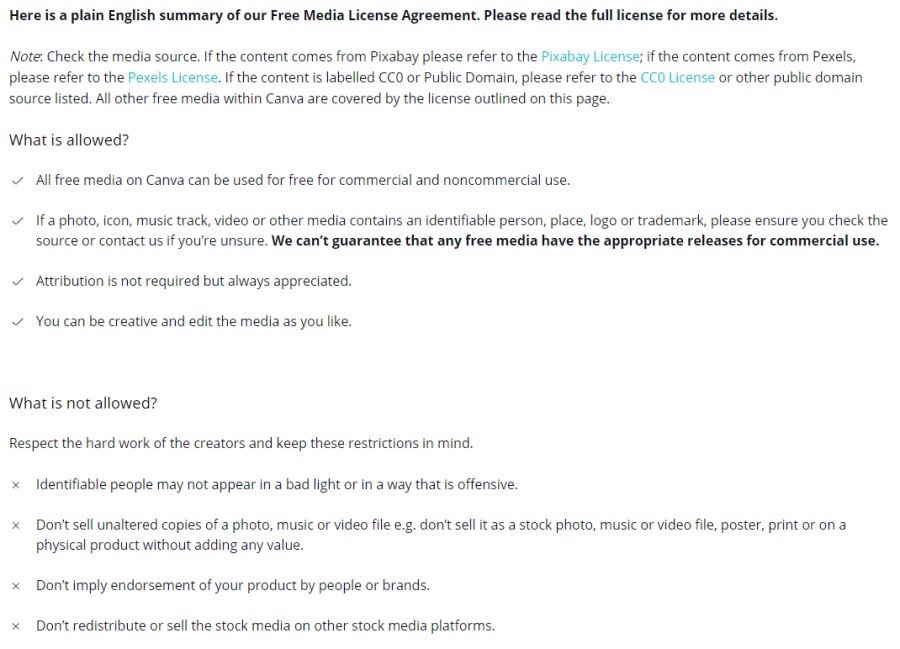
Commercial usage of the templates:
This is the breakdown for Canva license:
What else you can do on Canva:
When it comes to creating more stream designs you can a lot on Canva including:
- Creating a Twitch logo (one of the best gaming logo makers)
- Offline banners (here’s how to make an offline banner on Canva)
- Channel banners (one of the best Twitch channel banner makers)
- Alerts
- Twitch panels (also one of the best twitch panel makers)
- Twitch sub badges (again, one of the best Twitch sub badge makers)
Removing PNG backgrounds for free:
As promised we’re going to show you how to remove the background of static designs for free using a tool called Kapwing (You can also use Removal.ai).
Go to Kapwing’s image background remover:
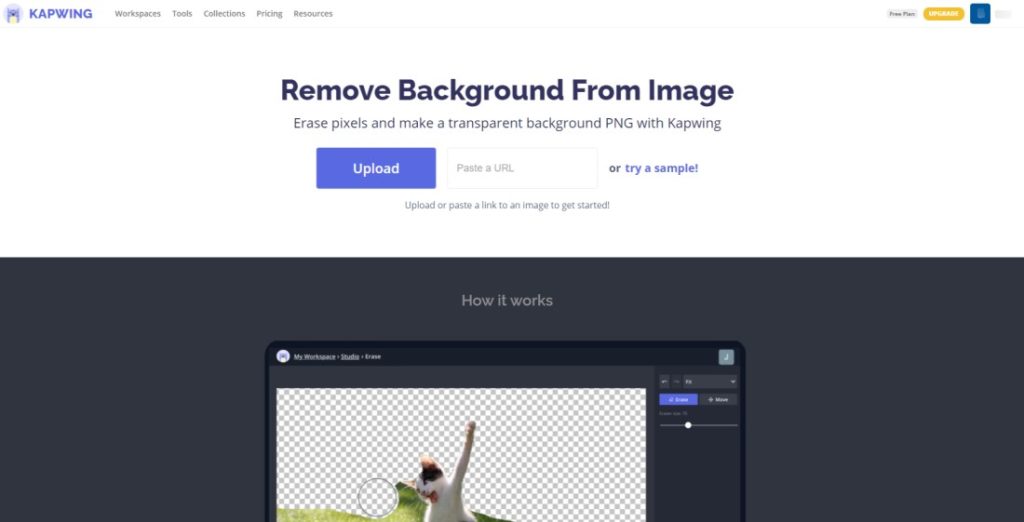
Upload a design, click on the uploaded image, select ‘Erase’ from the right side menu, then select the ‘Magic Wand’ button, click on the image background, and then click ‘Remove Pixels’ from the right side menu:

The background should be removed, but you may have to repeat that process a few times to get all parts of the background.
Eventually you should have removed all of the background and can click ‘Done’:

On the next screen click ‘Export Image’, and then you can finally download your Twitch overlay design with a transparent background:

Conclusion:
Canva is another incredible option for creating Twitch overlays for your stream.
It takes a bit more time and efforts than using Placeit’s but the customization options are far superior. So if you want to customize every aspect of your Twitch overlays (and create incrddible designs for free) then Canva is a good option for you.
#4 Alternative Tools
If you check out Placeit and Canva and they’re not quite what you’re after there are a few alternatives that we also recommend.
We tested out a lot of tools when we created our ‘Best Overlay Makers‘ article, so we recommend checking out that article for alternative options.
Free alternatives:
When it comes to creating your own overlays for free there are a few extra alternatives. You can create overlay designs using Paint (check out this video to see how) you can also use Photopea and Pixlr.
#5 Other resources
Sites to buy premade Twitch overlay designs and packs:
Video on how to add Overlays to your Twitch stream:
#6 Using Photoshop
If you want to use Photoshop to create your overlays here’s a good video showing you how:
Final thoughts
So, there you have it, that’s how you can quickly, easily, and affordably create high-quality overlays for your Twitch channel using online design tools.
No matter what your skill level when it comes to design you will have no trouble creating something that looks great, and since Placeit and Canva offer so many templates and options there’s a great chance you’ll create something that works for you.
Enjoy creating! Oh, and if you have any questions, comments, or have suggestions for other awesome overlay tools, leave a comment below!