There are many factors that go into creating a successful YouTube video (and channel). One of the major elements is your YouTube video end screens.
An end screen, also known as an end card or outro, can be used in various ways. For example, to get viewers to watch more of your videos, to subscribe to your channel, and also to click through to your website.
We’ll cover all the classic end screen goals in this article, as well as how to make sure they are high-quality, and the tools you can use to create them.
Jump to a specific section:
- What is an end screen?
- Why are they important?
- Essentials
- Tools
- How to make one
- Testing and analyzing
- FAQs
#1 What is a YouTube end screen?
A YouTube end screen is essentially an overlay that sits on top of your video as it comes to its conclusion.
Typically, end screens will appear over the last few seconds of the video (usually between 10 – 20 seconds) and will have a clear call to action (or several).
Here’s an example of one in action:
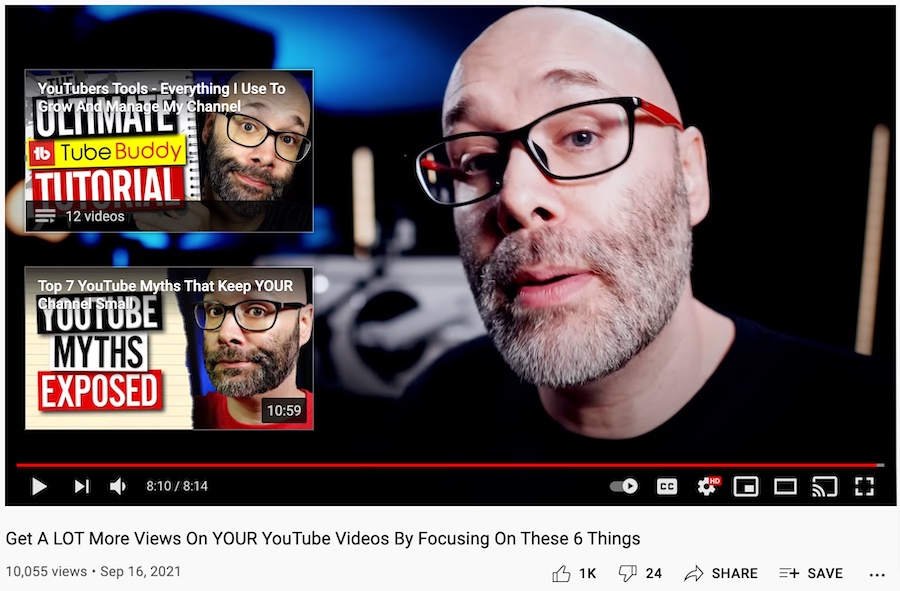
You can see that in Nick Nimmin’s outro for this video he recommends that viewers click on the thumbnail for the ‘YouTubers Tools’ video – which is very relevant to the content of the video the viewer just watched.
It’s a great way to get viewers to continue watching more of his videos, which will improve his session time. This is an important ranking factor on YouTube.
#2 Why are end screens important?
You could simply end your videos by saying thank you and goodbye, however, if you do that you’re missing a big opportunity to engage that viewer further.
If someone has stuck around until the end of your video they were obviously engaged and enjoyed your video content. So why not take advantage of that fact.
Outros are critical mainly because they give you an opportunity to give your viewers a call to action (CTA).
In other words, you can direct engaged viewers towards doing something that you want them to do.
People do respond to reminders and instructions, a great example of this is from a case study by Real Men Real Style who saw a 70% drop in engagement on videos with no CTA. End screens are a non-intrusive way to ‘tell’ viewers what to do.
What CTA you use depends on your video content and your goals. Here are the most widely used CTAs in YouTube video end screens:
Related videos
As you saw in the Nick Nimmin example, you can direct viewers to more of your YouTube videos in your outro.
This can be an individual video or a related playlist.
This increases viewer session time on YouTube which will help your videos rank better on YouTube.
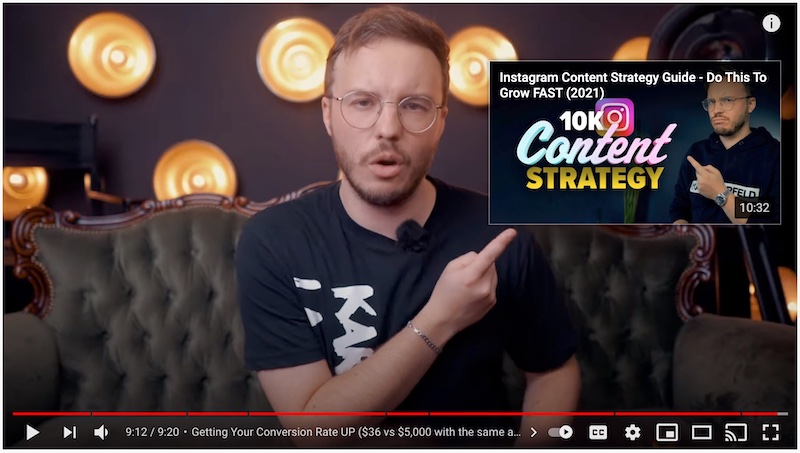
Here’s another example from HeyDomink (notice he’s pointing to the related video to reinforce the CTA):
It can also help viewers get to know you more, enjoy more of your content, and ultimately this can play a huge part in encouraging them to subscribe to your channel and to become regular viewers.
Increase subscribers
If someone has watched all of your video, they’re clearly enjoying your content so it’s the perfect opportunity to encourage them to subscribe to your channel so they don’t miss out on your content in the future.
Ask the viewer to subscribe in your outro and then add the subscribe CTA in your end screen to make it easy for them to do it.
Here’s an example of how that looks:

Drive traffic to a website
Another commonly used CTA in end screens is the external link CTA.
If you’re on the YouTube partner program you can link out to external websites (as long as they don’t breach YouTube’s guidelines.
So, if you have a Merch store, a website, or a landing page that you want to drive visitors to, your end screen could be the perfect spot for this.
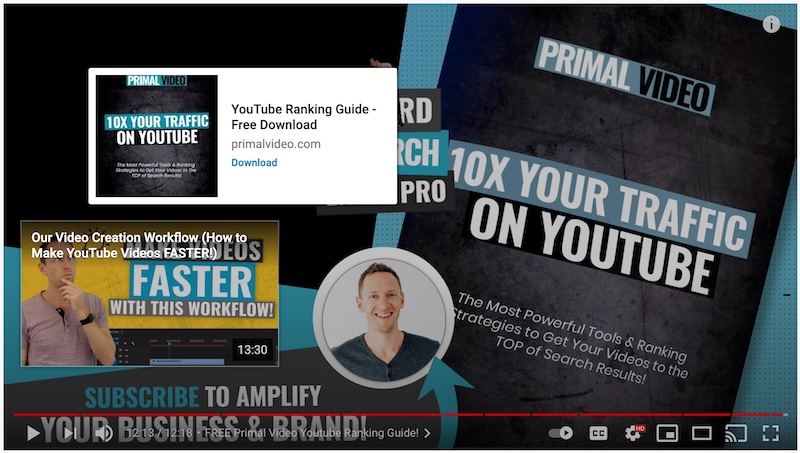
Here’s a good example from Primal Video. You can see they have a CTA that goes to a webpage where you can download their free YouTube ranking guide.
Not a bad lead generation tactic:
#3 End Screen Essentials
We’ll cover the steps to create your end screen below, but first here are the essential components on a YouTube end screen:
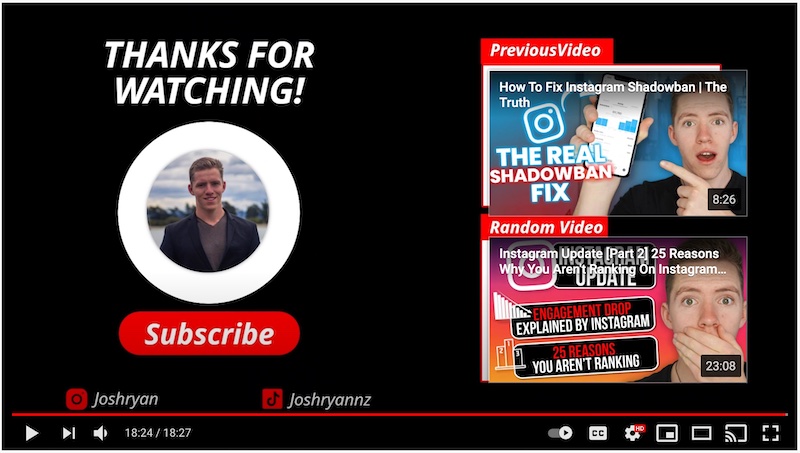
It needs to be relevant
Whatever you decide to focus on with your end screen CTA, it needs to be related to the video content.
This doesn’t really apply to a ‘subscribe CTA’ as this can be used on all of your videos but if you’re encouraging viewers to click on other videos or playlists, or click through to a landing page then it has to make sense contextually.
If not, you’re unlikely to get a good amount of viewers to do whatever it is you want them to do.
A simple example is from Josh Ryan’s end screen below where he links to very related videos to the topic of the original video:
It’s not too long or short
End screens can’t go longer than 20 seconds but you need to make a judgment call on what the right amount of time between 5 – 20 seconds is for your end screen.
For longer videos, you can easily have a 20-second outro but if your video is short an outro/end screen of that length might be a bit odd.
In YouTube Analytics, you can see data on the top videos by end screen, top-performing end screen element types, and also end screen element CTR.
This data can inform on what end screens are working and help you understand what length (as well as other features) work best for you.
You can also only put your end screen at the very end of the video.
It’s the right size and format
Your YouTube outro, like your video, should have a 1920px x 1080px resolution (16:9), and the end screen elements should be as follows:
- Channel / Subscribe CTA – 294px x 294px
- Other channel CTA – 294px x 294px
- Website link CTA – 294px x 294px
- Video or playlist CTA – 615px x 345px

It has the right background audio
If most viewers have the option to sit through or not sit through 20 seconds of silence, odds are they’ll choose the latter.
You could optimize the end screen elements and visual design, but if you don’t account for the listening experience, you probably won’t see the engagement rates, click-through rates, and subscriber growth that you want.
A simple solution to this problem is to use background music from the YouTube Audio Library or a royalty-free music company.
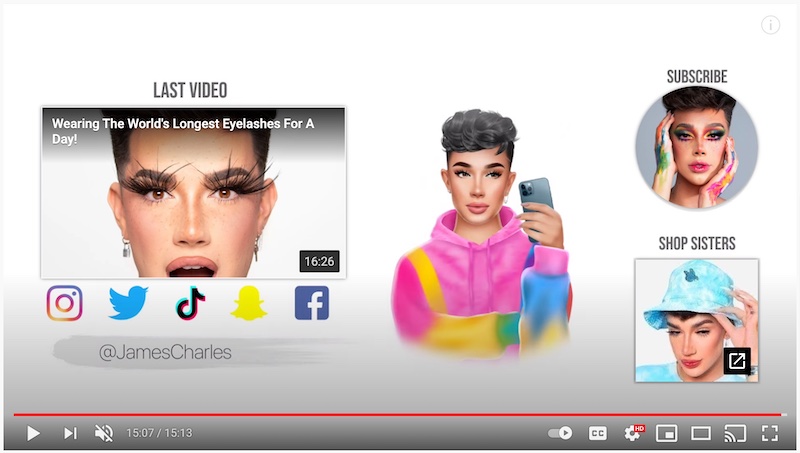
It doesn’t look overcrowded
You can have up to four elements in your end screen at once, but sometimes too many choices can lead viewers to feel overwhelmed.
Pick the elements that make the most sense for a given video, and don’t overdo it.
Very rarely does it make sense to include all four possible elements in an end screen but it’s important to test and see what works best for you.
You can see below that YouTuber James Charles has a lot going on in their end screens with a video CTA, website link, and subscribe CTA – as well as social media icons.
If you’re just starting out we’d recommend having two CTAs in your end screens but as time goes on you should continue to test and optimize.
It is on brand
Keep the color palette and styling consistent across all elements of your videos. From the thumbnails, intro, content, and outro.
With this consistency over time, you can build an effective and memorable brand, and your end screen plays a part in that.
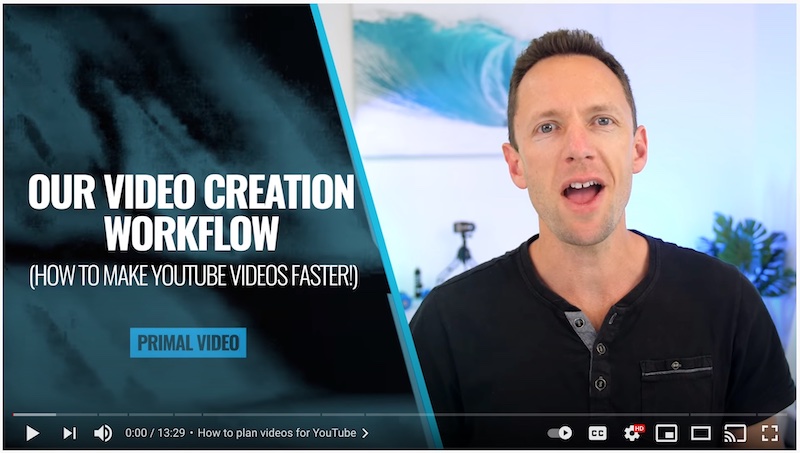
You can see that Primal Video’s intro has their brand colors, font, and typical layout:
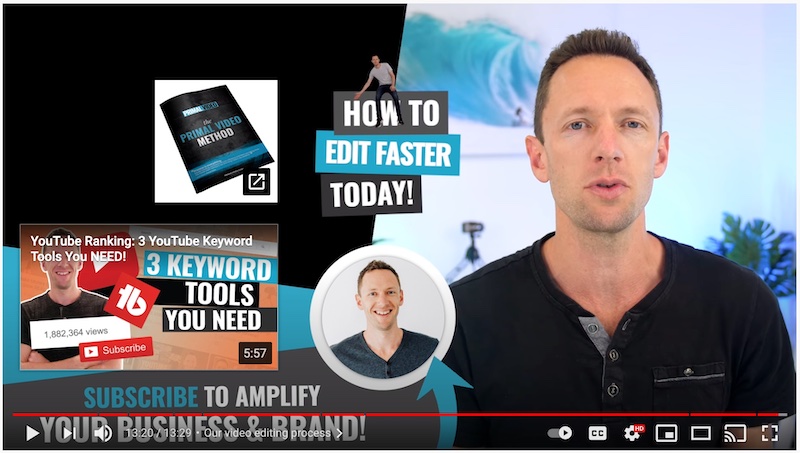
And their outro and end screen have the same consistent look and feel:
It’s been researched
If you’re just starting out then you’re unlikely to know what the best approach is for your end screens and video outros.
A good tactic here is to research your competition and see what they’re doing with their end screens.
This is a good place to start, and over time you can develop your own style and work out what’s best for your videos and channel.
#4 Tools to create YouTube end screens
There are plenty of tools you can use (here are some of the best) to create your end screens.
Here are some other useful tools you can use:
Fastreel Video Editor

Fastreel Video Editor is an online video maker that makes it incredibly easy to make videos, all within your browser.
They have a good range of templates you can utilize, including outros, so all you have to do is upload your files, add your text, and choose the music (if needed).
If you want to make more detailed changes to the videos Fastreel allows for this too. You can easily cut, crop, rotate, compress, and much more.
Whether you’re a beginner or an experienced video editor, Fastreel’s straightforward and user-friendly interface and broad functionality will make it easy for you to create videos and outros.
InVideo
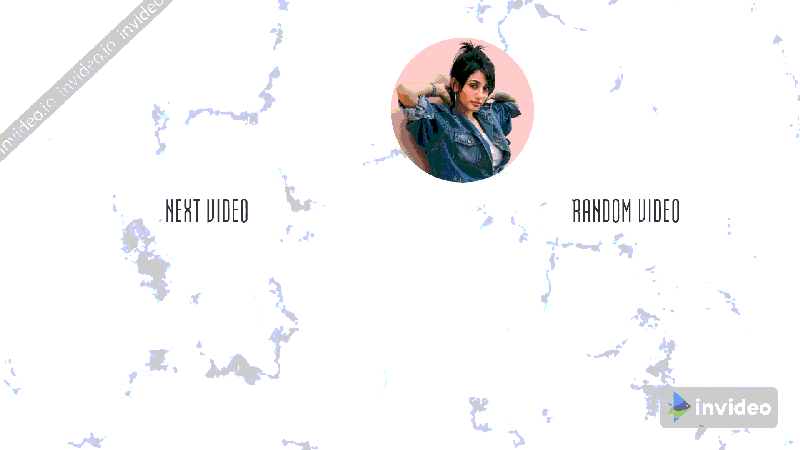
InVideo is another browser-based tool that allows you to create videos from scratch, as well as create specific video elements including end screens.
They have a solid range of end screens and ‘thanks for watching’ outro templates that you can use to quickly and easily create your own end screen.
All templates on the platform are fully customizable, so you can change all the various details to get a look that will match your brand.
Whether you’re a beginner or intermediate video creator InVideo is certainly worth checking out.
Free Options
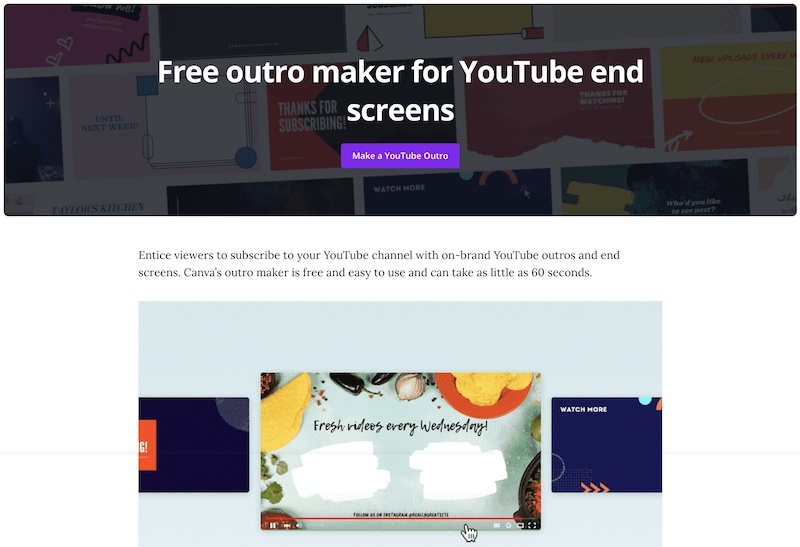
If you’re on a tight budget, there are some incredible free options when it comes to creating end screens.
Here are some of the best free tools:
#5 How to easily make a YouTube end screen
If you’re looking for the quickest and easiest way to create a YouTube end screen, we recommend using Placeit.
All you have to do is choose an end screen template from their library, they have over 240, customize it your brand, and download it.
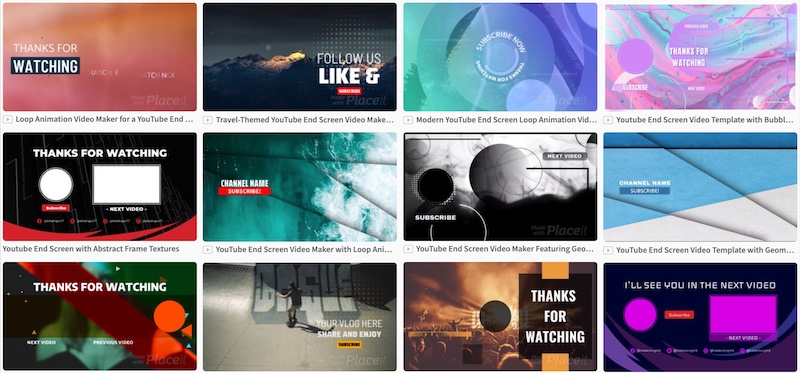
The whole process takes a few minutes – you quickly change the elements of your end screens including placements, colors, fonts, etc.
The guys from Primal Video have created a great video walking you through the process, as well as showing you how to add it to your video on YouTube:
#6 Testing & Tracking
As mentioned, you’ll want to keep track of how your end screens (and the elements) are performing.
You can see all this data in the ‘end screen elements’ report in YouTube analytics.
This video by Rafa Carpio gives you a quick look at this part of YouTube analytics:
#7 FAQs
- What length should a youtube outro be? – no more than 20 seconds, 10 at a minimum
- How to make a youtube outro with links? – watch this video
- How to put an outro on youtube? – same as above – watch this video
- Where to find free outro templates? – go to our YouTube end screens article.
- Where to find youtube outro songs? – check out Epidemic Sound
- How to make a youtube outro in Photoshop? – here’s a good tutorial
- Should you always use an outro? – it depends on the goal of the video, if you want viewers to stick around and watch more if your videos it’s highly recommended!
Wrapping things up
So, there you have it, that’s how you create good YouTube end screens.
Stick to the basics, understand what the goal of your outro/end screen is, test, refine, and keep improving and over time you will learn how to utilize your end screens in the best way possible for your channel and videos.
Enjoy creating! Oh, and if you have any questions, comments, or suggestions for creating awesome YouTube end screens, leave a comment below!
