
Looking to create an intro for your YouTube videos but not sure which of the many online intro makers out there is the best choice for you?
Well, stress no more. We’ve compiled a list of the best YouTube intro makers to make it easy for you.
We’ve ranked them from strongest to weakest in terms of the final quality of the intros and the ease of use and functionality of the tools, but every intro maker mentioned deserves its place on the list.
But first, why use an intro maker?
- Reason #1: You don’t need to spend a lot of money to get a great intro
- Reason #2: Create an intro for yourself without needing any editing skills
- Reason #3: It’s very fast – you can have your intro finished in a few minutes
You can jump to a specific product if you want:
Let’s get to the list…
#1 Renderforest Intro Maker
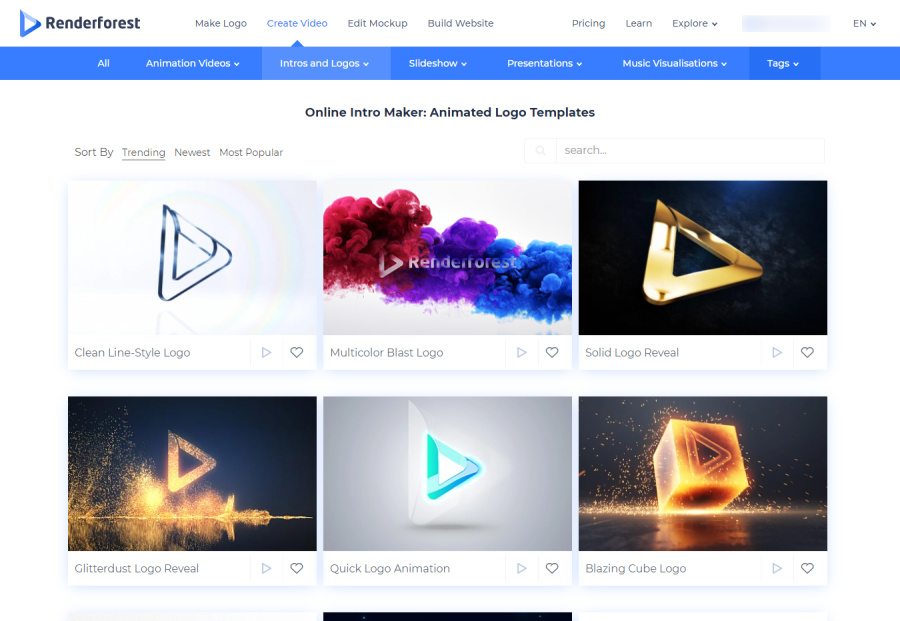
Renderforest is much more than just an intro maker. They have plenty of other tools and templates for YouTubers, such as their logo maker and website builder. Their intro maker is one of the best around in terms of the quality of the intros you can create, and how easy it is to do so.
They have hundreds of high-quality intro templates you can easily customize, and the best part of the tool is that it is incredibly easy to use. You’ll have an awesome intro ready to go in a few minutes.
The customization options aren’t limitless, for example, you can only choose colour palettes they provide. However, if you’re after something that looks professional and you’re happy to go with a great looking pre-made template, you won’t be disappointed.
Steps to create your intro:
- Choose a template you like and click ‘Create now’
- Add your logo file (if it applies to your chosen template)
- Alter the text (if it applies to your chose template)
- Choose the look (colour palette) and font you want
- Set the music (Choose a track, upload your own or select none)
- Preview (render) the video file
- Download it!
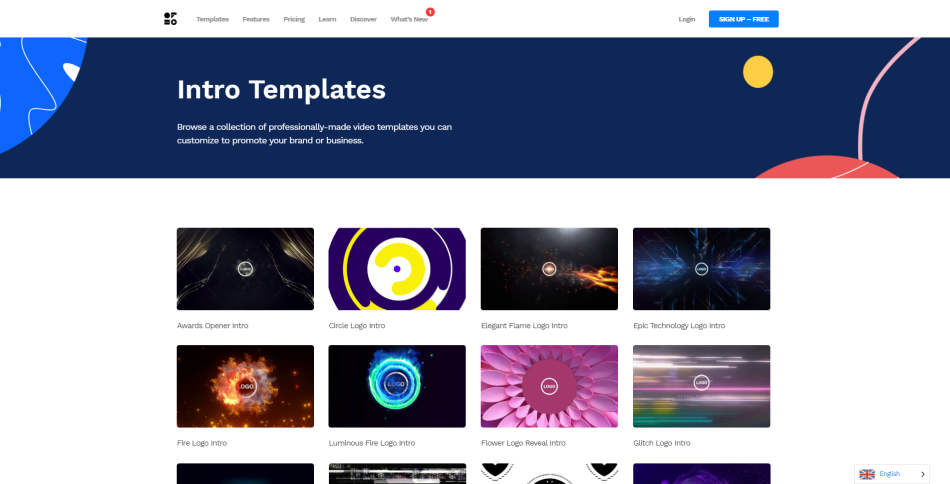
Intro template example from Renderforest:
Pricing:
- Individual intro template:
- $9.95 (360p)
- $14.99 ((720p)
- $19.99 (1080p)
- ‘Free’ with a subscription:
- $9.99 p/month (Amatuer account) to $49.99 p/month (Agency account)
What we like:
- Tonnes of quality intro templates to choose from
- Easily find intros in specific categories
- Very simple and intuitive interface and process
- You can upload your own music or choose from their library
- Insanely quick to create your video intro
#2 Placeit Intro Maker
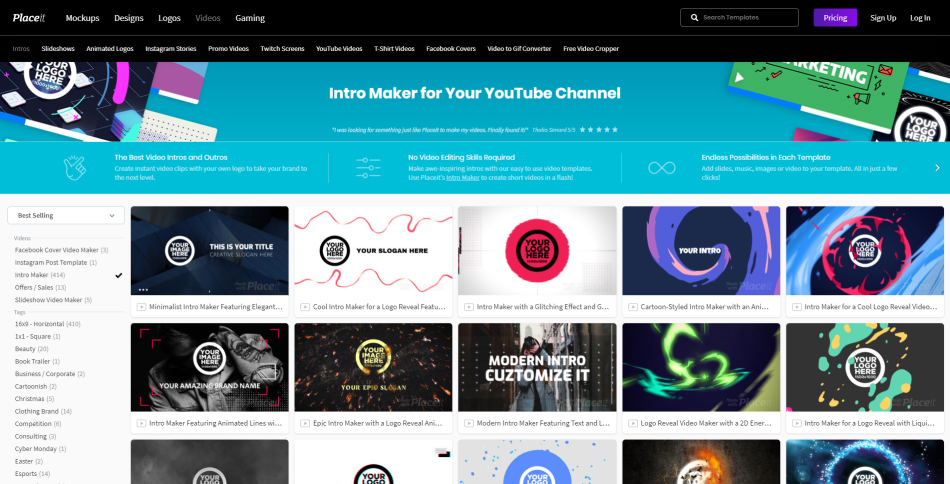
Like Renderforest, Placeit is much more than just an intro maker. They offer lots of tools and templates that make life easy for YouTubers. Their intro maker is also a lifesaver, especially for those who don’t have any video editing skills and a limitless budget but still care about creating something professional looking.
Out of all the tools on the list, Placeit offers the most templates, so whatever niche your YouTube channel is in you should have no problem finding a template that fits with your brand. They have an especially awesome collection of gaming-focused templates.
You can easily customize various elements in your intro template. Like, Renderforest, the interface is really intuitive and easy to use even for those who have never used a similar tool before.
Steps to create your intro:
- Find an intro template you like
- Add your logo file (if it applies to your chosen template)
- Change the text (if it applies to your chosen template)
- Customize to your liking (e.g. colours, music, add more slides, etc.)
- Render the video file
- Download it!
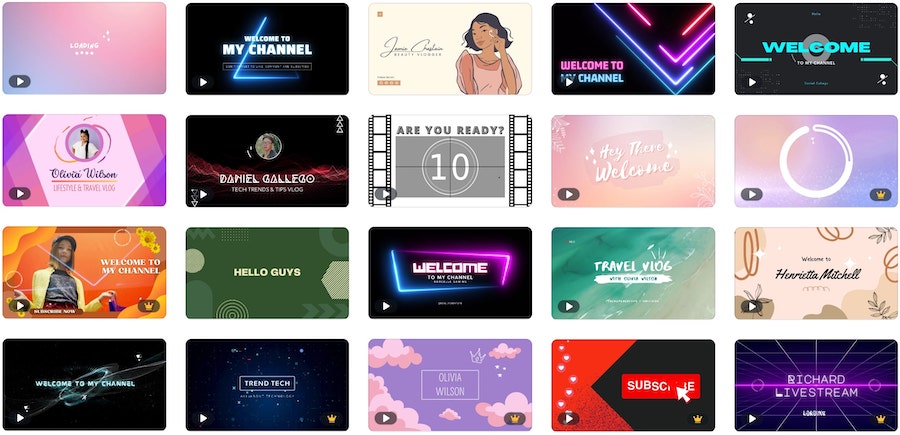
Intro template example from Placeit:
Pricing:
- Individual intro template: $9.95
- ‘Free’ with Placeit’s monthly subscription plan ($14.95 for one month with unlimited downloads of all their templates – logos, intro, banners, etc.)
What we like:
- Fantastic quality intro templates to choose from
- Easily find intros in specific categories (e.g. gaming)
- You can create something that looks professional in a few minutes
- Intuitive and easy to learn interface
- Fair price for an intro
- They are always adding new templates!
#3 Video Bolt
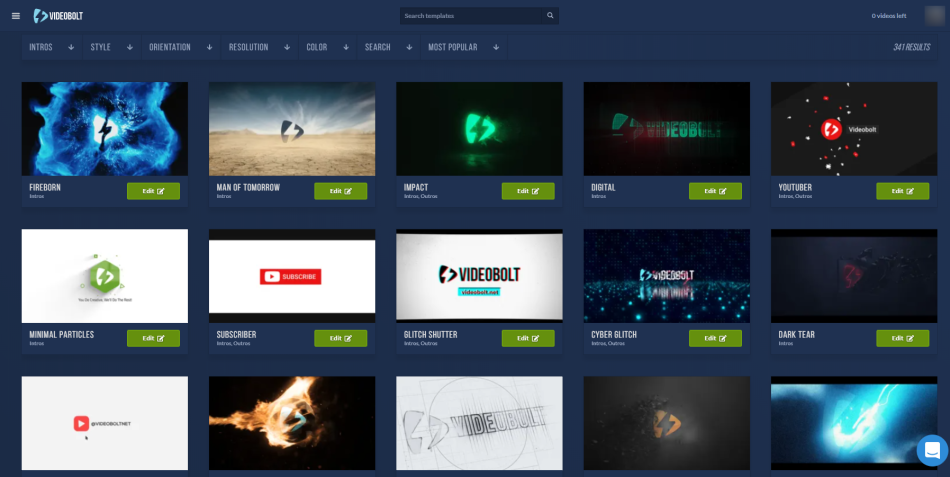
Put simply, Video Bolt is an awesome intro maker! Unlike the previous two tools in this list, Video Bolt’s sole focus is on their video creation tools.
If you subscribe to Video Bolt you get access to all they have to offer, this includes incredible templates for intros, stories, product promos, music visualizers, and more.
The tool is very quick and easy to use but they actually offer some extra customization options that are not available on Placeit and Renderforst, which is great for those who want to add those unique touches to their YouTube intro.
Although, not quite as much as the two tools mentioned on this list already, Video Bolt still has a large library of high-quality intro templates. So, whatever your niche focus is there is bound to be a batch of templates that are a good fit.
Steps to create your intro:
- Find an intro template you like – click ‘edit’
- Add your logo file (if it applies to your chosen template)
- Change the text (if it applies to your chosen template)
- Choose a ‘theme’ (colour scheme) (optional)
- Customize to your liking (e.g. colours, music, etc.)
- Render the video file
- Download it!
Intro template example from Video Bolt:
Pricing:
- Basic plan: $7.99 monthly ($5.99 p/m if paid annually)
- Plus plan: $39.99 monthly ($24.99 p/m if paid annually)
- Unlimited plan: $79.99 monthly ($49.99 if paid annually)
- Custom plan
What we like:
- Huge selection of intro templates
- Templates put into categories for easy discovery
- Great quality intro templates
- Quickly preview any customization you make
- Simple interface but with some good customization options
- Saved previous versions so you can easily revert back
#4 InVideo
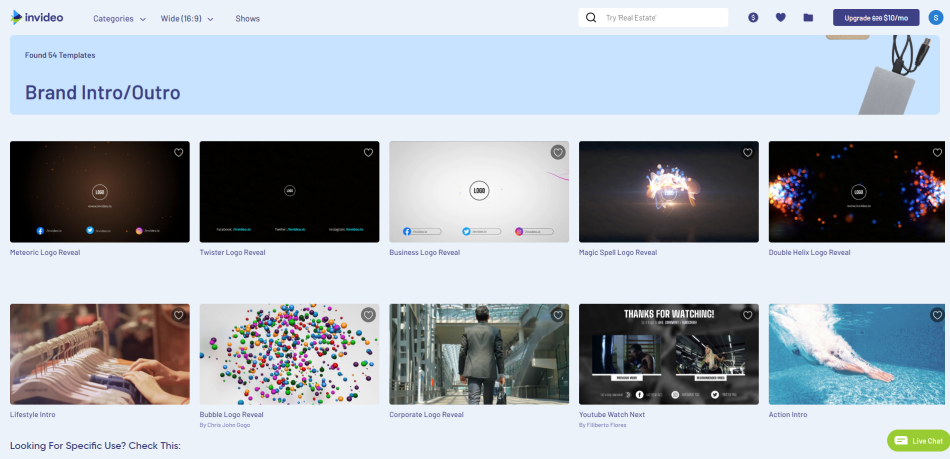
The first thing to note with InVideo is that it is designed to work with Chrome browser. So, if you’re working on another browser it might be not run as smoothly as you might expect.
When it comes to creating an intro video, InVideo is pretty awesome. It’s very different from most of the other tools in this which offer very limited customization options. With InVideo you have so many more options. This may result in a small learning curve for some users, but for the most part it is easy to use.
The great thing is that you can start from premade templates and then add your own customizations to make them unique and fit in with your brand. Perfect, for any YouTuber wanting a 100% unique intro for their channel.
Steps to create your intro:
- Find an intro template you like
- Choose size/dimensions (Wide, Tall, Square)
- Click ‘use this template’
- Add your logo file
- Customize to your liking (e.g. colours, music, fonts, effects, etc.)
- Click ‘Preview and Export’
- Download it!
Intro template example from InVideo:
Pricing:
- Some individual templates can be bought for $4.99
- ‘Free’ with Business subscription ($20 monthly or $120 annually)
- ‘Free’ with Unlimited subscription ($60 monthly or $360 annually)
What we like:
- Can get a free video (without a watermark) if you share video on social
- Lots of customization options (could be tricky for some)
- Access a huge library of images/videos (partly free)
- Stunning intro templates
- Can buy some individual templates
- Preview changes very quickly
#5 Intro Brand
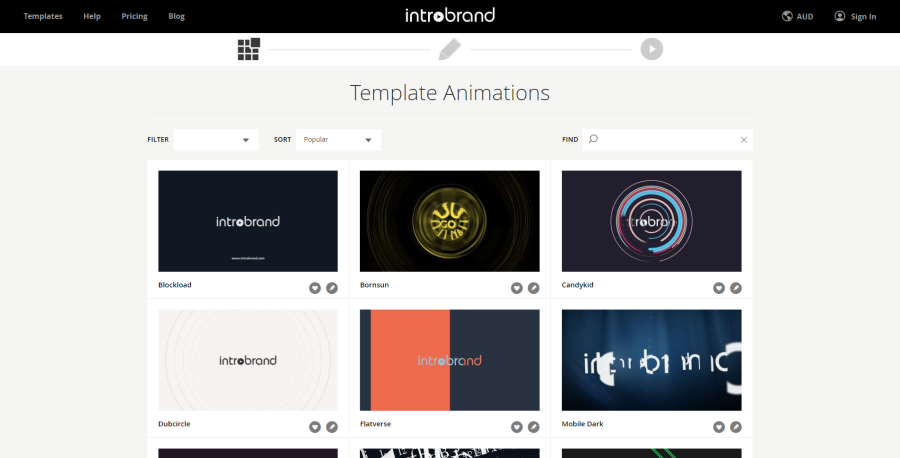
Intro Brand is an affordable intro maker and unlike the other tools mentioned on this list so far, it is not subscription-based. You simply pay for whatever template you use and that it, very simple.
The product is very easy to use, they’ve stripped it down to make things as straightforward and easy as possible so users can quickly create a great looking intro in under 5 minutes and be good to go.
The main issue we had with the tool is the limited music/audio options. They do offer some really good tracks to use but the options are far from exhaustive. Otherwise, this is a really intro maker for any YouTuber looking to create a good looking intro for their channel and videos.
Steps to create your intro:
- Create a free account and make sure you’re signed in
- Find an intro template you like
- Choose which version you want e.g. 3-second or 5-second version
- Upload your logo and choose logo size
- Enter slogan if applicable
- Choose a colour palette
- Choose audio
- Create the video
- Download it!
Intro template example from Intro Brand:
Pricing:
- Free – low res + watermark
- 720p – $14.99
- 1080p – $19.99
- 4K 2160p – $49.99
What we like:
- Some really great quality templates
- Extremely simple editor interface and journey
- Can create an awesome intro in no time at all
- Creating previews of your customized video is also super quick
#6 Intro Cave
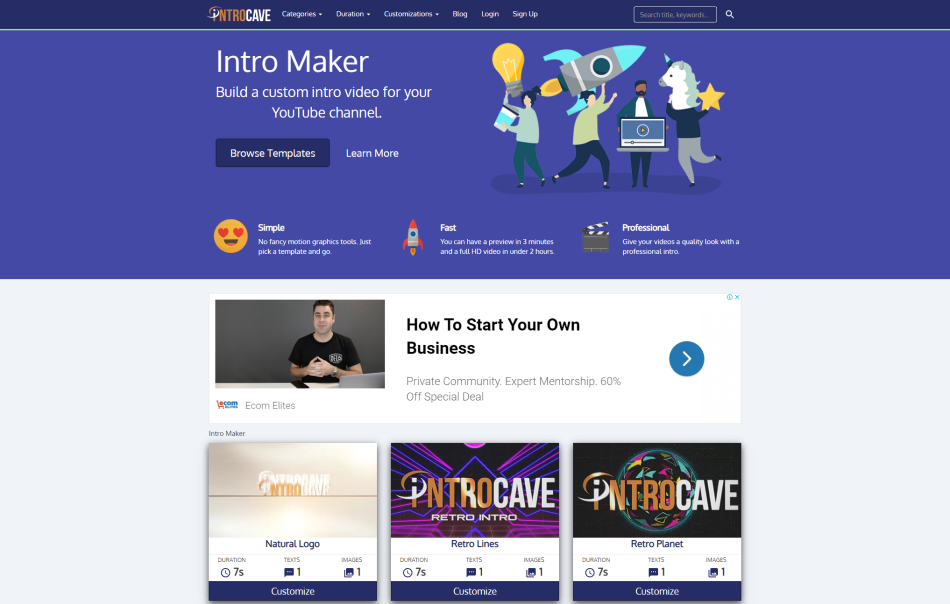
The second solely intro template tool on our list is Intro Cave, which is an extremely affordable online intro maker. So if you’re a YouTuber with a tight budget, they could be the choice for you!
There’s a good number of templates to choose from, many of which have a slightly retro look to them but most are really good quality. The templates are also broken down into categories so it’s easy to find an intro for your niche.
Like most of the other tools on this list, Intro Cave is super easy to use. You can customize a few different elements of the intro templates very easily, and in a couple of clicks, you’ll have your intro ready to go.
Steps to create your intro:
- Find an intro template you like
- Click ‘Customize this video’
- Add in replacement text (if applicable)
- Add your logo
- Choose audio
- Render the video file
- Download it!
Intro template example from Intro Cave:
Pricing:
- 720 HD Version – $5
- 1080 HD Version – $10
- Extras Pack – $100
What we like:
- Intro templates put into categories for easy discovery
- Unique and quality templates
- Very easy interface
- Super quick to create a quality intro
- Order satisfaction guarantee
#7 WoFox Intro Maker
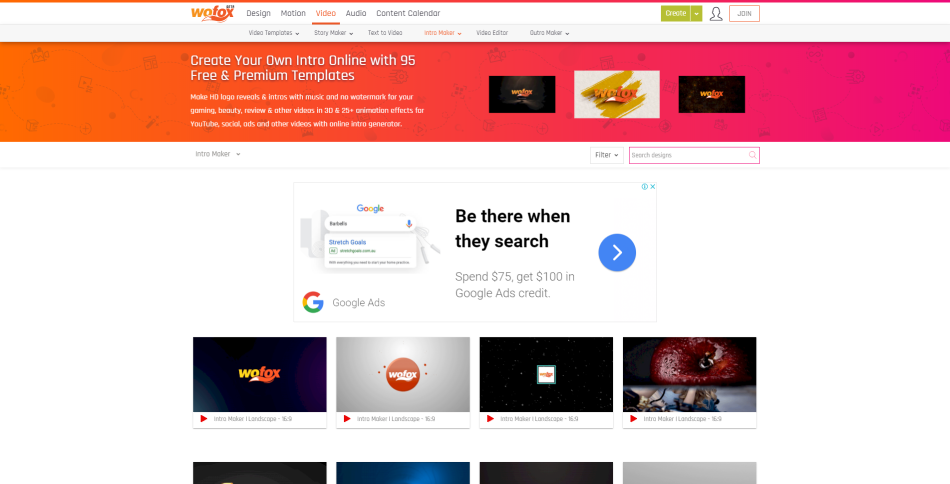
Similar to Placeit and Renderforst (albeit a much newer tool) WoFox offer much more than just their intro maker tool. They have plenty of other tools and templates for YouTubers. The intro maker is really good and very simple, so it’s ideal for anyone looking to quickly create a quality intro.
WoFox’s intro template library isn’t as large as a few of the other tools on this list but it is, for the most part, full of really good quality templates. Most of the templates are quite similar though, so you won’t find too much variety here.
However, if you like the style of intro they have on offer you’ll be happy with the selection, and in a few clicks, you’ll have a quality intro template ready to be used on your YouTube channel.
Steps to create your intro:
- Find an intro template you like
- ‘Click customize template’ (You will need to create a free account)
- Add your logo file (if it applies to your chosen template)
- Change the text (if it applies to your chose template)
- Customize to your liking (e.g. choose font pack, etc.)
- Click ‘Download’ (Choose video quality)
- Download it!
Intro template example from WoFox:
Pricing:
- Free – low res version, personal use only
- ‘Free’ with Business plan: $19 monthly, $120 annually
- ‘Free’ with Team plan: $35 monthly, $360 annually
- ‘Free’ with Virtual Assistant plan: $229 monthly, $2500 annually)
What we like:
- Very simple editor interface
- Can upload own music/audio
- Takes no time at all to create a quality intro
- Good number of templates available
#8 Tube Arsenal
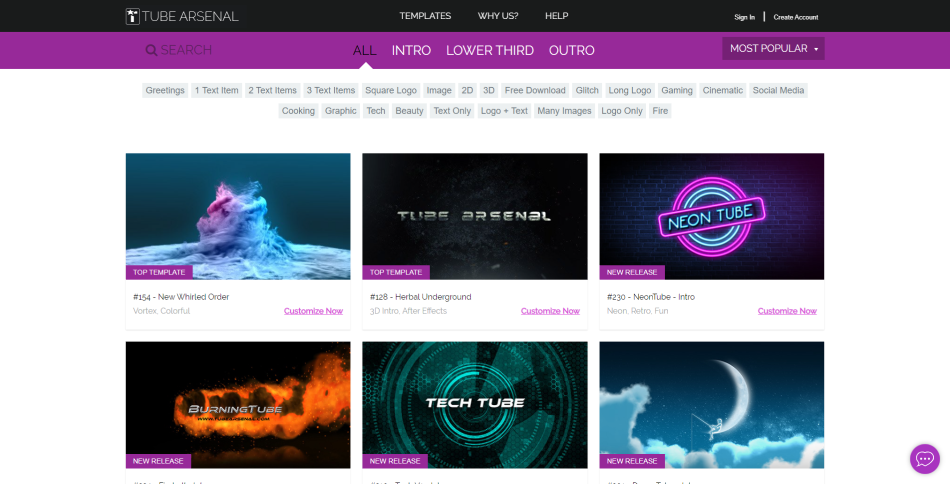
Tube Arsenal is another tool that only allows you to purchase individual templates. There’s no subscription so if you only need an intro template and you’re looking for an affordable option then Tube Arsenal could be the one for you.
The tool is very easy to use. In just a few steps you can customize the intro template and you’re new intro will be ready in minutes. Finding the right template in your YouTube niche is made easy to by the fact they have the template listed by category.
Most of the templates really good quality as well, however one of the few negatives for Tube Arsenal is that they don’t currently have a huge library of templates on offer. However, what they do offer is definitely unique so you’re still likely to find a few templates that fit the look you’re going for with your YouTube channel.
Steps to create your intro:
- Find an intro template you like
- Add your logo file (if it applies to your chosen template)
- Change the text (if it applies to your chose template)
- Customize to your liking (e.g. colours, music, images, etc.)
- Preview the video file
- Download it!
Intro template example from Tube Arsenal:
Pricing:
- 720p – $9 – $12 per template
- 1080p – $13 – $16 per template
What we like:
- Unique looking templates
- Mostly good quality templates
- Intros broken down by category for easy discovery
- Really easy to customize intro templates
- Option to download template files (for use in Adobe After Effects)
#9 Offeo
Yet another multi-faceted tool, Offeo is a tool for creating various video assets such as intros, social media videos, promos, and more. It’ a clean looking tool but is definitely more complicated to use than most of the other tools on this list.
So, if you’re looking for a really simple tool to quickly create your intro then Offeo might not be the best choice for you. However, if you want more customization options then it could be a great option.
The tool allows to do all the same customizations as the other tools on this list but with additional options such as being able to tweak with the video timeline and add in custom animations.
The main downsides to Offeo are that there’s a slight learning curve and they currently don’t offer that many intro templates. However, for those of you who are willing to put in the time to learn the tool, it could be just what you’re after!
Steps to create your intro:
- Find an intro template you like
- Click ‘Create’
- Click on the ‘Scene’ you want to edit
- Customize to your liking (e.g. logo, text, colours, music, effects, etc.)
- Click on ‘download’
- Download it!
Intro template example from Offeo:
Pricing:
- ‘Free’ with product trial – $1 for 30 days
- ‘Free’ with subscription – $19 per month after trial
What we like:
- Great quality templates
- Can try out the tool for $1 for 30 days
- Videos render super fast
#10 Canva
Last up we have Canva which is beginning to become a power player when it comes to video creation online.
The tool has over 2,000 YouTube intro templates at the time of writing and it’s insanely quick and easy to create your own YouTube intro with Canva.
In a few simple steps you’ll have a very professional intro that you can utilize for your YouTube channel.
Steps to create your intro:
- Find an intro template you like
- Customize the template (colors, shapes, etc.)
- Add your logo file
- Change the text (font, colors)
- Change/add music/audio
- Download it!
Intro template example from Canva:
Pricing:
- Some free templates
- $12.99 /month for Pro plan
- $119.99 /year for Pro plan
What we like:
- Plenty of very cool and unique templates
- Very easy and quick to customize them
- Video renders super fast
- A lot of additional animations and graphics to utilize
- Sizeable music/audio library for your intros too
To conclude…
You can spend a lot of time learning tools such as Adobe After Effects, or you can pay a freelances a lot of money to create your YouTube intro.
However, if you’re looking for an affordable option but still care about the quality of your YouTube intro, we’re positive you’ll be able to create your perfect intro on one of the aforementioned tools.
Enjoy creating! Oh, and if you have any questions, comments or have suggestions for other awesome intro makers, leave a comment below!


Like!! Thank you for publishing this awesome article.
You’re welcome 🙂